Revised: 9/2022
CDE site link to file layout: tsdl_2022-2023_file_layout
(state.co.us)
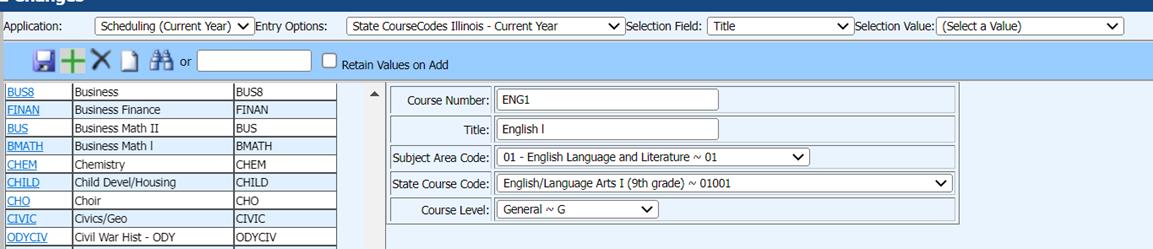
The TSDL report expects the STATE COURSE CODE to be included in the file. Make sure that all of your active courses, those courses in the students’ schedules, have the state course code and course level filled in. The subject area code is optional. This is done using the following view: State CourseCodes Illinois (even though the view it titled Illinois, it is used by any state that needs to match state course codes to their local course code.) By matching up your local codes to the State codes, this will automatically fill in the state course code into the the student Transcript Detail table during the GPA compute.
Figure 1 Make sure that your course codes are matched to a state course code and course level.
School District/BOCES Code - A unique code assigned to a district by CDE. Refer to School District/BOCES Code table at http://www.cde.state.co.us/DataPipeline/org_dist-BOCES.asp
School Code – A unique code assigned by CDE to a school building. Refer to School Building Code Table at
Local Course Code – The identifier designated by the local district for the course.
Section Number – The identifier designated by the local district for the section for the course.
EDID - An eight(8) digit numeric field containing the 8 digit value assigned by CDE to the Educator.
Staff's First Name - A name given to an individual at birth, baptism, or during another naming ceremony, or through legal change.
Staff's Last Name - The name borne in common by members of a family.
Staff's Gender An individual's sex.
Staff's Date of Birth The month, day, and
year on which an individual was born.
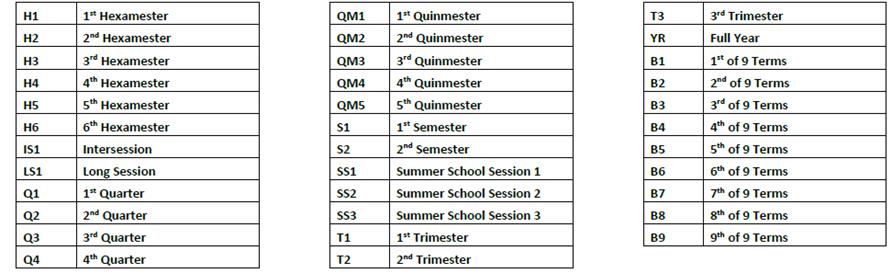
Term The time frame when instruction
occurred.
Staff Role –
The role of the individual assigned to
the corresponding course. This is a required field and must be reported as
either 01 (educator of record) or 02 (contributing professional).
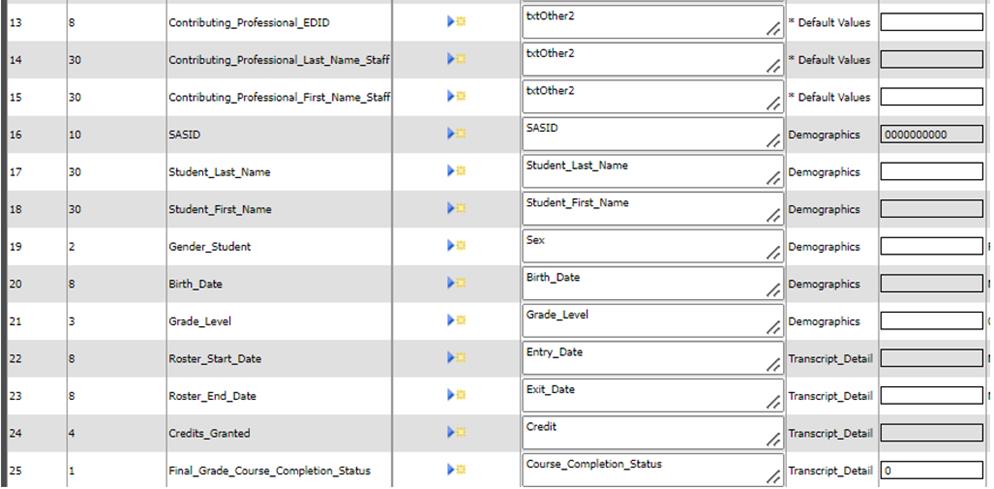
Data Entry for Report: Use
the view in the screen shot below for the course master fields. (This view is
not limited to IL, it is useful to other states that use similar fields)
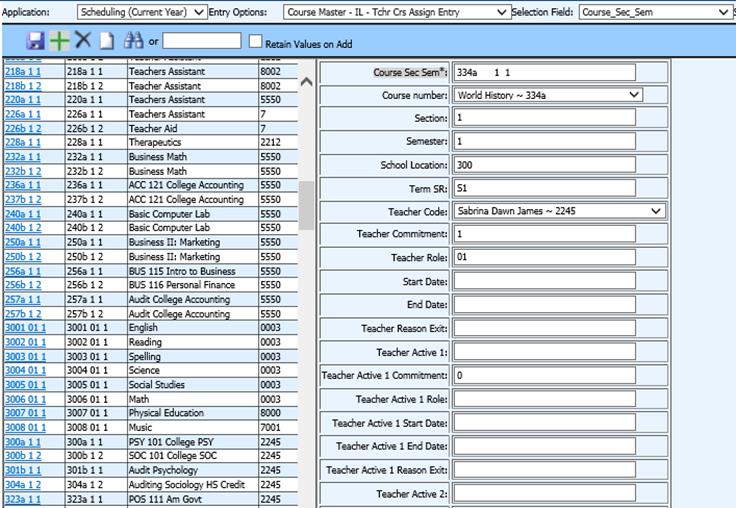
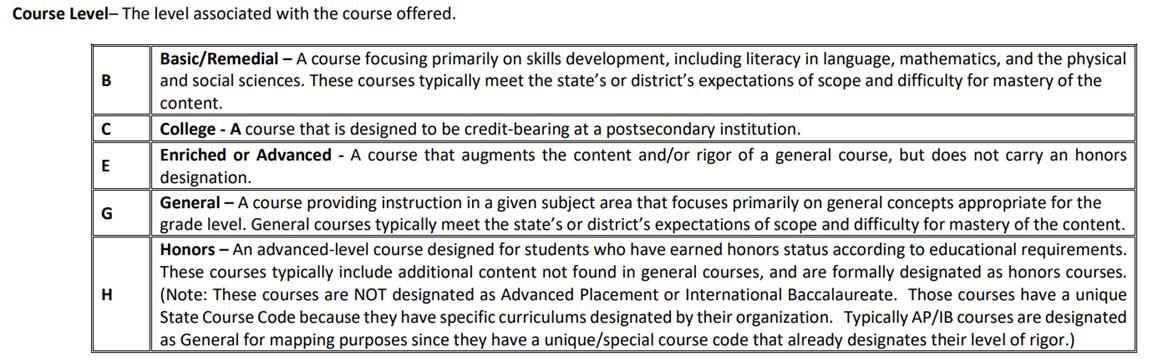
The Teacher Role field (for the primary teacher of the course) must be entered using these codes. Logically this field would be code 01.
|
00 |
N/A |
|
01 |
Educator of Record - An individual assigned primary responsibility for a student's learning in a subject/course with aligned performance measures. |
|
02 |
Contributing Professional - An individual assigned responsibility to provide additional services that support and increase a student's learning in a subject/course with corresponding aligned performance measures. |
If more than one teacher is
assigned to a class, the SDS teacher code must be entered in the field
Teacher_Active_1 (additional fields are available if there are more
teachers assigned to the class). The Teacher_Active_Role_1 field would
logically be code 02.
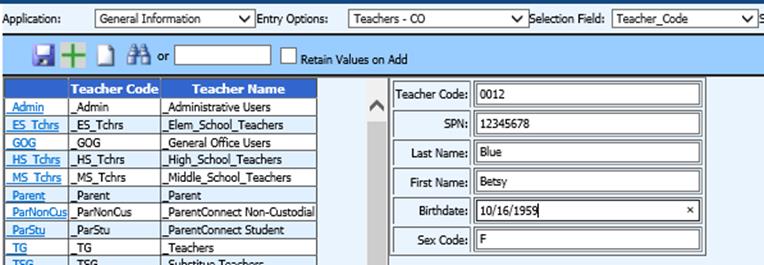
Use this view to enter required
teacher information. SPN (School Personnel Number) is the field to enter the 8
digit EID number.
Match the report fields as shown
in the screen below.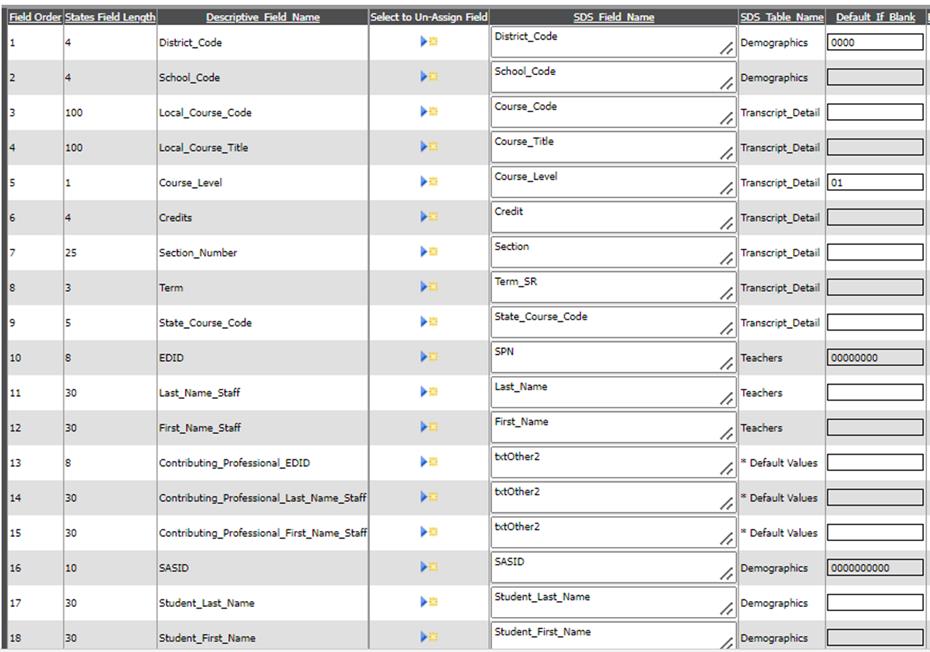
To create your report for the state.
•Complete the Basic Report Information
o Click the Basic Report Information button to open the basic information area.
o Complete all the boxes with the appropriate information
o Click the Save Report Changes button to save changes made to the report setup.
•Select the records you wish to include in your report.
•Click the Data Selections Option (A to Z) button at the top of the screen.
o For example, to setup a selection for current year seniors:
§ Choose the Demographics table
§ Choose the Grade_Year field
§ Highlight the correct year (i.e. 12)
§ Click the right pointing arrow button to move the value to box #4
§ Choose a Record Selection Option “is in list”)
§ Click the Add to Sort Definition button to save your sort.
o Setup and save additional selections as desired.
o To include only current students, click the blue link “Adjust Selection to Include Only Active Students”
•Create your export file.
o Click the Create Export File button at the top of the screen.
o Read the message and write down the name of the file it tells you to rename the exported file to.
o Click OK on the message and save the file to your desired folder.