
Revised 10/2/2018
In Data Entry & Changes|Student Maintenance|Processing Options, selecting this option will open the Withdraw/Re-enter Student screen
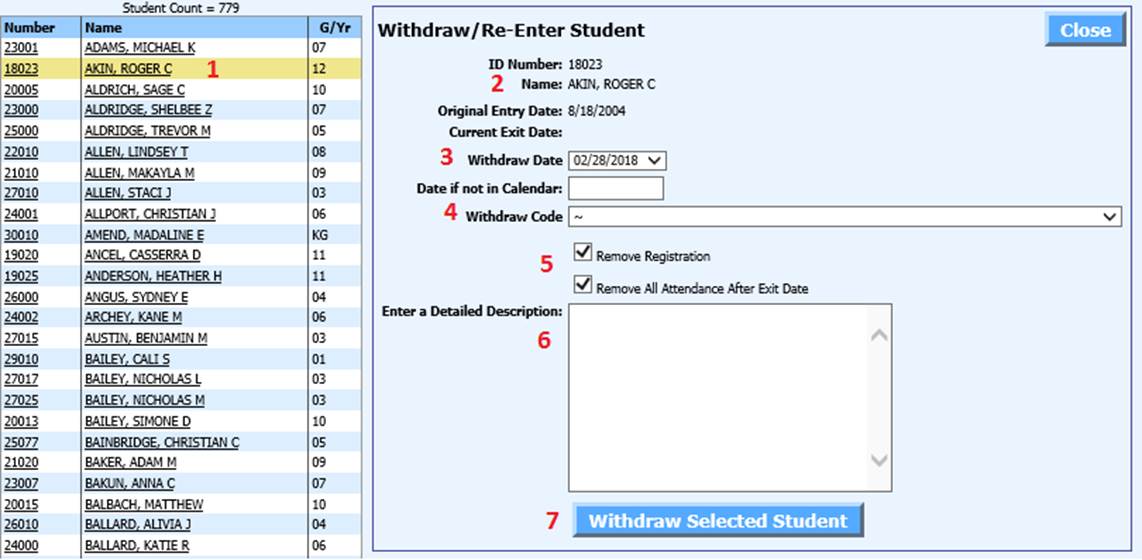
Follow these steps to withdraw a student:
1. Select a Student by clicking on the student’s name you would like to withdraw.
2. Verify the Student’s name you select shows next to Name in the withdraw box.
3. Select a Withdraw Date – Date can be selected from the dropdown or if you wish to withdraw the student on a date not in the calendar, type the date in the Date if not in Calendar box. NOTE: This is usually done to withdraw students not returning after summer break with a date prior to the first day of the school year.
4. Select a Withdraw Code.
5. Note that the Remove Registration and Remove All Attendance after Exit Date boxes are checked by default. Uncheck if you don’t wish to remove this data.
•Remove Registration will remove any next year course registration records that have been entered on the student. This option is checked by default because normally, if a student is withdrawing prior to the end of the current school year, you wouldn’t want retain their next year course registrations. But, if you know the student will be returning for the next school year, you can uncheck this to retain those records.
•Remove All Attendance after Exit Date will remove any period and daily attendance records dated after the Exit Date. This is helpful when you didn’t know the student had moved and the student has been marked absent for dates after the Exit Date.
6. Enter a Detailed Description note such as the name and location of the school where the student transferred.
7. Click ‘Withdraw Selected Student” to withdraw. (If you don’t wish to withdraw the student, click the Close button instead.)
Follow these steps to Re-enroll a student:
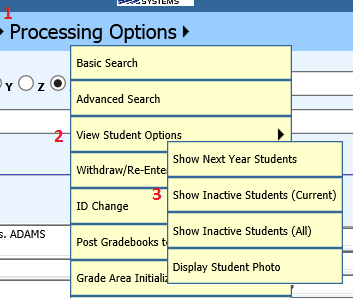
1. Click on Processing Options.
2. Click on View Student Options.
3. Click on Show Inactive Students (Current) to include withdrawn students in the student selection.
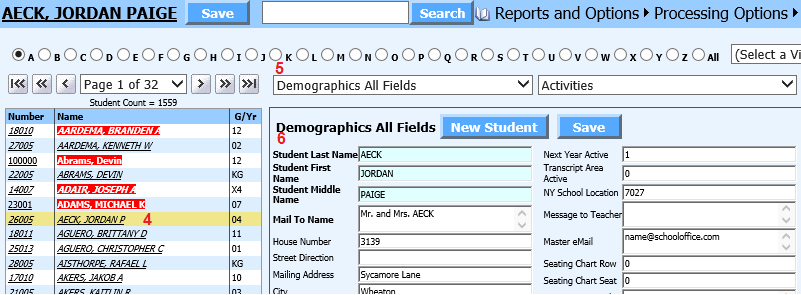
4. Select a Student by clicking on the student's name you would like to re-enter.
5. Select Demographics All Fields from one of the data entry view dropdowns.
6. Make any necessary changes to the student’s demographic information and save changes.
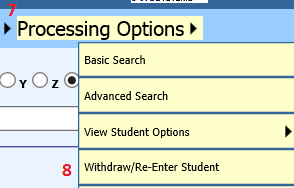
7. Click on Processing Options.
8. Click on Withdraw/Re-Enter Student.
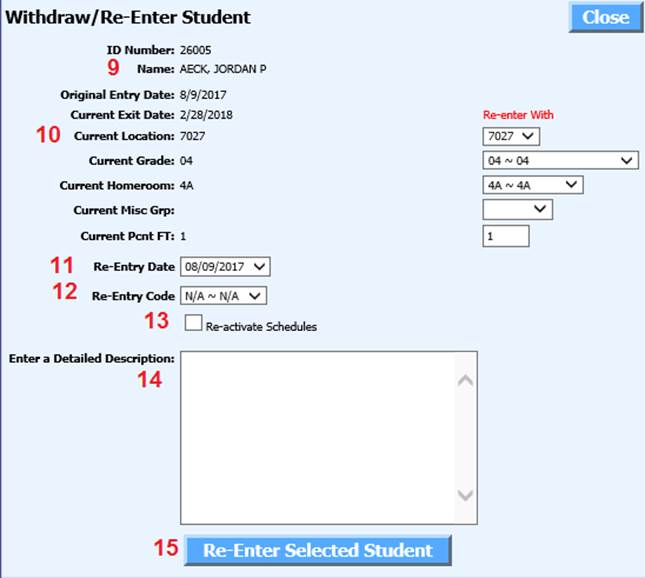
9. Verify that the name of the student selected shows next to Name in the re-enroll box.
10. If the re-enroll values for School Location, Grade Year, Homeroom, Misc Group, or Percent Full-time fields are different than the current values shown on the left, update the values for those fields on the right. It is important that correct values are entered for these fields before clicking the ‘Re-enter Selected Student’ button so that re-enroll and enrollment records post with correct values for Attendance Analysis calculation.
11. Select a re-enroll Date.
12. Select a re-entry Code.
13. Checkmark the Re-activate Schedules box if you wish to re-activate the student’s schedule.
14. Enter a Detailed Description regarding the re-enroll.
15. Click ‘Re-enter Selected Student’ to re-enroll. (If you don’t wish to re-enroll the student, click the Close button instead)
NOTE: ALL students who have previously been withdrawn and are returning (even those who withdrew in a previous school year) are reentered using the above process. Do NOT manually remove the exit date and enter a new entry date on a student demographic record. The Withdraw/Reentry process must be used in order to allow the program to correct the student enrollment records.