Revised: 12/2022
This process is used to import time for payroll processing and attendance from a 3rd party software program, or csv / xlsx files. If using a Third-Party Vendor, you will need to work with Vendor to create file.
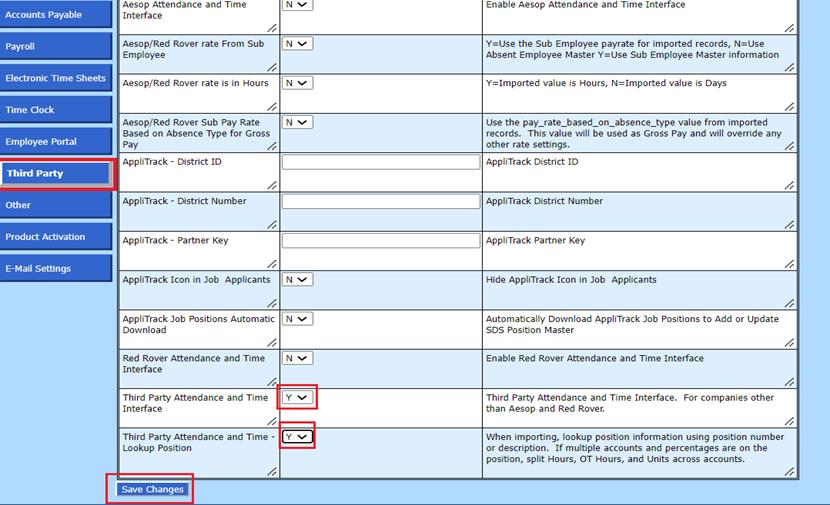
1. Activate the 3rd Party Attendance and Time option:
1. Select Administrative Utilities
2. Select SDS Web Office Settings
3. Select Third Party
4. Update required fields:
Third Party Attendance and Time Interface: Change to “Y” to “Enable 3rd Party Attendance and Time Interface”.
Third Party and Time Look Up Position: Change to “Y” to use or look up position information from Position Master.
5. Select Save Changes
6. Log out and back in to activate this process
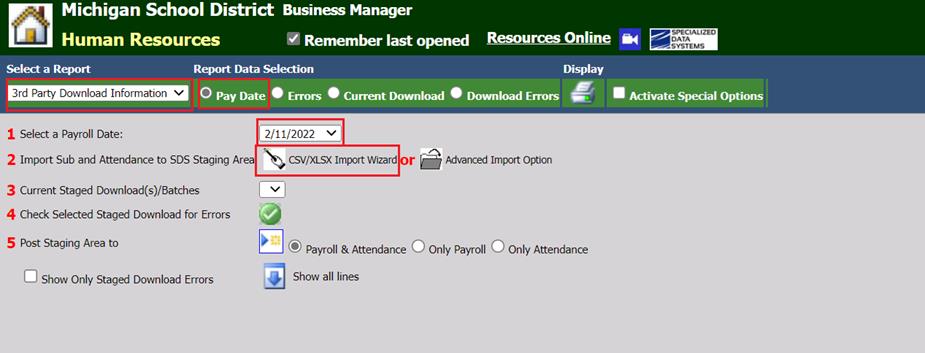
2. Entering Time or Attendance Using the 3rd Party Import Feature
1. Select Human Resources.
2. Select 3rd Party Attendance and Time Processing.
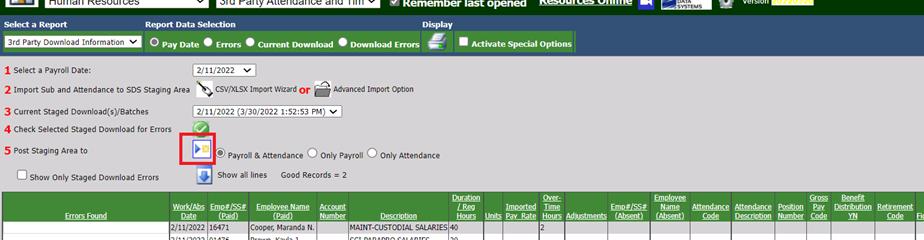
3. 1 Select a payroll date: Select payroll date.
4. 2 Import Sub and Attendance to SDS Staging Area.
5. Select CSV/XLSX Import Wizard.
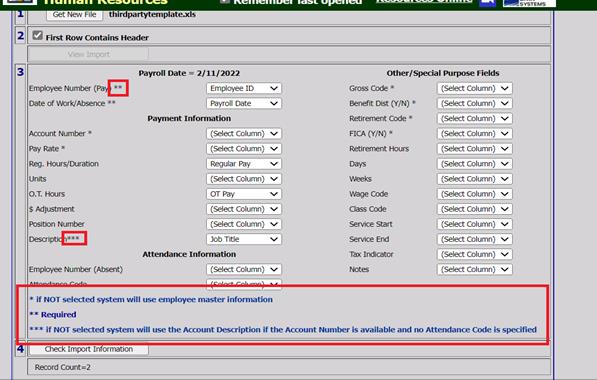
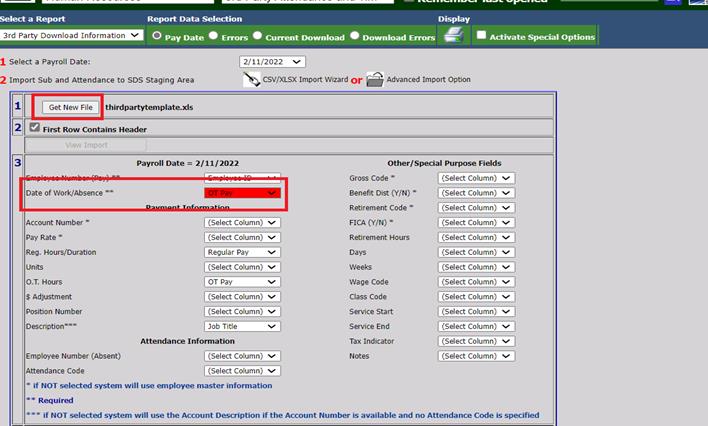
6. 1 Select Choose File and search for file to be imported.
7. 2 First Row Contains Header: If the file contains a header row, select First Row Contains Header.
8. Select View Import.

9. 3 Match the header fields from the import file to the related fields on the setup screen. Example import file header Employee Id is Employee Number (Pay) in setup screen. If the file name and the format of the file remain unchanged from one payroll to the next the system will remember your selections.

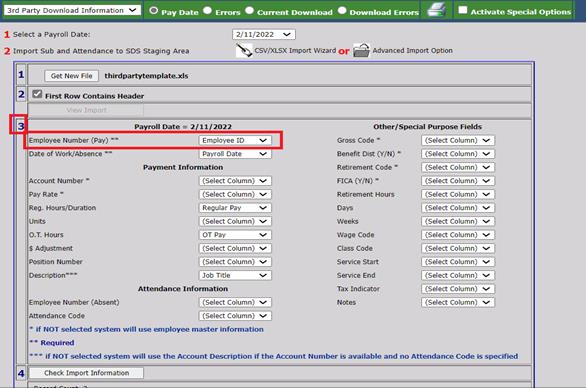
NOTE: If you are not importing Account Numbers, Pay Rate, Retirement Code or FICA Y/N etc., you must have the information completed in the employee’s Position Master or Employee Master information.
10. 4 Select Check import Information.
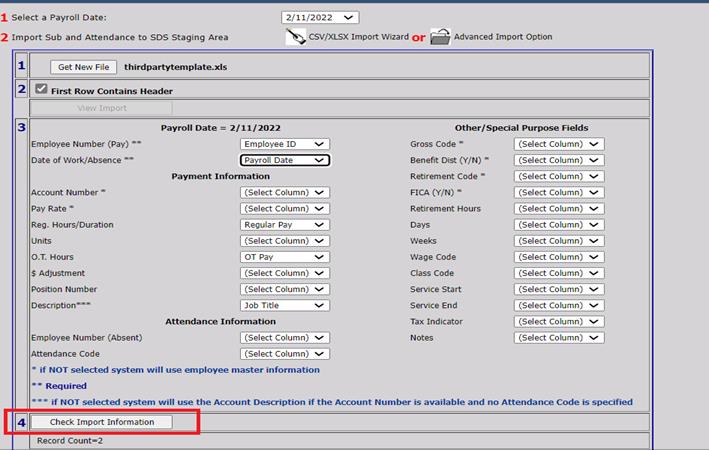
11. If any errors are found, a message will display, and the field will be highlighted in red. Correct any errors in the import screen or file. If errors are in the file you will need to correct and re-save file, then select get new file. You will not be able to proceed until all errors are corrected.

12. If no errors are found a message will show Ready for Import.

13. Records will show at the bottom of the screen. 5 Select Import to Staging Area.
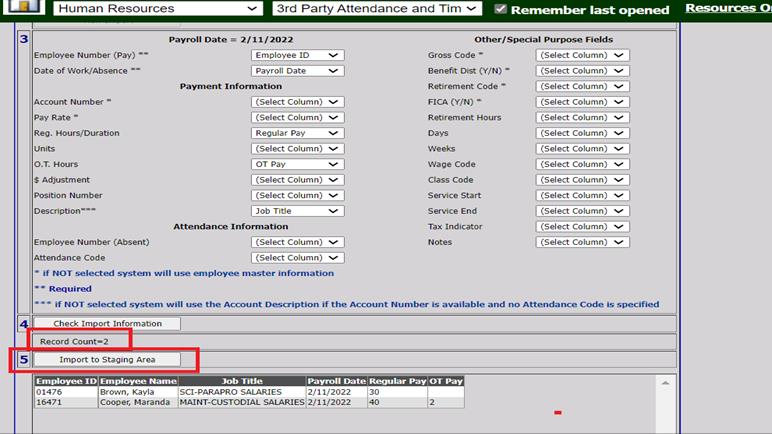
14. The system will review the file and place the information in the staging area. If there are any errors in the file, it will show in the Errors Found Column. You can go back to the file and make any changes that are needed. If you make changes to the file, you need to start the import process over.
15. 5 Select the staging option “Post Staging Area to: the Payroll & Attendance, Only Payroll or Only Attendance”.
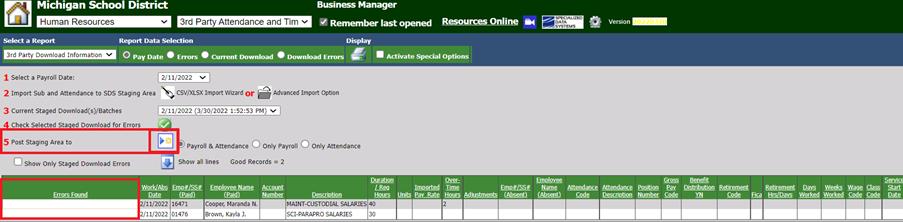
16. Select the Post to Staging Area
Icon.

Note: If the file has any errors in it and you select the option to post the items from the staging area the system will not post any of these errors to the payroll or attendance areas in the program that were found in the file. It will list them in the staging area as “Errors found.”
17. Review message and select Okay.

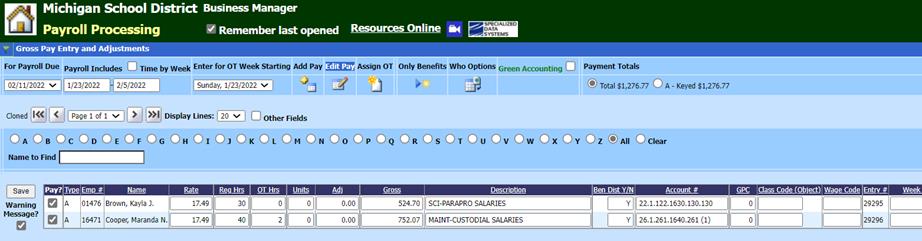
18. Review timecards in Payroll Processing, Gross Pay and Entry Screen.
3. Deleting File from the Staging Area
1. Select Activate Special Options

2. Select file to be deleted.
3. Select which option in the file that needs to be deleted, timecards, attendance or both.

4. Check Remove from Staging Area. Select the “X” to complete the deleting of file.

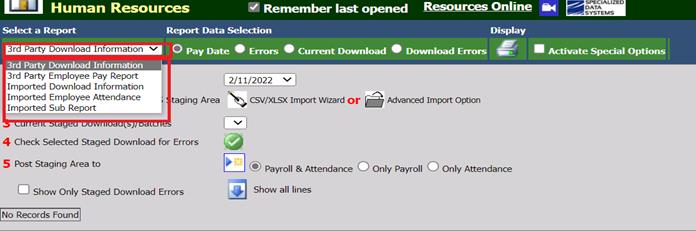
4. Creating Reports from the 3rd Party Attendance and Time Processing
1. Select a Report: There are several reports available to view and print.
2. After selecting the report select the Display printer icon.
3. Review the report for accuracy.
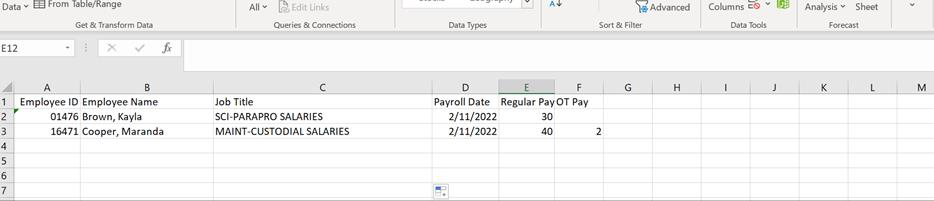
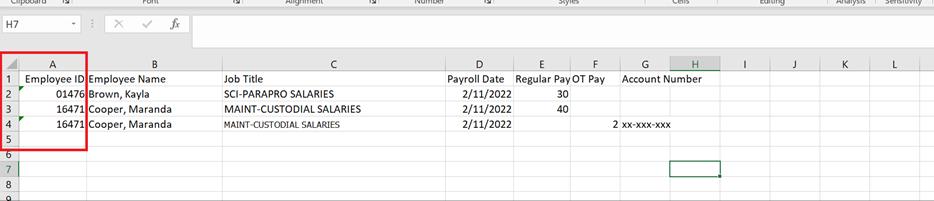
Examples of files.
Note: Each Line item will be separate timecard. You must have payroll date or date must be equal to or between start and end dates for payroll date for each line.
If OT is to be charged to a separate account number, it will need to be recorded on separate line and manually change account number in payroll processing or include account number in file.

Attendance Example:

Combination Payroll Attendance Example: Note the Attendance hours and Pay Hours are specified in Column.

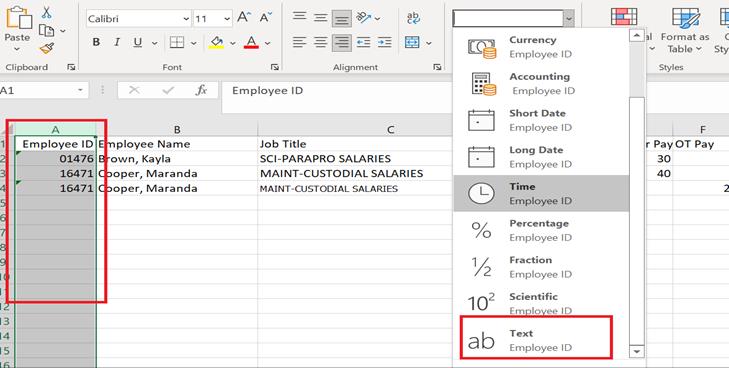
File Format may need to be saved as text especially for Employee ID if Ids start with Zero.
Tips:
1. File needs to be saved as .CSV file or xlsx file. If file will not load, try changing the file name to a shorter file name or use xlsx. Example instead of “payrolldate20112022Michigan.xlsx” try “pay20112022.xlsx”
2. When “saving file as” xlsx make sure to use an updated version. Some of the older versions will not load.
3. Having your Position Master and Employee Master setup prior to attempting file upload is beneficial. You will want to match your file headers and information such as position numbers and descriptions to what you have in SDS.