Revised: 10/2020
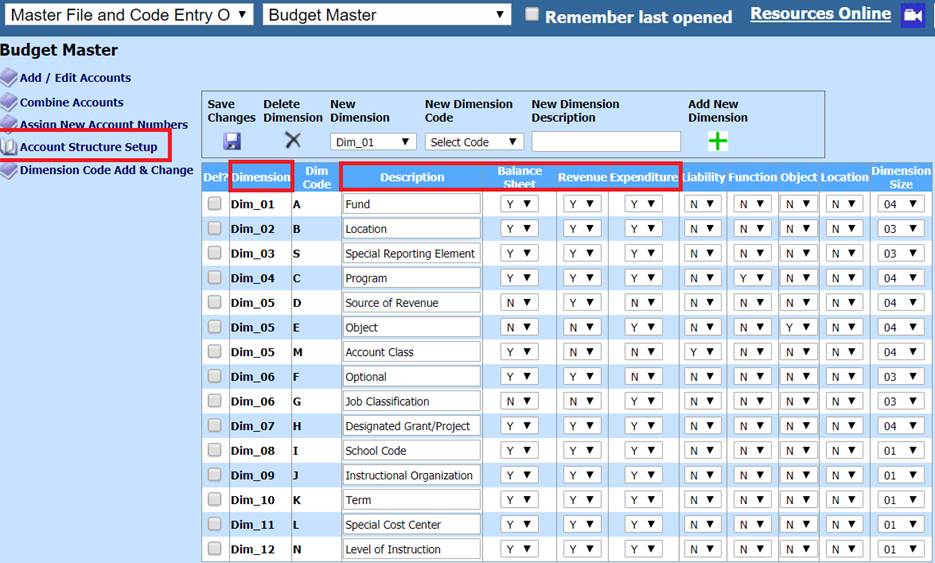
This section of the Budget Master displays the setup of the state account numbers. The Dimension number and Description of that dimension. It also displays the breakdown of the dimension and if it is a “Balance Sheet”, “Revenue”, or “Expenditure” account. This area is state specific and is setup for you with your initial installation by SDS and should not be adjusted.
1. Select Master Files and Code Entry Options
2. Select Budget Master
3. Select Account Structure Setup
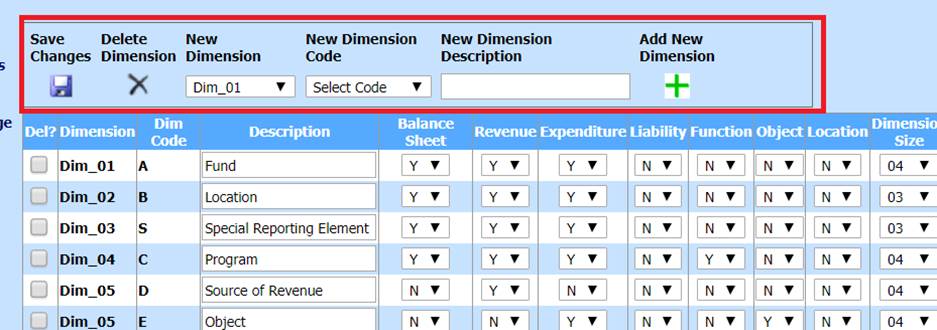
4. If there are more dimensions to be added to your database please contact a support person before going through this process. Once you have determined the need for another dimension you can do that by selecting the “New Dimension” drop down and select the dimension. Then select the code for this dimension by using the drop down under “New Dimension Code”. Once these are selected enter in the description for this new dimension and select the “Add New Dimension” button and then “Save.”
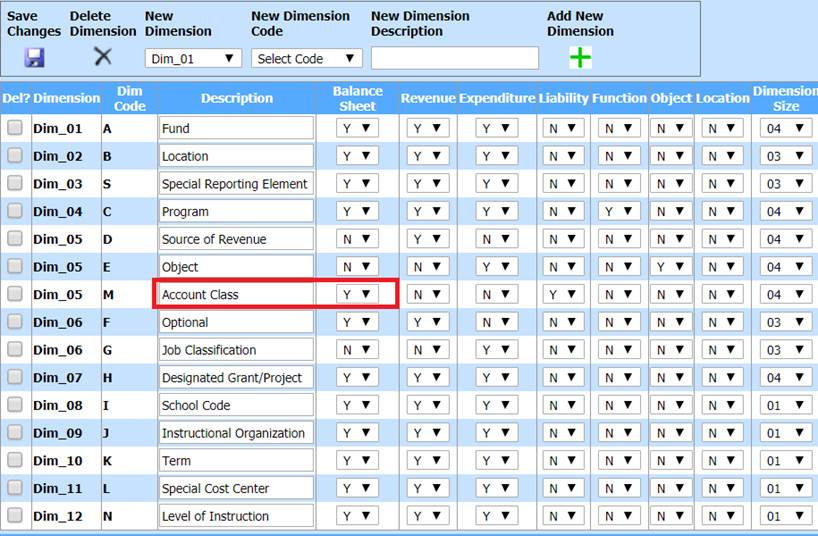
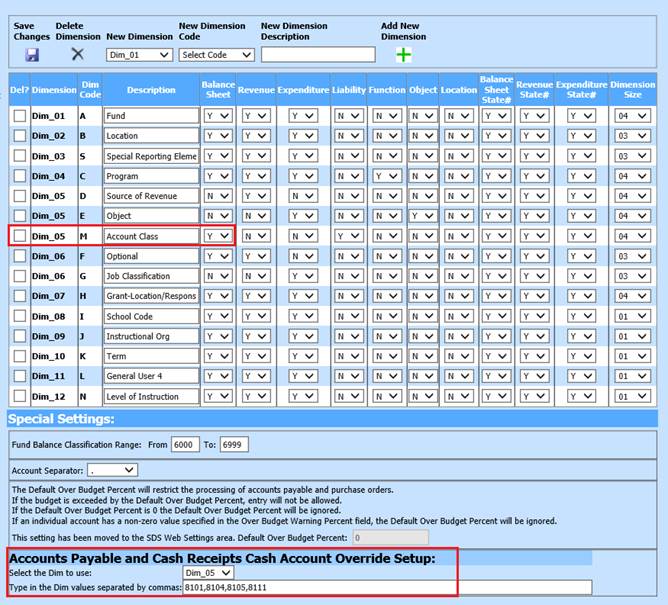
5. Special Settings: This section is what sets up the system to correctly know which accounts are used for your “Fund Balance.” These codes are state specific and are setup during the initial installation.

6. Depending on your state these codes are from the Balance Sheet “Account Class” dimension.
7. Account Separator: The account separator is used to determine if you want a separation between the various dimensions in the account number or (ASN). The format types are:
a. Use a dash (-) between account dimensions
b. Use a period (.) between account dimensions
c. Do not separate account dimensions

8. This needs to be setup the way you want the separation in the account number so if the system creates any new accounts for you it would use the same separator that you are already using in the account number.
Note: If you change the setting in the “Account Separator” it does not go back and change the accounts that are already in the system. If you do want the separator type changed in all your accounts, please review the documentation for “Assign New Account Numbers.”
9. Over Budget Warning: This setting has been moved to the SDS Web Office Settings area of the program. For more information on this please select the following link. http://help.schooloffice.com/financehelp/#!Documents/overbudgetwarningandprocessing.htm

10. Accounts Payable and Cash Receipts Cash Account Override Setup: This option allows the user to post the cash receipts accounts payable or journal transactions to bank accounts other than the ones that are setup in the Ledger Interface.

11. Determine the dimension your account class codes are in and which values for that dimension you need to use.
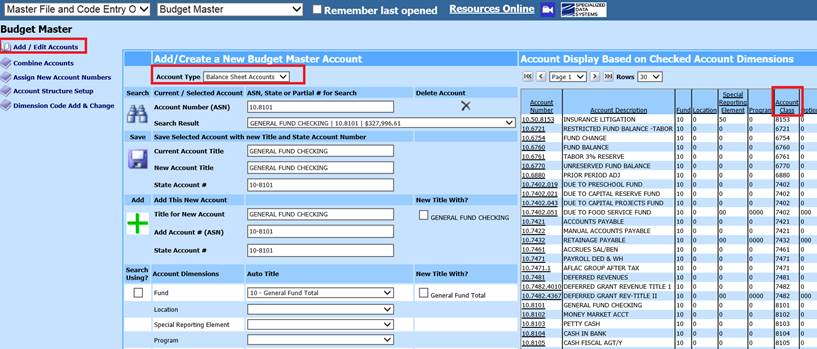
a. Select Add / Edit Accounts
b. Select the Balance Sheet Accounts
c. Search for cash accounts or other accounts to be used to override cash receipts and accounts payable items
d. Make note of the field and the code that the cash account identifier is. For this example it is in “Account Class” and the number is “8101”.
12. In the drop down next to “Select the Dim to use:” select the correct dimension for your data base. This is state specific. In this example it is “Account Class” and the dimension is “Dim_05.”
13. In the filed “Type in the Dim values separated by commas”. Separate various account codes needed with a comma and no spaces.
14. Select Save
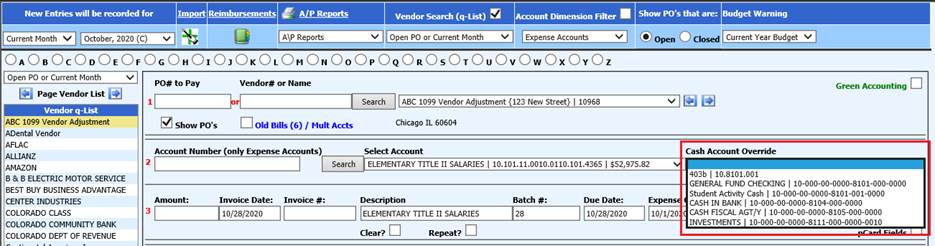
15. Once the overrides have been setup you will be able to use them when entering in account payable invoices, cash receipts or journal entries.
Accounts Payable Entry: Upon entering in an invoice, the Cash Account Override selection will have the cash accounts available for the Fund associated with your account number.
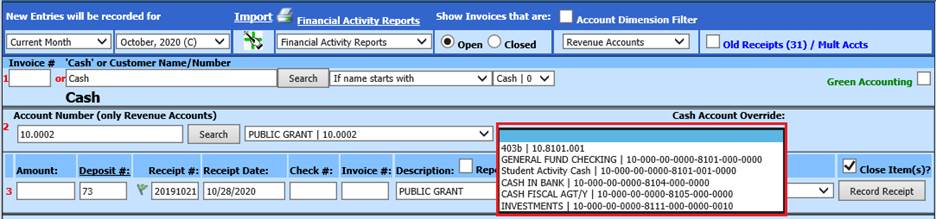
Cash Receipt Entry: Upon entering in a cash receipt, the Cash Account Override selection will have the cash accounts available for the Fund associated with your account number.
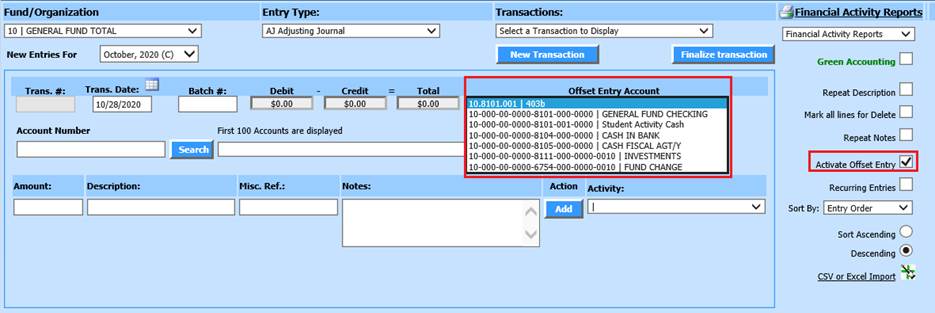
Ledger Transaction Entry: Upon entering in a journal entry, the “Offset Entry Account” will have the cash accounts and the fund balance account available for the Fund associated with your account. The “Activate Offset Entry” needs to be selected to have the option available.