Revised: 10/2020
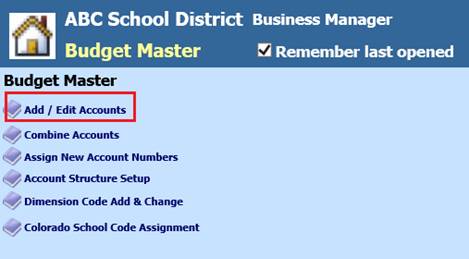
1. Select Master Files and Code Entry Options
2. Select Budget Master
3. Select Add/Edit Accounts
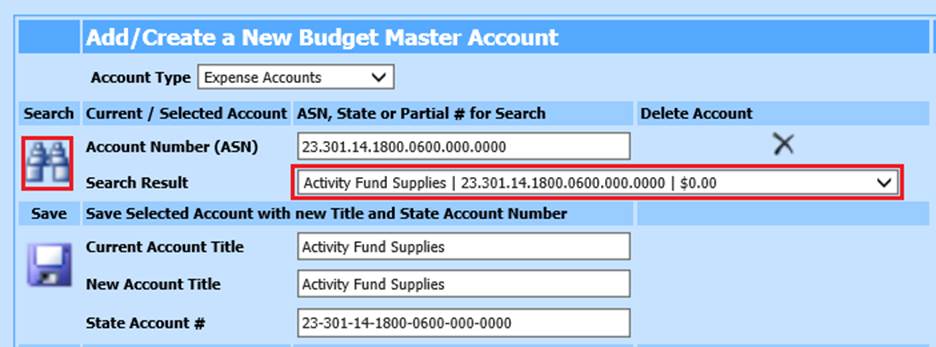
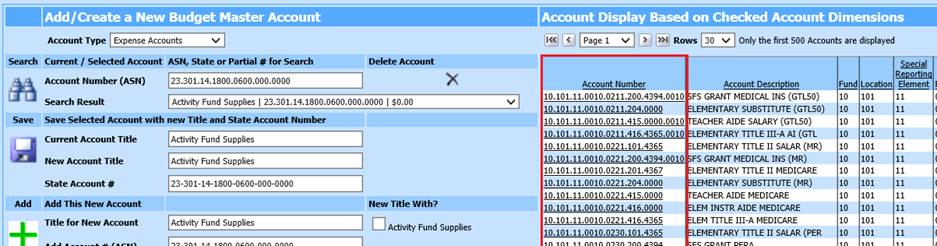
Add/Create a New Budget Master Account
4. Select Account Type: Expense Account, Revenue Account, Balance Sheet
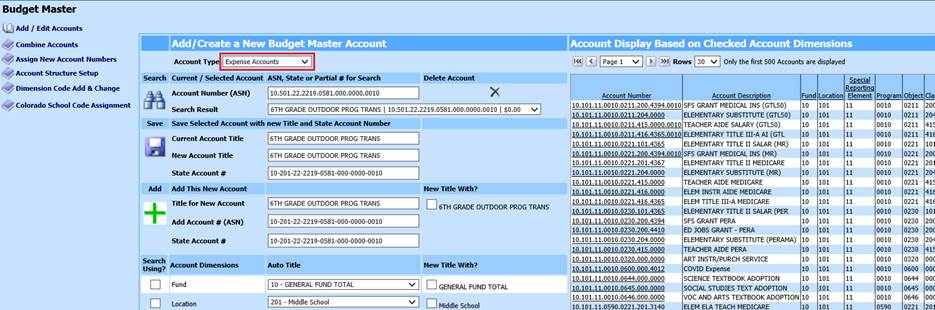
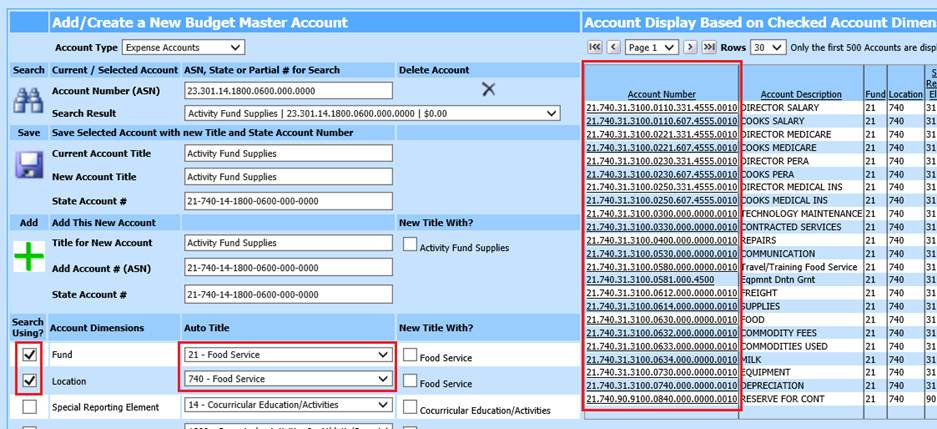
Search: There are three different options to use when searching for an account.
Option 1: Select the drop down of accounts when you first enter the screen. Select the desired account.
Option 2: Select the account from the right side of the screen from the list of accounts that are showing.
Option 3: Use the “Search Using ?” area. Select one or more of the dimensions of the account that you would like to edit. Then changed the drop down for that dimension to be the one desired.
In the example below The Fund was changed to “21” and the Location was changed to “740”. Once these selections are made, the data on the left side of the screen changes to show the criteria that has been selected to view.
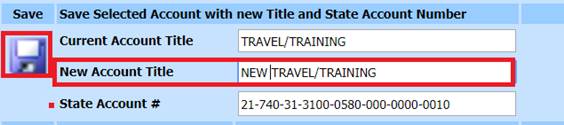
Save: Once an account has been adjusted, Select Save. Enter New Account Title, if adding new account
Add: To add a new account
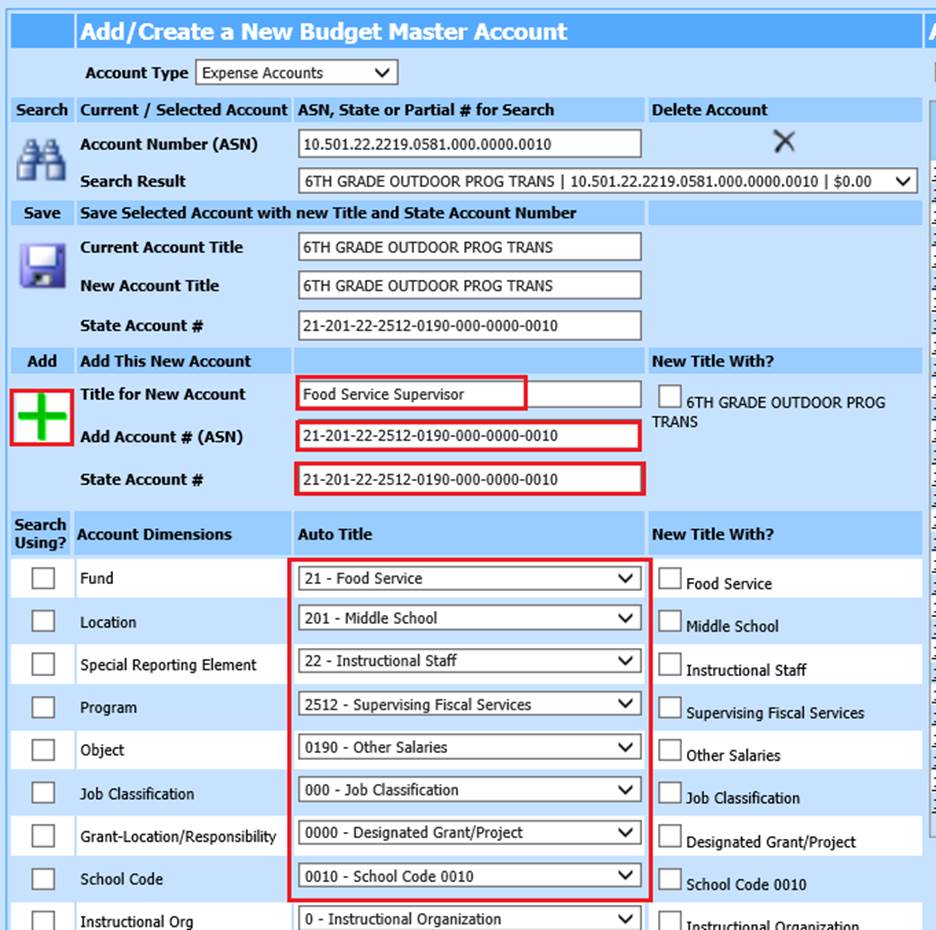
1. Auto Title: Select State Codes from the drop down selections below.
2. The select state codes will be listed under Add Account # (ASN) and State Account # fields, above.
3. Title for New Account: Update Title for New Account
4. Select “Add”
Edit Account: To edit the “State Account Number” select the account that you want to change.
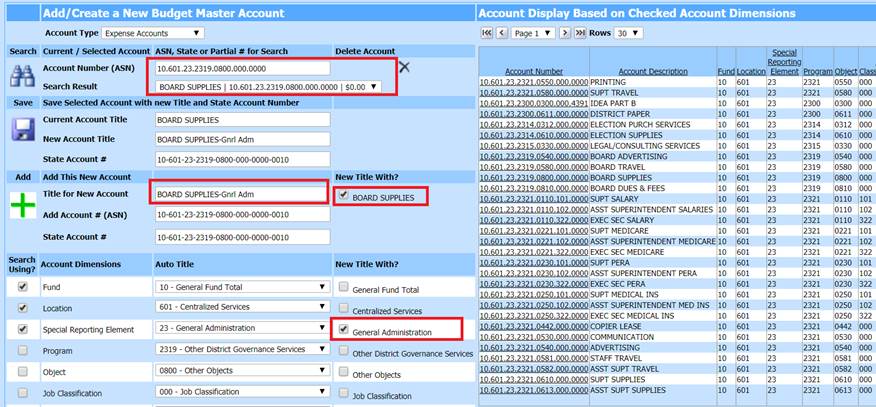
•After the account is selected, change the part of the state account number that you would like to change. In the example below, it is changing the object number from “0800” to “0600”.
Note: once the object has been changed by the drop down the system will change the object number in the account in the “Account # (ASN)” and the “State Account #”.
•The description can also be changed by using the “New Title With?” area. If any of the options in this area are selected, the program will adjust the description of the account. In the example the check boxes of “Board Supplies and General Administration” have been selected. The description has changed from “Board Supplies” to “Board Supplies-Gnrl Adm”. By using the check boxes in the “New Title With?” area the system will adjust the description and abbreviate the description as needed.
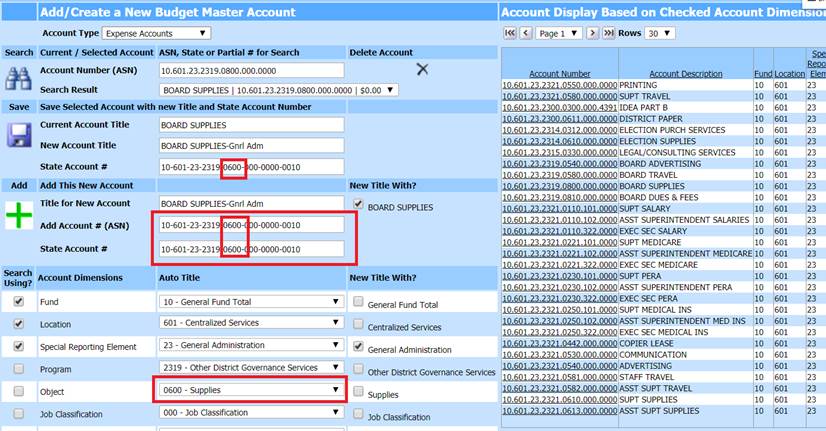
•After making all the needed changes select “Save”
Note: This process will only change the State Account Number. To change the ASN Account Number, you will need to run a process. See link for additional information on changing the ASN Account Number: http://help.schooloffice.com/FinanceHelp/#!Documents/assignnewaccountnumbers.htm
Revised: 10/2022
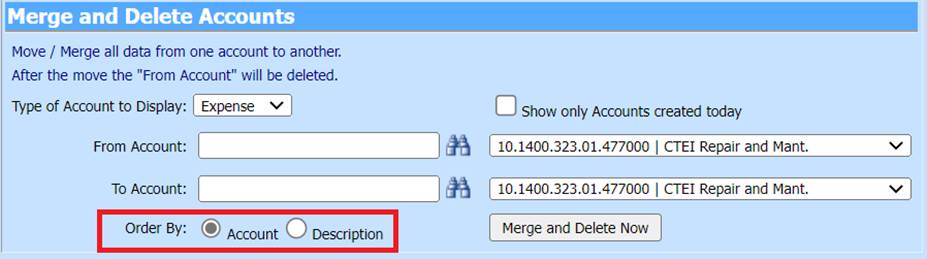
This section allows you to combine accounts together, the system will merge the information from one account into another account. The account that the information was moved from will be deleted during the process. You can only merge with the same Fund and from Expense/Expense, Revenue/Revenue and Balance Sheet/Balance Sheet accounts.
1. Select Master Files and Code Entry Options
2. Select Budget Master
3. Select Combine Accounts

4. Select the type of Account to merge. You can only merge into the same type of account.

5. Show only Accounts created today: Select to see only accounts that have been created today, if unselected, you will see all accounts

6. Order By: area select either the “Account” or “Description”.
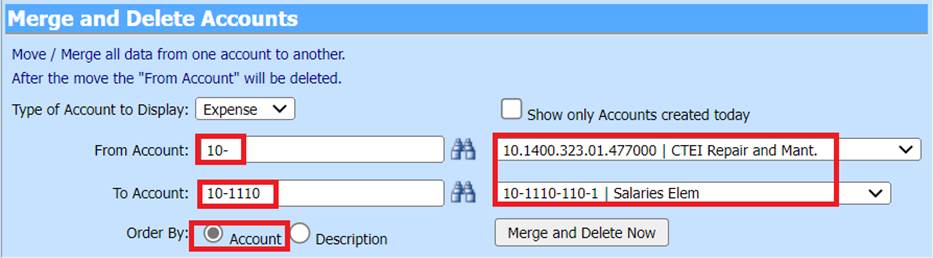
b. If the “Description” is selected in the “Order By:” area, then in the “From Account” and the “To Account” you can enter in a portion of the Description or the entire description and select either the binocular button or the enter key. The system will change the accounts found to the right of the screen. Then in the first drop down select the account you want to move the information from. In the second drop down select the account you want to move the information into.

7. Once you have the accounts you want to merge in the “From Account” and the “To Account” select the “Merge and Delete Now” button. The system will take the information in the “From Account” and move it into the “To Account”. The “To Account” will have its original information along with the information from the “From Account” once the process is complete.
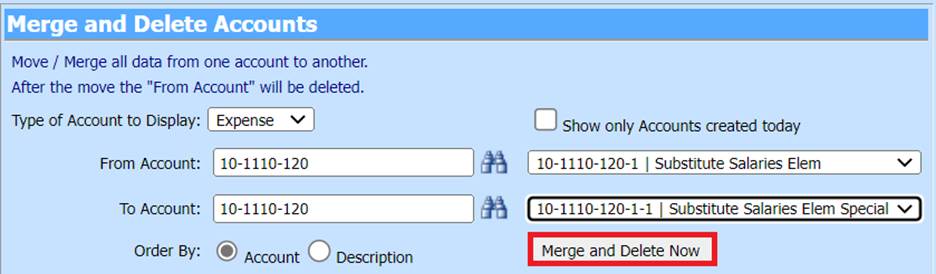
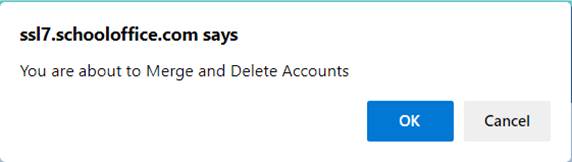
8. Once the “Merge and Delete Now” is selected you will get the following message. To finish the merge process, select the ok button if you decide you do not want to continue with the merge process select the cancel button.
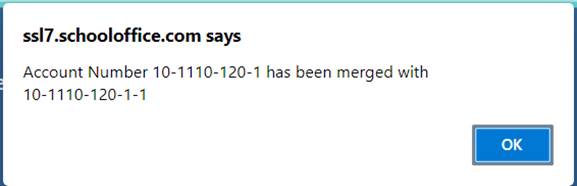
9. After you select the “Ok” button to complete the process another message will display that will verify the accounts that have been merged.
NOTE: To verify the merge process, go into Look and Browse and then Finance Look and Browse. Select the account that the information was merged into to complete the verification process.