
AMERICAN FIDELITY has two files that may be submitted. A detailed list of the files, the fields included in each file and where the information for these fields resides in the SDS database is provided below.
Revised: 2/2022
AMERICAN FIDELITY is a third party administrator for 403(b) and 457plans. Following the below steps will assist you in creating the files required by American Fidelity.
AMERICAN FIDELITY has two files that may
be submitted. A detailed list of the files, the fields included in each file and
where the information for these fields resides in the SDS database is provided
below.
1. The Census File for remitting contributions for 403(b), 457, etc. It contains employee demographic info and 403(b) information.
2. The Common Remitter File is for remitting contributions for 403(b), 457, Roth etc. It contains employee demographic info, 403(b) information and vendor names.
Note: For any questions regarding timing of files to be
submitted or how to submit files, please contact AMERICAN FIDELITY directly.
Census Fields and their locations in the SDS
database:
The following fields are located in the Employee Master:
Note: Only full-time employees will be included, as indicated by
American Fidelity.
1. Select Human Resources Or Payroll Processing
2. Select Add, Change Employee Information
3. Select Tables: General Information, Payroll Control, Other and Contracts

General Information

•SSN: Social security number
•Employee number: Employee Number
•Last name: Employee Name (Last Name, First, Middle)
•First name: Employee Name (Last Name, First, Middle)
•Middle name or initial: Employee Name (Last Name, First, Middle)
•Address line 1: Employee Address 1
•Address line 2: Employee Address Two
•City: Employee City
•State: Employee State
•Zip: Employee Zip
•Home Phone: Employee Hope Phone
•Date of Birth: Employee Date of Birth
•Age: Computed from date the report is run using Birthdate.
•Gender: Employee Gender
Payroll Control

•Pay Periods: Employee Times Paid (Tax Table)
•Date of employment: Employee Date of Hire
•Location: Employee Work (school) location
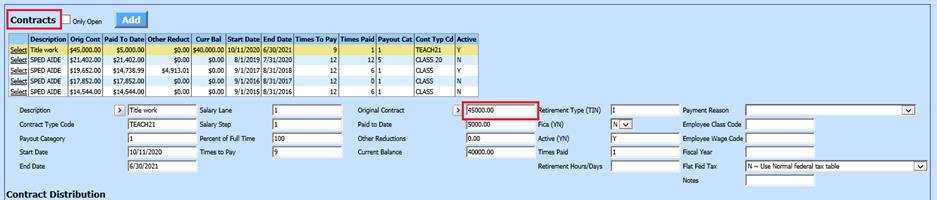
Other & Contracts
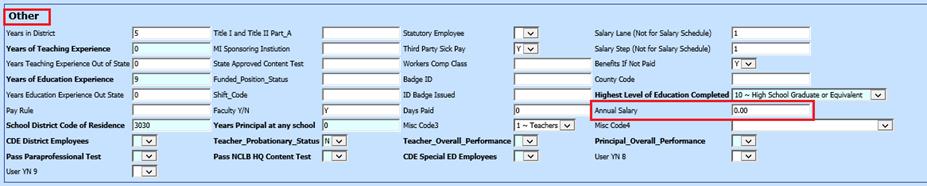
•Yearly Salary: Annual Salary field in Employee Other, if blank will use the Original Contract from Employee Contracts
Creating the Census File:
1. Select Payroll Processing
2. Select State/Federal Reporting and 3rd Party Data Export
3. Select Your State: Select American Fidelity
4. Select a Report: Select Census File
5. Report Date: Select date
Note: This report will include employees with a termination date greater than or equal to the report date selected.
6. Verify/update District Address, Contact, Account #’s and other coding information
7. Select Save Setup, if any changes are made
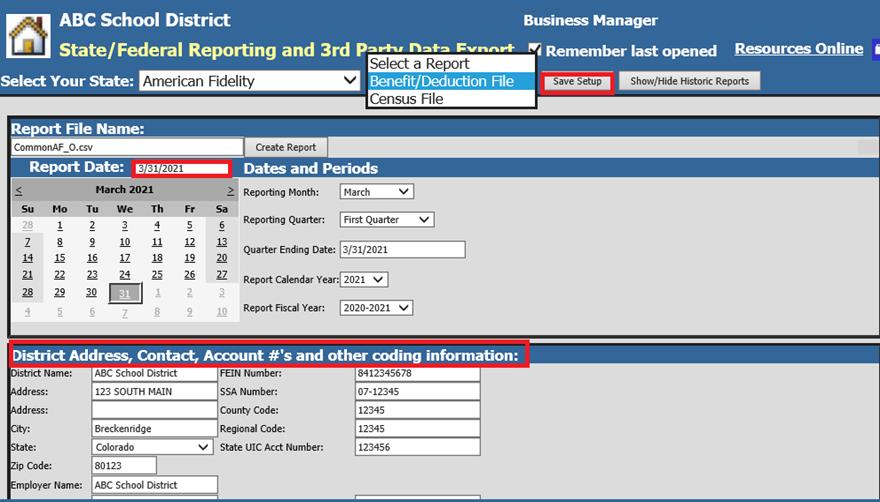
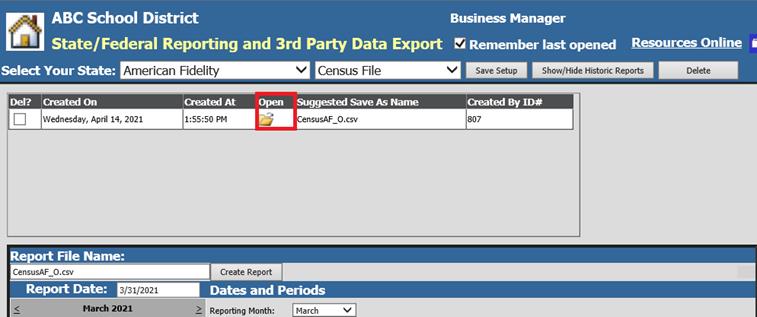
8. Select Create Report

o The system will create a file. The file that is created is a .csv file. To save this file to your computer right click on the folder and select save target as or save link as. Then change the file name for example to ABCSchoolAFCensus.csv. The file is now ready to upload to American Fidelity
Benefit Information Fields
and their locations:
The following
fields are located in the Employee Master table and Deduction Master
table:
1. Select Human Resources Or Payroll Processing
2. Select Add, Change Employee Information
3. Select Tables: General Information and Deductions & Benefits
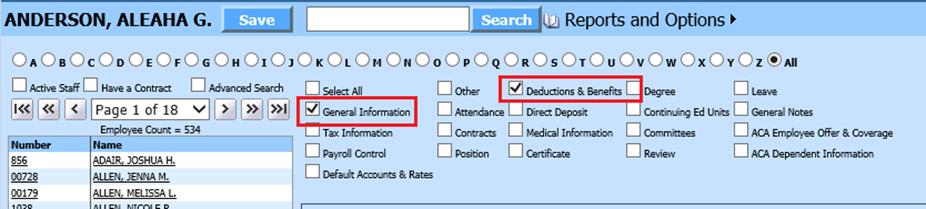
General Information

•Social security number
Deductions & Benefits

•Deduction Code: Deduction Code/Benefit Code
o The deductions/benefits will be reported only if the Deduction/Benefit is active for the employee and matches what is selected in the list on the screen for the ones that are checked.
Deductions & Benefits Master
1. Select Human Resources
2. Select Human Resources Control Center
3. Select Deductions & Benefits Master
4. Select Deduction or Benefit
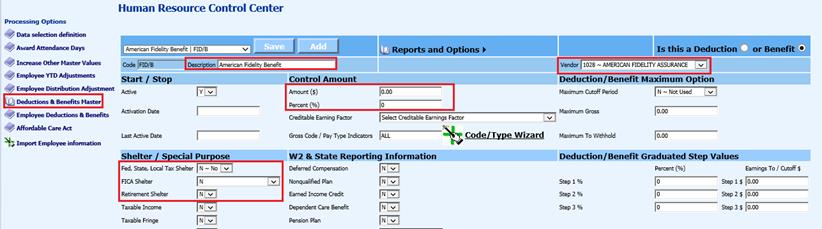
o Benefit: Description from Deduction & Benefit Master
o Company: Vendor Name listed for Deduction or Benefit Code
o Premium: Amounts are pulled from the Employee Deductions or the Deduction master. The amount of the deduction/benefit reported comes from the employee deduction/benefit. If this amount is zero it will use the amount from the Deduction Master.
o Tax:
•A = After (if taxshelter_YN = ‘Y’ in the Deduction Master)
•B = Before (if taxshelter_YN = ‘N’ in the Deduction Master)
•E = Employer paid
Creating the Benefit/Deduction File:
Note:The deduction/benefit file will include both full-time & part-time employees, in case an employee with the deduction changes from full-time to part-time.
1. Select Payroll Processing
2. Select Your State: Select American Fidelity
3. Select a Report: Select Benefit/Deduction File
4. Report Date: Select date
Note: This report will include employees with a termination date greater than or equal to the report date selected.
5. Verify/update District Address, Contact, Account #’s and other coding information
6. Benefit, Retirement, and Deduction Selection Options: Select deductions and benefits that are to be reported. If unsure, please check with American Fidelity.
7. Select Save Setup, if any changes are made
8. Select Create Report
The system will create a file. The file that is created is a .csv file. To save this file to your computer right click on the folder and select save target as or save link as. Then change the file name for example to ABCSchoolAFdedben.csv. The file is now ready to upload to American Fidelity
