Revised: 4/2021
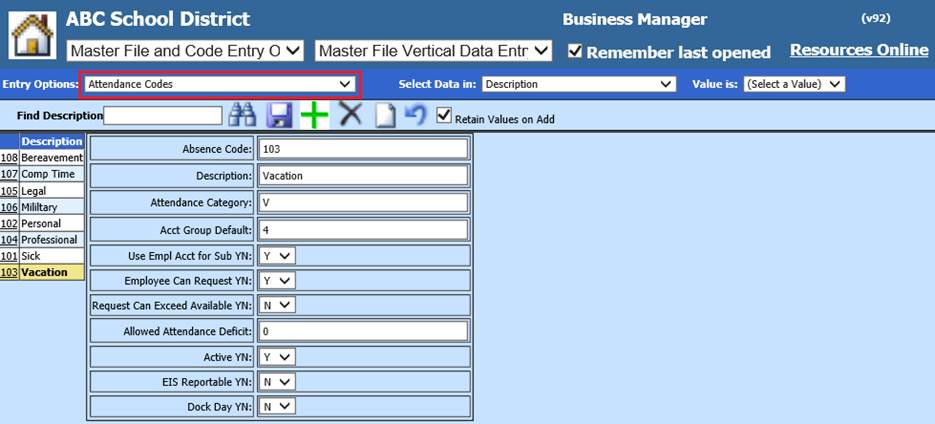
Add and maintain attendance codes used when recording employee absences and paying substitutes. The codes must be defined here before you can use them. The steps listed below will walk you through how to add/edit attendance codes.
Add a new Attendance Code
1. Select Master File and Code Entry Options
2. Select Master File Vertical Data Entry and Changes
3. Entry Option: Select Attendance Codes
4. Select  to add a new Attendance code
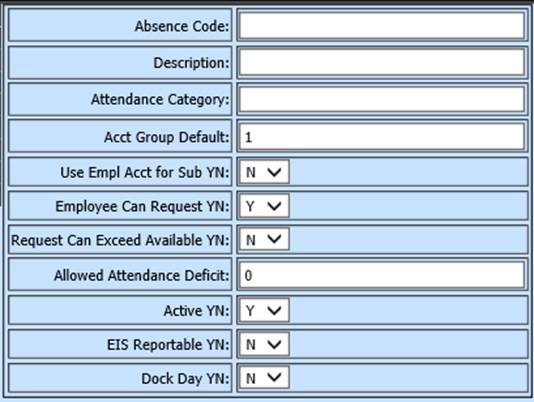
5. Complete all fields
•Attendance Code: Enter Attendance Code
•Description: Enter Description of Attendance Code
•Attendance Category: Code assigned for tracking individual absence codes, use A(Sick), V(Vacation), P(Personal) or numbers 1 – 9
Note: If you have more than 12 attendance codes, some of them may need to be lumped into the same category for tracking purposes
•Account Group Default: Use codes from Employee Master Default Accounts & Rates. See below link for additional information:
http://help.schooloffice.com/financehelp/#!Documents/enteringanemployeedefaultaccountsrates.htm
•Use Empl Account for Sub YN: If the account is defined in Employee Default Accounts & Rates, determine if you wish to use this account for substitute assigned
•Employee Can Request YN: Determines if you wish the employees to request attendance through Employee Portal
•Request Can Exceed Available YN: If you wish the employee to exceed the available assigned days/hours
Note: this would normally be set to “N” if employees should not use more days/hours than they have available for a code.
•Allowed Attendance Deficit: if the employee can exceed a code’s total available, this setting is how much over an employee can use.
•Active YN: Activate/Inactivate Attendance Code
•EIS Reportable YN: (Illinois only) Determines if the Attendance code is EIS reportable
•Dock Day YN: Determines if it to be reported as a Dock Day
6. Select Save
Edit an Attendance Code
1. Select Attendance Code
2. Make needed adjustments
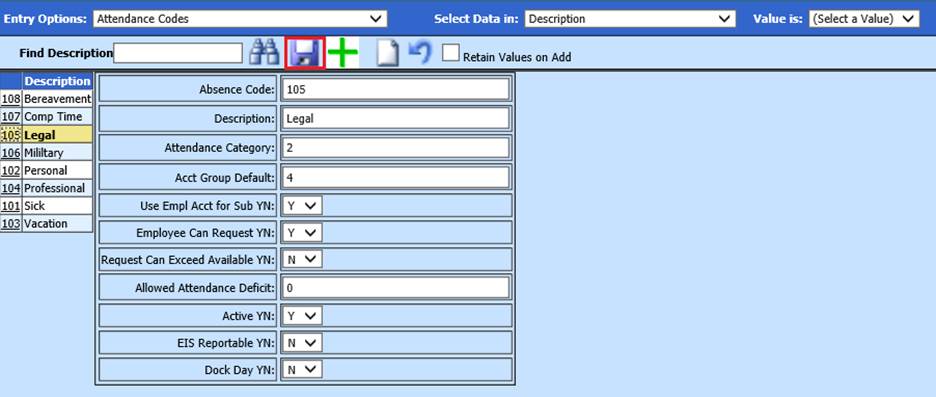
3. Select Save