Revised: 4/2021
This area is used to add new accounts, change dimensions, change descriptions on existing accounts and utilize the Due to and Due From fields. The Due To / Due From fields are available in this entry view. These fields allow you to designate different accounts for Due To Liability, Due From Receivable and Due From Cash on an individual account basis.
First follow the steps to learn
how to add/edit accounts.
1. Select Master File and Code Entry Options
2. Select Master File Vertical Data Entry and Changes
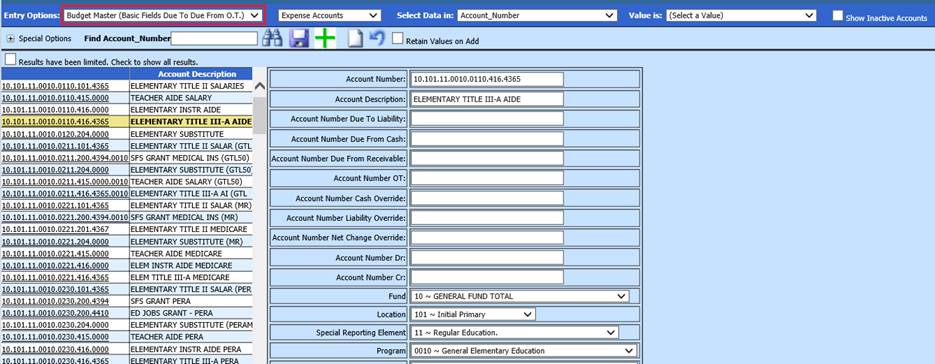
3. Entry Options: Select Budget Master (Basic Fields Due to and Due from O.T.)
4. Select Account Type

5. Select  to add new account
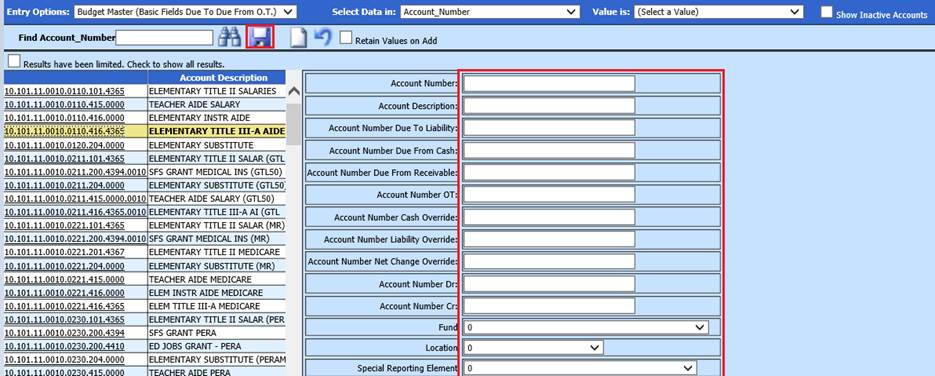
6. Enter new Account information
•Account Number: Account number used in 10-key
•Account Description: Enter Account Description
•Account Number Due To Liability: Enter Account number
•Account Number Due From Cash: Enter Account number
•Account Number Due From Receivable: Enter Account number
•Account Number OT: Enter Account number
•Account Number Cash Override: Enter Account number
•Account Number Liability Override: Enter Account number
•Account Number Net Change Override: Enter Account number
•Account Number Dr: Enter Account number
•Account Number Cr: Enter Account number
•Fund (Dim_01) & (Dim_2 thru Dim_12): Enter State Codes
•Adopted Operating Budget: Enter Current Budget
•Adjustments to Curr Budget: Enter Adjustments to Current Budget
•Next Yrs Budget Proposed: Enter Next Years Budget Proposed
•Next Yrs Budget Approved: Enter Next Years Budget Approved
•Next Yrs Budget: Enter Next Years Budget
•Next Yrs. Adjustments to Budget: Enter Next Years Adjustments
•Over Budget Warning Percent: Enter percentage for over budget warning
•Admin Group: Assign Security Admin Group, if needed
•Account Status: “A” Active, “I” Inactive
•Employee Payment Reason (Illinois only): Used for Gemini reporting
7. Select Save
Edit account information
1. Select account number
2. Make account changes
3. Select Save
Note: Select the account that you have due to and due from entries for and fill in the due to liabilities, due from receivable and due from cash fields and save. Repeat for each account that this applies to. Once this is completed and you start creating your entries, it will make the journal entries for you automatically.
Sorting
Accounts
•Account Type: Select Expense, Revenue or Balance Sheet accounts. The default view for this is Expense Accounts.

•Select Data in: Allows you to filter any of the account fields.
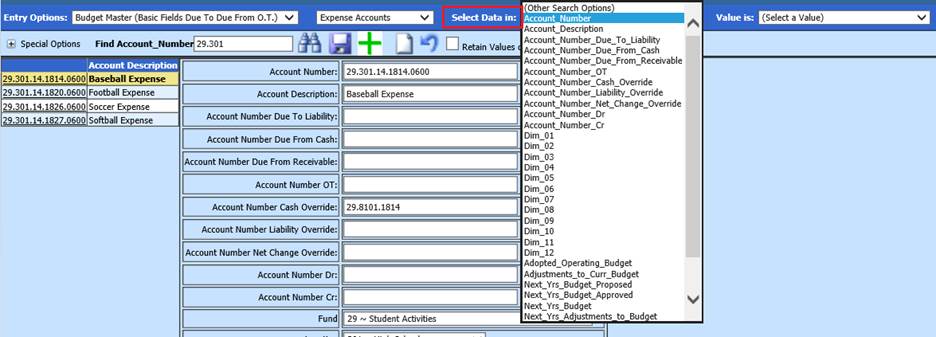
•Value is: Allows you to select a value in any field you have chosen in the Select Data in field.

•Show Inactive Accounts: If selected, Inactive Accounts will be included in the display.

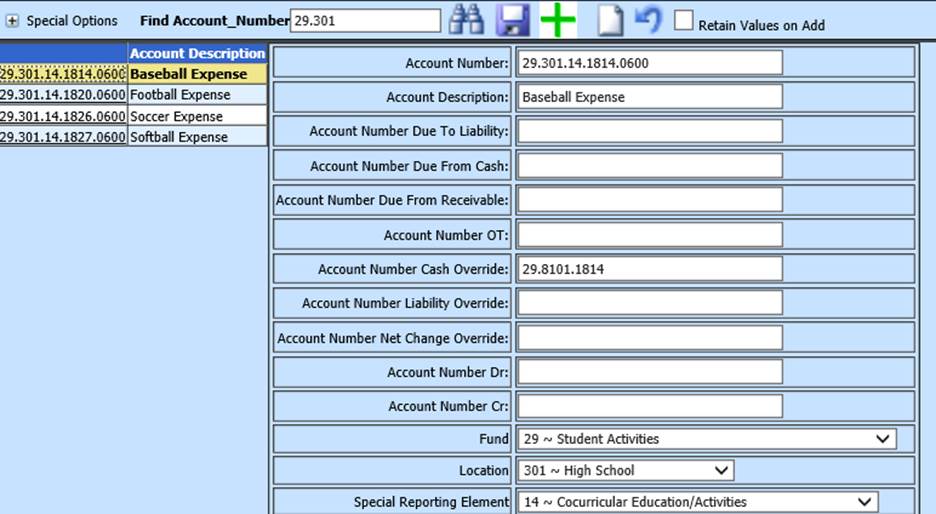
•Find Account_Number: Key in part or all of the account number.
o Select the binoculars or hit enter, to preview.

•Find Account_Description: Key in the description in the Find Account Description box. All instances of the description will display.

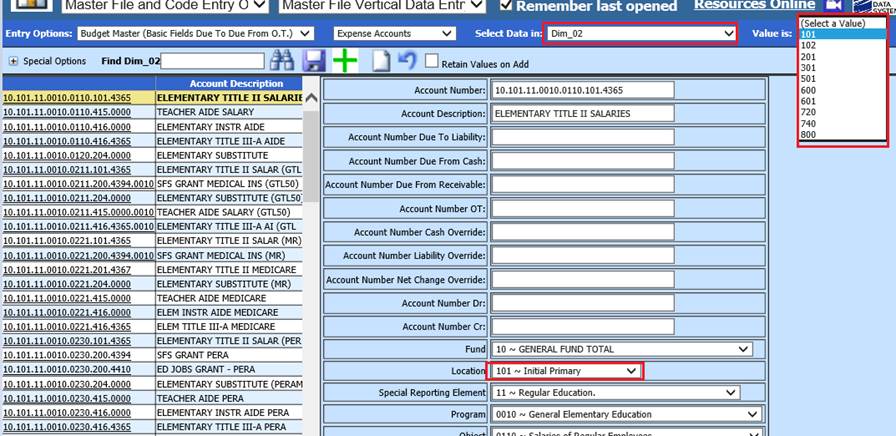
•Find Account_Dimension: Select Dim_xx
o Value Is: Select dimension number. All accounts within that dimension will appear on the left side of the screen.