Revised: 3/2020
1. Select General Ledger Processing and Entry Options
2. Select Budget Planning Assistant
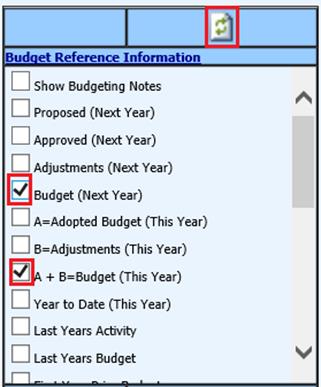
Budget Reference Information
Select the budget columns that
you wish to display for view to the right of the Working Value Column. Press the
Refresh Icon  to display
the columns that have been selected.
to display
the columns that have been selected.
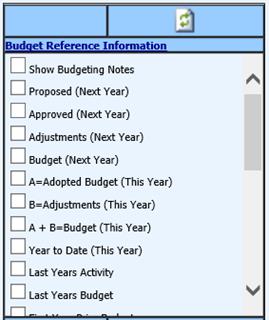
•Budget Notes and Forecasting Columns:
o Show Budgeting Notes
o Budget Forecast Columns (1)-(5)
•Current Year Columns:
o A= Adopted Budget (This Year)
o B= Adjustments (This Year)
o A+B = Budget (This Year)
o Year to Date (This Year)
•Last Year’s Columns
o Last Year’s Budget
o Last Year’s Activity
•Next Year Columns
o Proposed (Next Year)
o Approved (Next Year)
o Adjustments (Next Year)
o Budget (Next Year)
Copy From/Add To Operations
Copy From
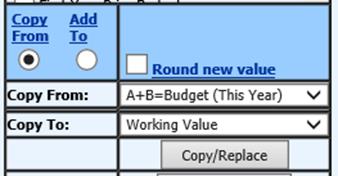
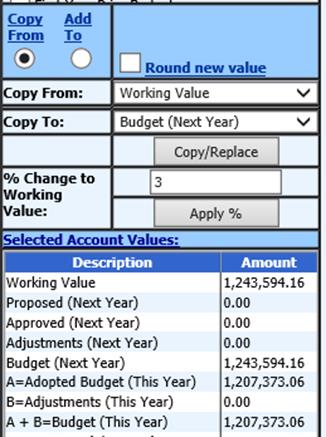
Select the “Copy From” Button to Copy Figures from One Column to Another
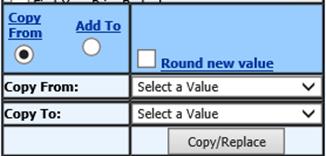
•Copy From: The selection will determine what figures will be copied to the column selected under “Copy To”
Drop Down Choices:
o Zeros Sets the “Copy to” column to Zeros
o Working Value Sets the “Copy to” column equal to the Working Value Column
o Budget Columns Includes Next Year, Current Year, Last Year Budget Columns
o Payroll Trans Exp Allows the expenses of an open,
computed payroll to be
included in a Budgeting Column. Select the Payroll
Date to
Copy.
o Budget Forecast Columns (1) through (5)
o Open PO’s (This Year) and Open PO’s (Next Year)
•Copy To: The selection will determine the column the figures from “Copy From” will be copied to.
Drop Down Choices:
o Working Value Adopted Budget (This Year)
o Proposed (Next Year)
o Approved (Next Year)
o Adjustments (Next Year)
o Budget (Next Year)
o Adopted Budget (This Year)
o Adjustments (This Year)
o Budget Forecast (1) – (5)
•Select the “Copy/Replace” button to complete the copy procedure.
Add to
Select the “Add to” Button to Add/Combine Figures from one Column to Another
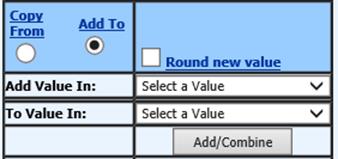
•Add Value In: This selection will determine what figures will be added to/combined to the column selected under “To Value In”
Drop Down Choices
o Zeros Adds a Zero to the column selected under “To Value in”
o Working Value Adds the Working Value Column to the figures selected in “Add Value to”
o Budget Columns Adds value from a budget column. Includes choice of Next Year, Current Year, Last Year Budget Columns
o Payroll Trans Exp Allows the expenses of an open, computed payroll to be added to a Budgeting Column. Select the Payroll Date to Add.
o Budget Forecast (1) – (5) Allows the value of a Budget Forecast Column to be added to a Budgeting Column
o Open PO’s (This Year) and Open PO’s (Next Year) Allows the value of the Open Po’s for current or next year to be added to a Budgeting Column.
•To Value In: The selection will determine the column the figures will be added/combined with.
Drop Down Choices
o Working Value
o Adopted Budget (This Year)
o Proposed (Next Year)
o Adjustments (This Year)
o Approved (Next Year)
o Budget Forecast (1) – (5)
o Adjustments (Next Year)
o Budget (Next Year)
•Select the “Add/Combine” button to complete the operation.
% of Change to Working Value

•Enter a positive number to represent the percentage of change increase to apply to the Working Value Column. (ex: 5 = 5% increase, 4.5 = 4.5% increase)
•Enter a negative number to represent the percent of change decrease to apply to the Working Value Column. (ex: -3 = -3% decrease, -2.5 = 2.5% decrease)
•Select “Apply %” to apply the percent change to the Working Value Column.
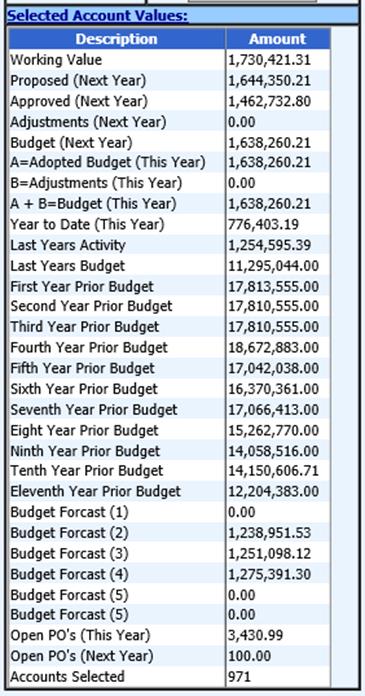
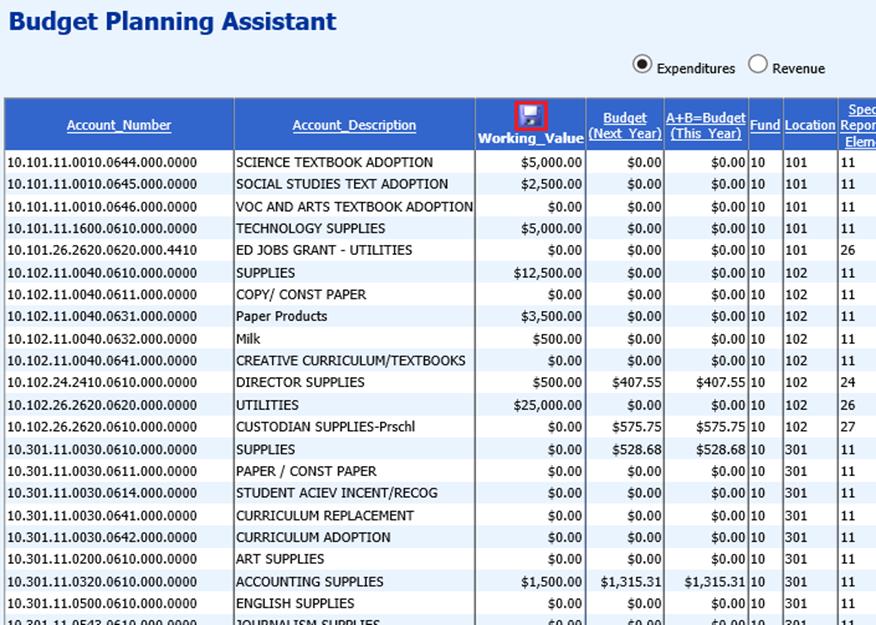
Selected Account Values
Shows totals for the displayed accounts for each listed column
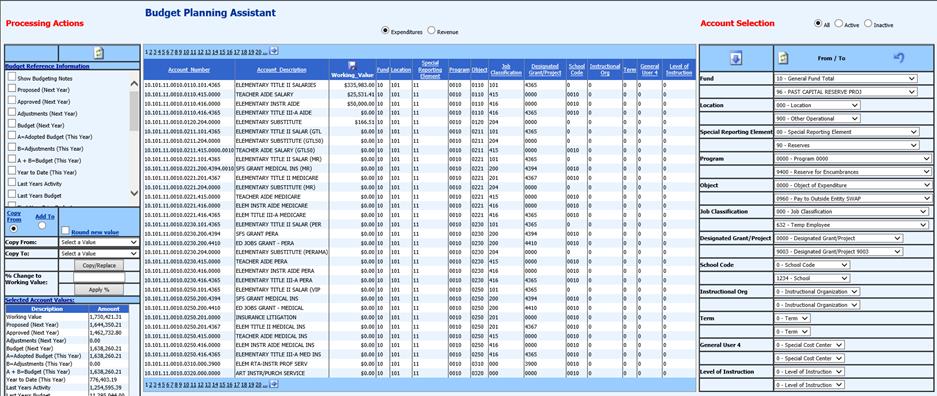
Screen Layout
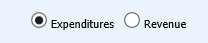
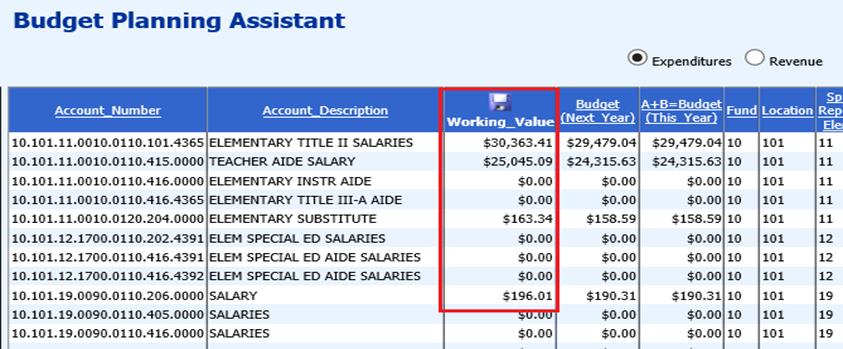
Select Expense or Revenue at the top of the screen to display the accounts of that type.

Page Number links allow for movement to different pages of accounts

•Account Numbers displayed are the ASN (Account Number of the District). This account may differ from the State Account Number.
•Working Value Column
o Manual Changes can be made to this column. Be sure to
SAVE  these manual entries.
o Manual Budget Entries should be a Positive for Expense Accounts and a Negative for Revenue Accounts.
o Figures from this column can be copied or added to other budget columns.
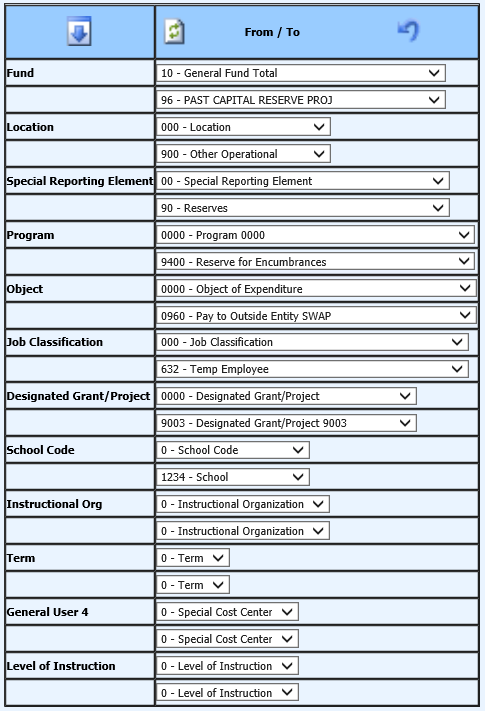
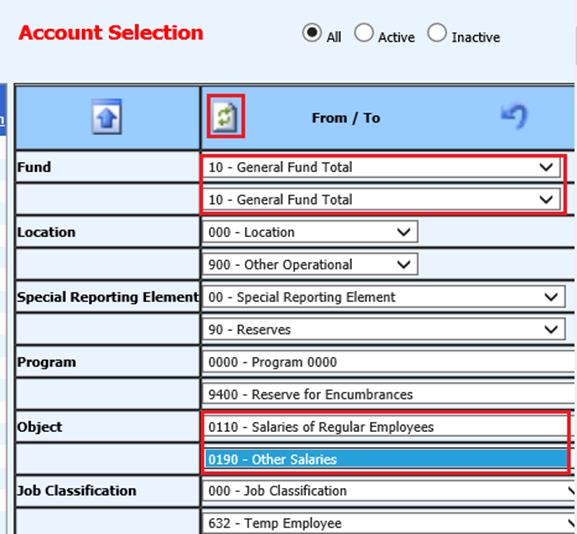
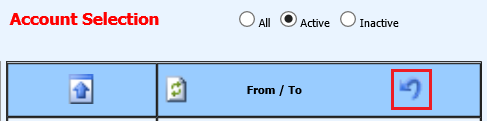
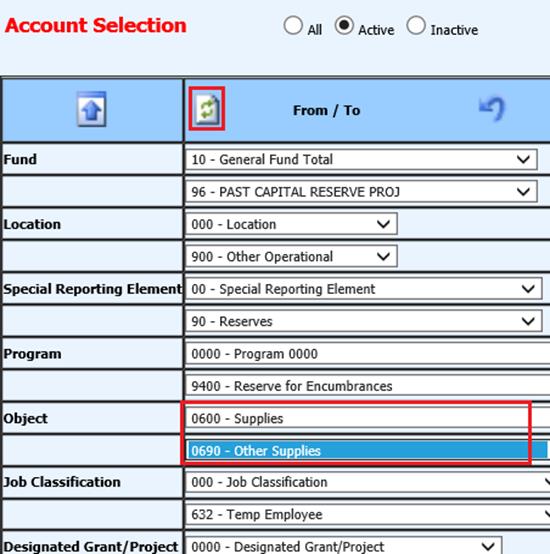
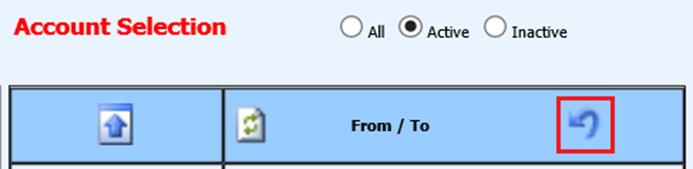
Account Selection
Apply a Sort to Accounts
Use the Range items for each account dimension to apply a sort to show specific accounts for budgeting.
Select to include All Accounts, Active Accounts, or Inactive Accounts.

Refresh the Screen after
selecting the sort using the Refresh Icon  at the top of this account selection
area.
at the top of this account selection
area.
 Resets the Account Selections back to Default Settings
 Displays
all accounts, according to account selections, all on one page.
Displays
all accounts, according to account selections, all on one page.
 Displays 32 accounts per page, according to
account selections, with pages listed at top of the screen
Displays 32 accounts per page, according to
account selections, with pages listed at top of the screen
BUDGETING SCENARIO 1
Use the Current Year Adopted Operating Column, add 3% to all salary expense accounts in Fund 10 and transfer those new figures to the Next Year Budget Column.
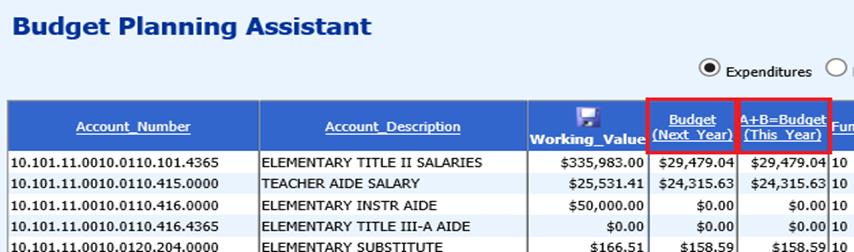
1. In the Budget Reference Information area, check the box for Current Budget and for Budget(Next Year). Click the Refresh button at the top of that area

2. The columns selected; Current Budget Column and the Next Year Budget Column will display next to the Working Value Column.
3. At the right side of the screen in the Account Selection area, select the range areas under Fund and Object. Select the Refresh area at the top of the screen.
4. Use the Copy From area to select the following:
•Copy From: Current Budget (A + B Budget This Year)
•Copy To: Working Value
5. Select Copy/Replace to replace the working value figures with the current budget figures.
6. In the % Change to Working Value column, enter a 3
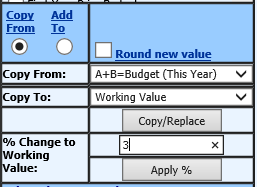
7. Select Apply %. This will apply the 3% increase to the Working Value Column.
8. Verify figures in the Working Value Column.
9. Use the Copy From area to copy the new figures to the Next Year Budget Column.
•Copy From: Working Value
•Copy To: Budget (Next Year Budget)
10. Select Copy/Replace to replace the values in the Next Year Budget Column for salary expense accounts in Fund 10 with the figures in the Working Value Column.
11. Reset the work area to display all expense accounts for all funds. Select the Back Arrow icon at the far right of the screen in the Account Selection Area to reset the default settings on the Sort Ranges for the Account Dimensions.
BUDGETING SCENARIO 2
Add specific dollar amounts to each supply account in the Next Year Budget Column.
1. In the Budget Reference Information area, check the box for Current Budget and for Budget(Next Year). Click the Refresh button at the top of that area
2. The columns selected; Current Budget Column and the Next Year Budget Column will display next to the Working Value Column.

3. At the right side of the screen in the Account Selection area, select the object range that represents your supply accounts. (ex: 0600 series) under Object. Select the Refresh area at the top of the screen.
4. Enter the dollar amount to be added to the Next Year Budget column into the Working Value Column. Select the diskette icon to save the changes.
5. When all amounts have been manually added, use the “Add To” option and select the following:
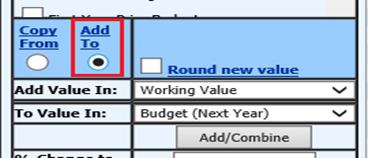
•Add Value in: Working Value
•To Value in: Budget (Next Year)
•Select Add/Combine
6. Reset the work area to display all expense accounts for all funds. Select the Back Arrow icon at the far right of the screen in the Account Selection Area to reset the default settings on the Sort Ranges for the Account Dimensions.
BUDGETING SCENARIO 3 - Projecting Payroll Transaction Expenses
This scenario allows for projecting the payroll salaries and expenses that are left to be paid from contracts for the fiscal year. This process temporarily does a payoff of contracts in order to compute the payroll expenses for use during the budgeting process. At the end of the process, the payoff of contracts will be reversed to take the data back to the original state.
1. Employee Master, set all contracts, to be included in the payroll transaction projection, to a specific payout category(s) if needed.
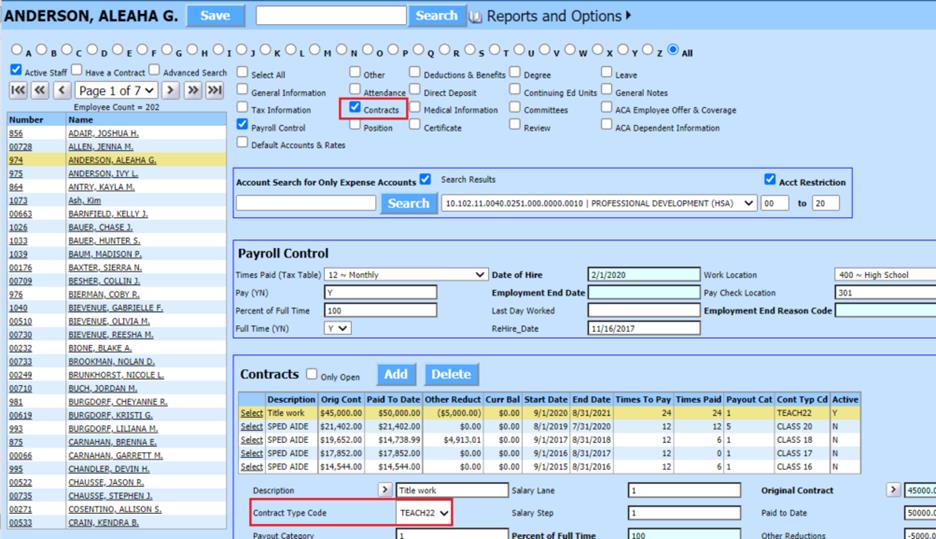
a. Select Human Resources or Payroll Processing
b. Select Add, Change Employee Information
i. Select Contracts
ii. Verify/update contract type code
iii. If any changes completed, select Save
Or:
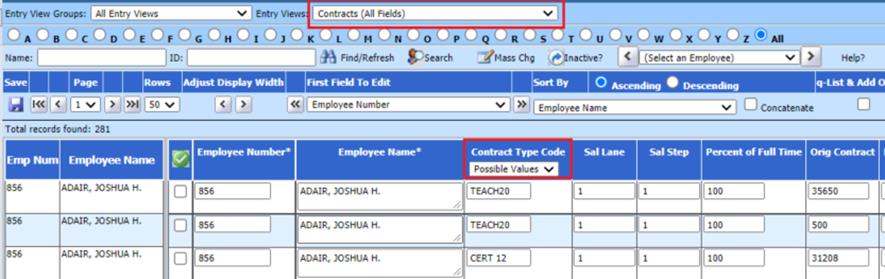
c. Select Employee Horizontal Data Changes
i. Entry Views: Select Contracts (All Fields)
ii. Verify/update contract type code
iii. If any changes completed, select Save
2. Select Payroll Processing
3. Select Activate/Open Payrol
4. Set up a New Payroll Date (this process will need to be done when payrolls are closed.
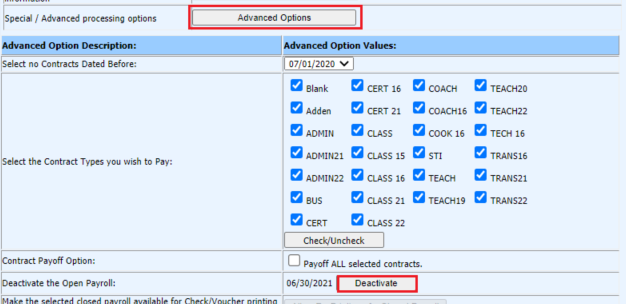
5. Select Advanced Options
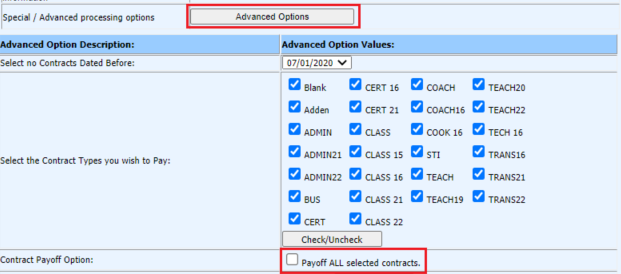
a. Note the option: “Select NO Contracts dated before”. Set this date to the earliest contract date that should be considered in this process
b. Check the contract type codes to be paid
c. Check the box “Payoff all selected contracts”
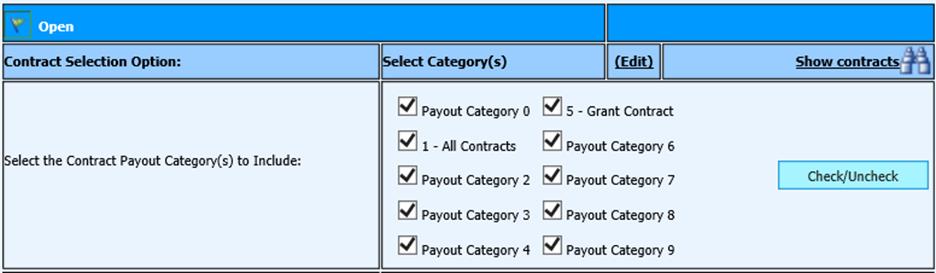
6. At the top of the screen, select the appropriate Payout Categories
7. Select the appropriate contract start date on “Select contracts with a start date before or equal to”
8. Activate Payroll date

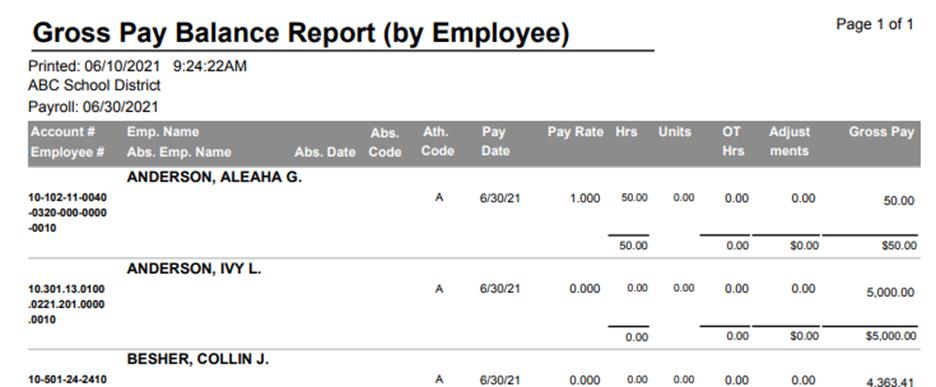
9. Under Payroll Processing, Payday Reports; Print a Gross Pay Balance Report to verify the accuracy of the contract payoffs for this temporary process.
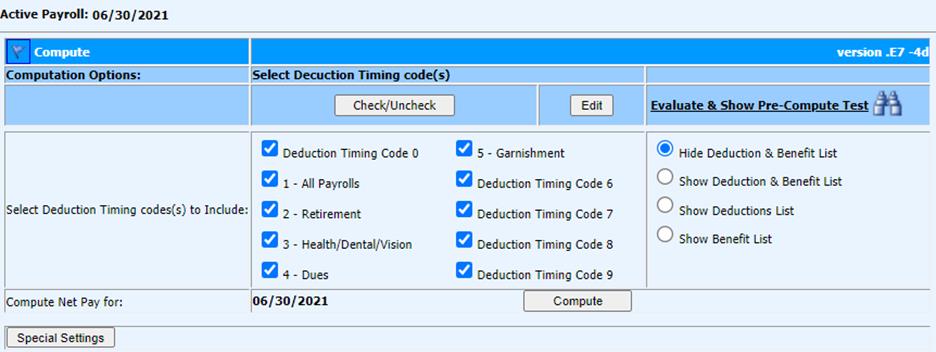
10. Compute Net Pay
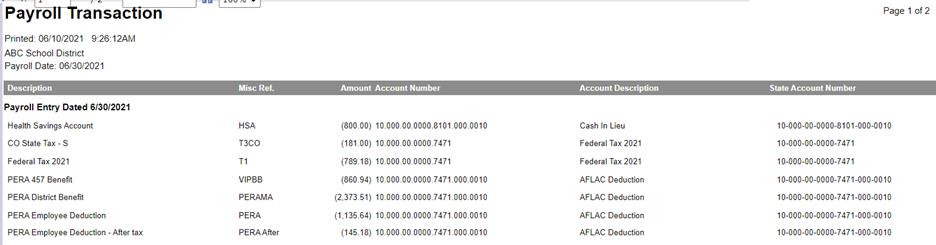
11. Under Payday Reports, Print Payroll Transaction Report. This will be the only copy for your records.
12. Select Budget Planning Assistant
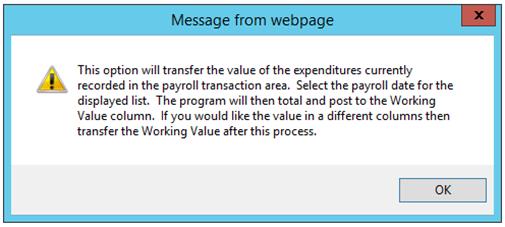
13. In the column “Copy From” or “Add Value in”, select “Payroll Transaction Expense”

14. The screen will refresh, select OK to message
15. The active payroll date will display
16. Select Copy/Replace or Add/Combine
17. The Payroll Transaction Expenditure amounts will be added to the Working Value Column. The figures can then be copied/added to other columns.

18. Select Payroll Processing, Activate/Open a Payroll
19. Select Advanced Options. Select Deactivate Payroll. This will reverse all payoff projections and restore the figures to their original figures prior to this process.