Revised: 6/2021
Getting Started with Check Reconciliation
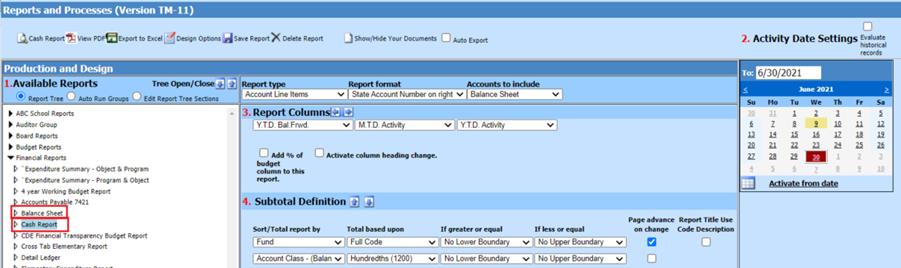
1. If you wish to run a cash report for all cash accounts listed in Check Group
a. Select Reports
b. Select Financial Reports
c. Select Balance Sheet. (if you have created/saved a Cash Report already, select Cash report)
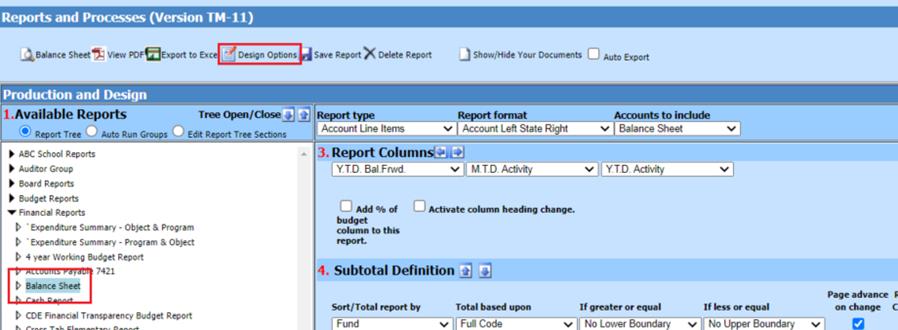
d. If you have not created/saved a Cash Report: Select from Available Reports; Balance Sheet then select Design Options.
e. Adjust Subtotal Definition: If Cash accounts have sequential Account Class, State Codes:
i. # of subtotals for this report: “1”
ii. Adjust the Account Class formula to show only cash accounts.
iii. Page advance on change: remove check mark
For more information on creating a Cash Report for Bank Reconciliation, see below link: http://help.schooloffice.com/financehelp/#!Documents/cashreportforbankreconciliation.htm
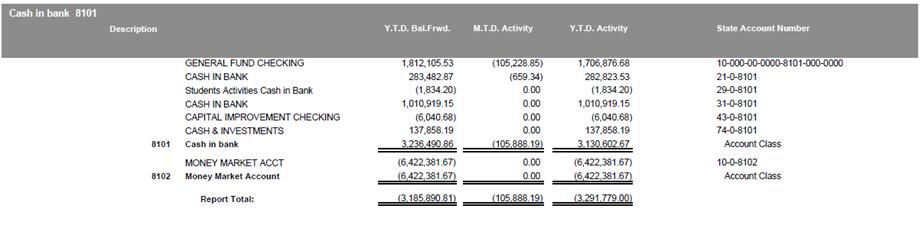
f. Preview Report
2. Check Reconciliation using Statement Date
a. Select General Ledger Processing
b. Select Check Reconciliation
c. Select Check Group
d. Select Bank Statement Ending Date
e. Date & Activity from /to dates will default to the first and last month of the statement date

f. Verify amount listed in Cash Account(s). This should be the amount from your cash report.

i. If they do not balance, verify all cash accounts listed. Possibly there is a cash account not needed or missing in this check group or the cash report has the correct cash accounts. If these totals do not balance and unsure how to proceed, contact SDS for assistance.
g. Enter the ending Bank Statement Balance
h. Select Save

Verify reconciling items
1. Print a Check Reconciliation report for the month you are working on
a. Select General Ledger Processing
b. Select Check Reconciliation
c. Select Check Group
d. Select Statement Date
e. Select Check Reconciliation Report
f. Preview Report

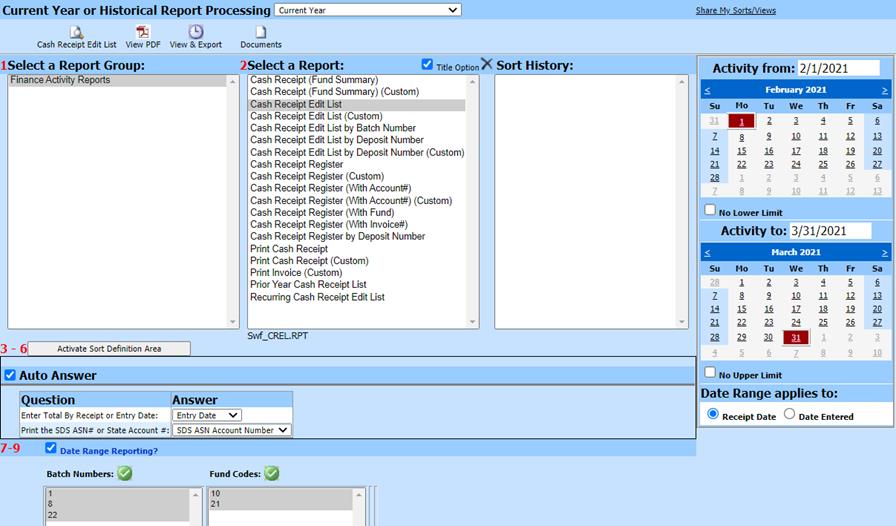
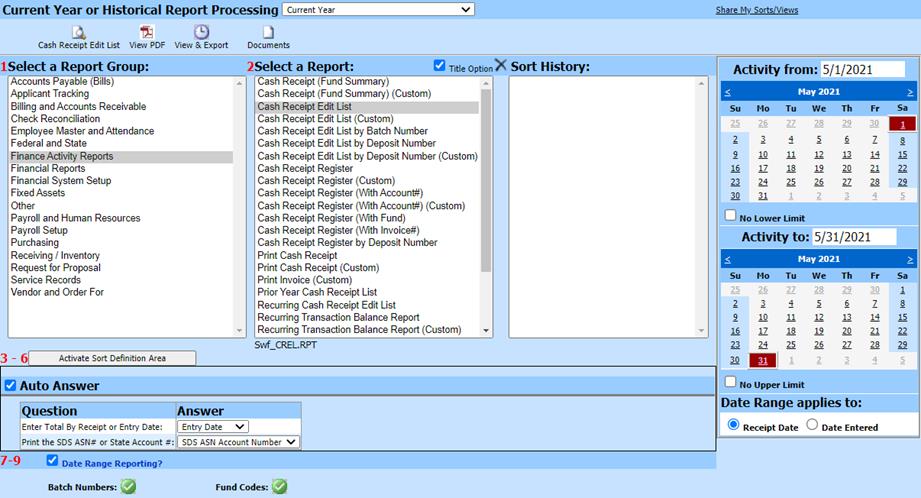
2. Verify current month cash receipts (run report with proper funds & dates). You can print this report from two different entry views; Cash Receipts and General Accounting Reports
From Cash Receipts entry View:
a. Select Cash Receipts
b. Select Print Cash Receipts
c. Select Cash Receipt Edit List
d. Select Activity date range needed
e. Preview Report
From General Accounting Reports entry view:
a. Select Reports
b. Select General Accounting Reports
c. Select Finance Activity group
d. Select Cash Receipt Edit List
e. Select Activity date range needed
f. Preview Report
Note: All deposits on the cash receipt edit list should be on the reconciliation report with same amount listed. If there is a deposit on one report and not the other, contact SDS for assistance.
3. Verify the current month checks/efts (run report with proper funds & dates) You can print this report from two different entry views; Accounts Payable and General Accounting Reports
From Accounts Payable entry view
a. Select Accounts Payable
b. Select Disbursements/Accounts Payable Entry
c. Select Check Register
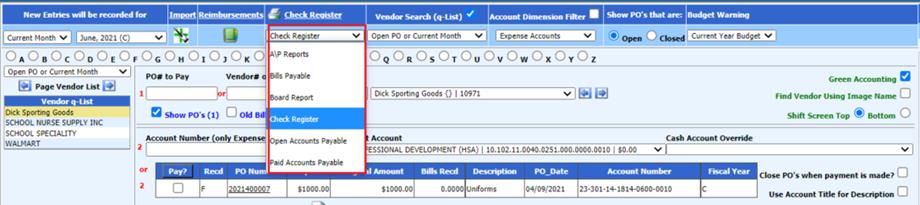
d. Select Activity date range needed
e. Preview Report
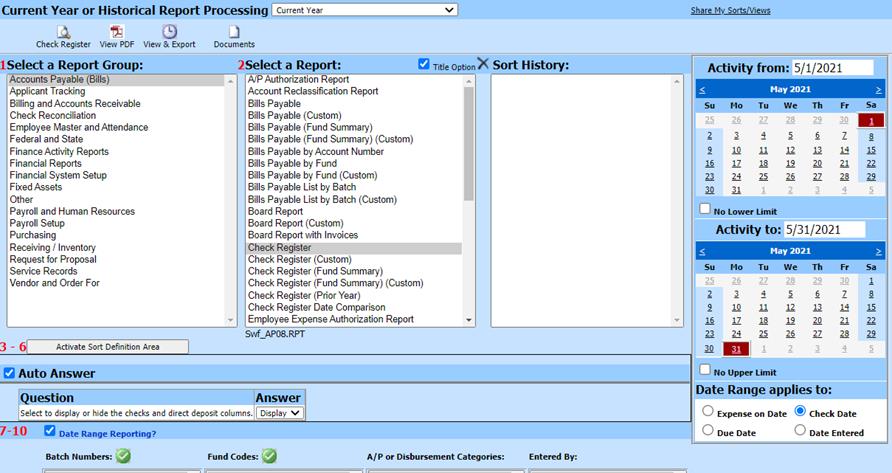
From General Accounting Reports
a. Select Reports
b. Select General Accounting Reports
c. Select Accounts Payable group
d. Select Check Register Report
e. Select Activity date range needed
f. Preview Report
i. All checks/EFTs on the check register report should be on the reconciliation report with the same dollar amount. If there is a check/EFT on one report and not the other, contact SDS for assistance.
4. Verify the current month Payroll Checks and Direct Deposit
a. Select Payroll Processing
b. Select Payday Reports
c. Select Payroll Date
d. Select Employee Check Register
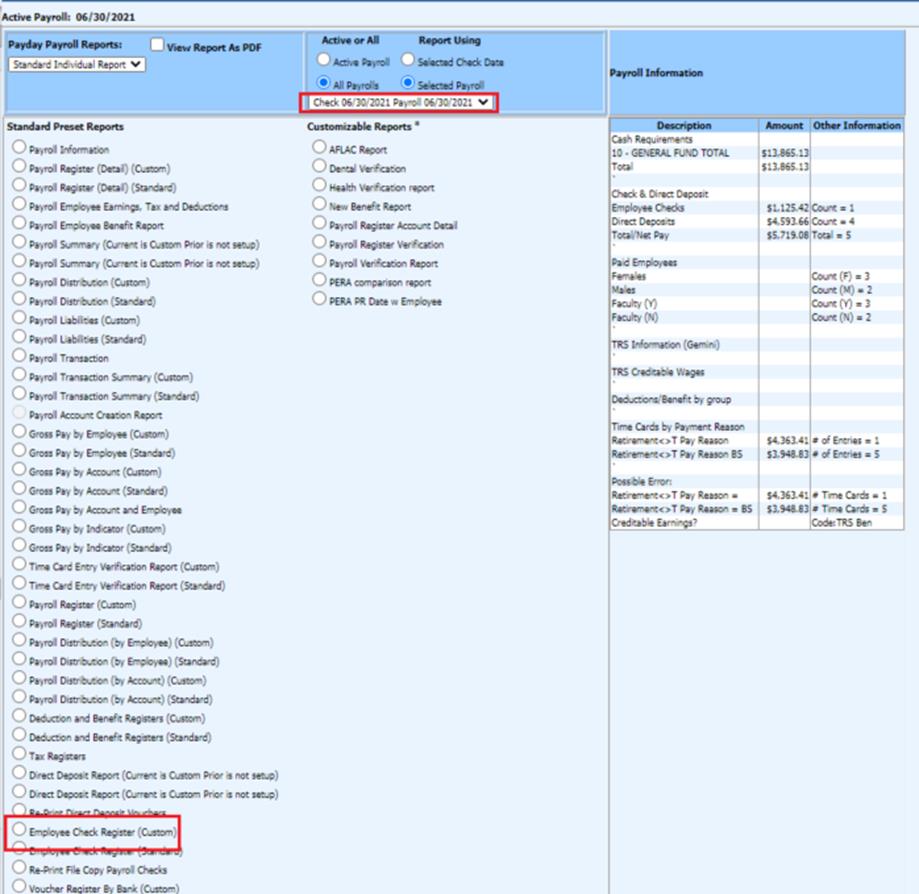
i. Run a report for each payroll completed for month balancing
ii. All payroll checks and the total for direct deposit on the employee check registers should be on the reconciliation report with the same dollar amount. If there are differences, contact SDS for assistance
5. Verify the current month journal entries (if applicable)

a. Using the check reconciliation report, review any journal entry items listed. If they are not reconciling items, meaning amounts are not on the bank statement, they can be deleted. Usually the only transactions that are reconciled, other than direct deposit, are transfers from one bank account to another.
Balancing to the Bank Statement
1. Print a Check Reconciliation report for the month you are working on
a. Select General Ledger Processing
b. Select Check Reconciliation
c. Select Check Group
d. Select Check Reconciliation Report
e. Preview Report

2. Using your bank statement, review all items cleared.
a. There may be items separated on the bank statement that are added together in the check reconciliation. It is suggested that you make note of these items and also “check numbers” for electronic transactions on your bank statement.
b. Be sure that the amounts cleared on the statement are the same amounts in the check reconciliation area. If they are not the same dollar amounts, you won’t balance until adjustments are made. Make note of these. When you are done with this verification process, make adjustments as needed.
3. Clear items in program that you have reviewed
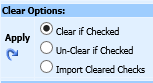
a. Put a check mark next to the items to clear, then select “Clear if Checked” then select the Apply
4. Cleared amounts on the Cleared Check report should match bank statement cleared items.
a. Cleared Check report is available in Check Reconciliation

5. If the reconciliation does not balance, see next section on “Finding an out of balance amount”
Finding an out of balance amount
1. Verify Bank Statement balance has been entered correctly
2. Print Cleared Check Report. Compare cleared item totals to bank statement
a. The cleared items should match the bank statement cleared items. If not, locate discrepancy and adjust item, as needed.
3. Verify entries on bank statement, are they posted in SDS
4. Verify entries are posted to correct cash account. Verify all cash overrides included in balancing.
5. Verify any voided entries which should be cleared out or still outstanding