Revised: 5/2020
In the current environment many clients are looking for a way to track costs related specifically to the Coronavirus Pandemic.
We have, as part of the standard SDS system, a method of tracking costs that lends itself to meeting this need without the need to setup special accounts in your ledger.
We have an additional area in which you can create a specific code within the Master File section. Using this code, found in the “Activities, Programs, Projects” (APP) entry view, will provide you the ability to code activities being recorded so it can be reported separately from other types of entries.
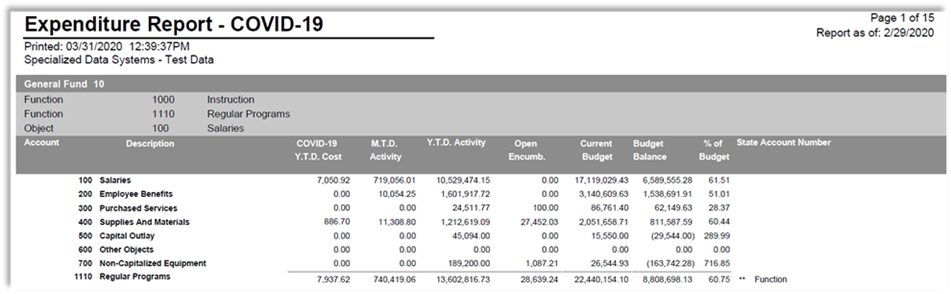
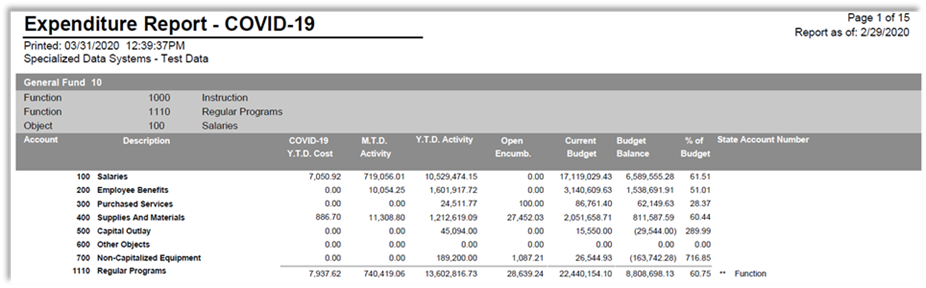
This is an example of a possible COVID-19 Expenditure Report
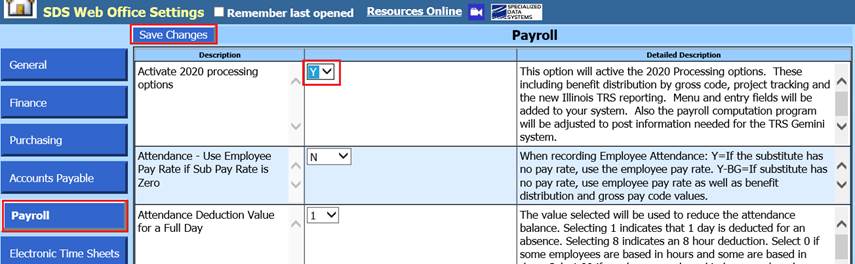
Step 1: Activate 2020 Processing options
1. Select Administrative Utilities
2. Select SDS Web Office Settings
3. Select Payroll
4. Activate 2020 processing options: Change to “Y”
5. Select Save Changes
6. Log out/in for changes to be activated
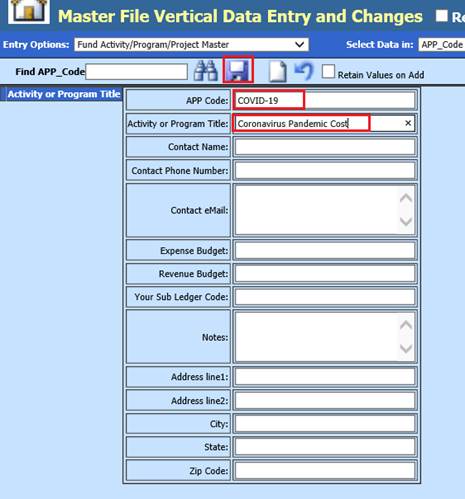
Step 2: Add a new Activity Program Project Master code
4. Select Master File and Code Entry Options
5. Select Master File Vertical Data Entry and Changes
6. Entry Options: Select Fund Activity/Program/Project Master

Note: First time using this entry view, enter data in the fields needed
a. APP Code: For Coronavirus cost tracking we recommend COVID-19
b. Activity or Program Title: We recommend Coronavirus Pandemic Cost
c. Select Save
d. To add additional APP codes, select Add a Record and repeat steps above (a, b, c)
How to utilize new APP code with data entries
Step 3a: Accounts Payable Entry with APP Code
5. Select Accounts Payable
6. Select Accounts Payable Invoice / Disbursement entry
7. Check the box to display “Other Fields”
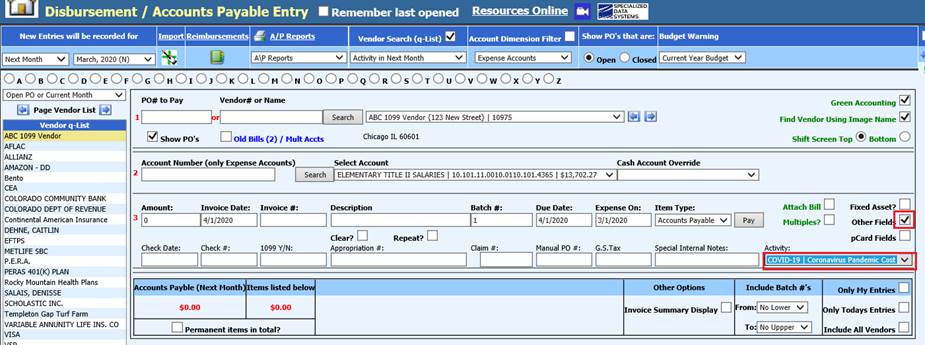
a. Because you now have an entry in the “Activity Program Project Master” the activity(s) in the master area become available for selections.
8. Complete normal Accounts Payable processes
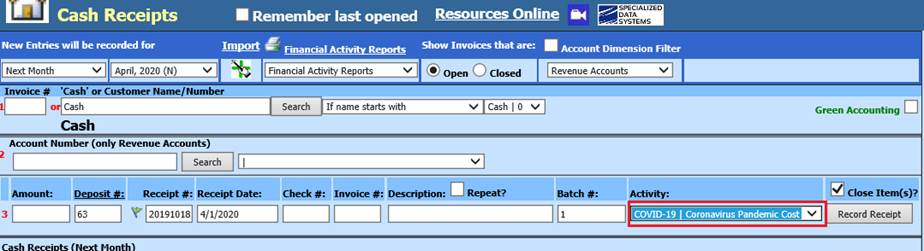
Step 3b: Cash Receipt Entry with APP Code
5. Select Cash Receipts
6. Select Cash Receipts
7. Activity: Use this option to select APP values from the “Activity Program Project Master” area.
8. Complete normal deposit entry
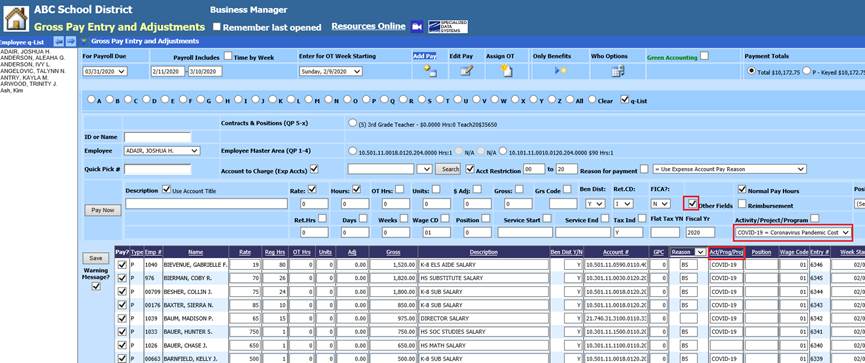
Step 3c: Payroll Processing with APP Code
5. Select Payroll Processing
6. Select Gross Pay Entry and Adjustments
7. Select Other Fields
a. Use this option to select APP values from the “Activity Program Project Master” area.
8. Complete normal payroll data entry
Updating Prior Accounts Payable Invoices with APP Code
7. Select Master File and Code Entry Options
8. Select Master File Horizontal Data Changes
9. Entry Options: Select Invoices Adjustments
10. Other Field: Use this to search out specific invoices to be updated
11. First Field to Edit: Select APP_Code
a. This view has the ability to add the APP code quickly to past activity.
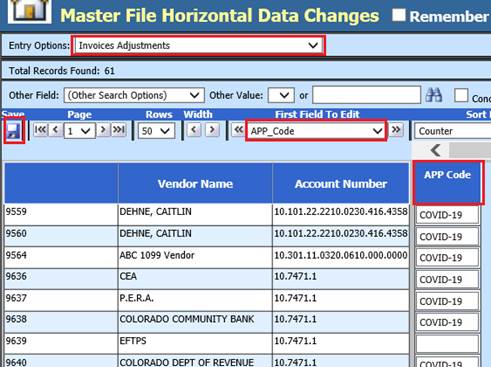
12. Select Save
Updating Prior Cash Receipts with APP Code
If you have not set up a Cash Receipt Adjustment entry view, see the following link:
http://help.schooloffice.com/financehelp/#!Documents/dataviewdefinition.htm
6. Select Master File and Code Entry Options
7. Select Master File Horizontal Data Changes
8. Entry Options: Select Cash Receipt Adjustments
9. Other Field: Use this to search out Deposits to be updated
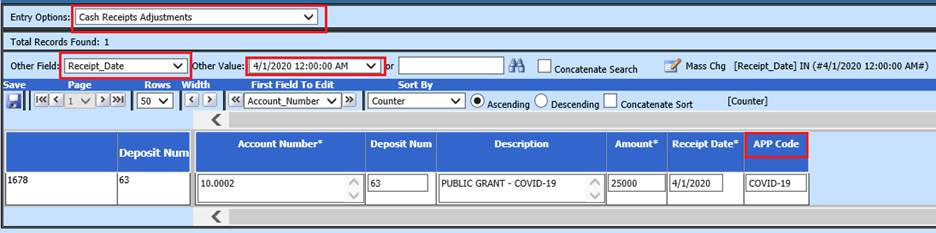
10. Select Save
Updating Prior Payroll Entries with APP Code
7. Select Human Resources or Payroll Processing
8. Select Employee Horizontal Data Changes
9. Entry Views: Select Program Project for COVID-19

10. Select Search: Use this to search out specific payroll dates to be updated
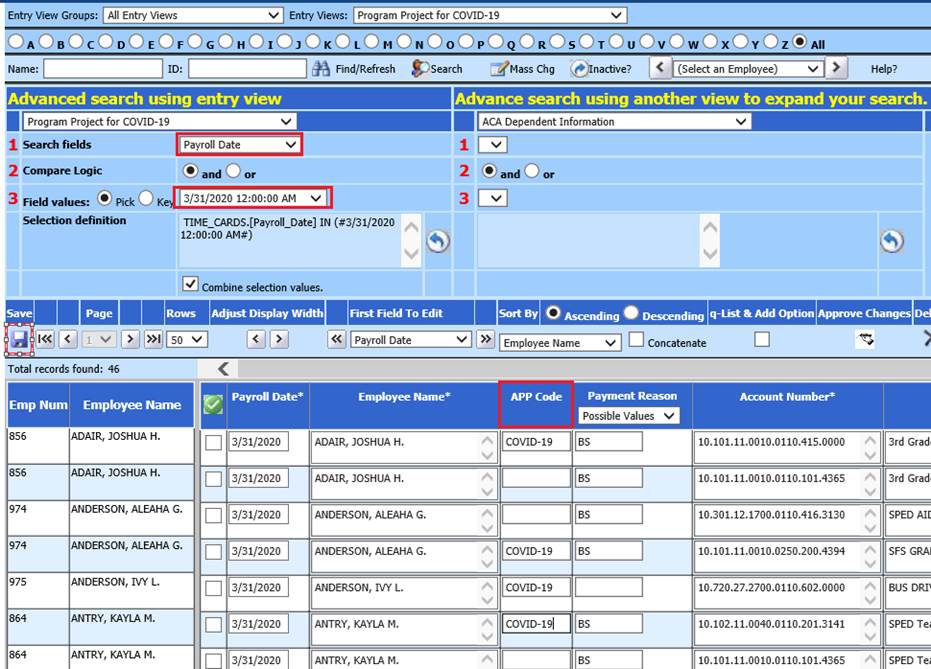
a. 1 Search fields: Select Payroll Date
b. 2 Compare Logic: Leave as “and”
c. 3 Field values: Select Payroll Date to adjust
11. Update field: APP Code
12. Select Save
Printing Expenditure Report with APP code
5. Select Reports
6. Select Financial Reports
7. 1 Select Expenditure report
8. Select Design Options

9. Report Type: Select Summary Report
10. Report format: Select desired format
11. 2 Activity Date Setting: Select date needed
12. 3 Report Columns
a. Adjust # of columns on the report to columns needed
b. Select Columns needed on report. Example: Date Range Value column is first column, but can be in any column.

13. Check “Activate column heading change”
14. Update Column heading

15. 3D Date Range Value Column Definition(s)

a. Date Value #: Select “U”
b. Step: Select “00”
c. User Date Range Value Options: Select “Disbursements for Fiscal Year thru “Activity To:””
d. Push Column Data Selection icon
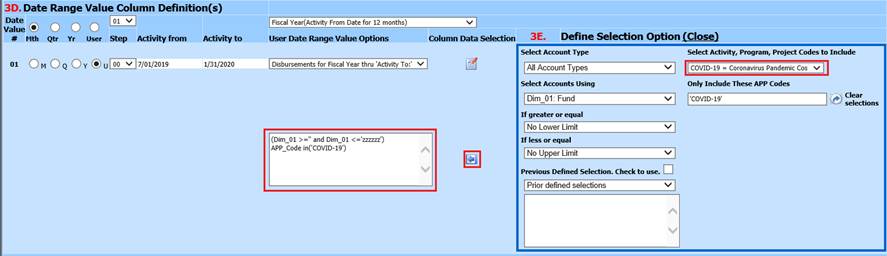
e. Select Activity, Program, Project Codes to include. Select the code you setup. Example is COVID-19
f. Push “Left Button” this will evaluate and place the formula in the Date Range Formula area for the date range you are defining.
16. Preview Report
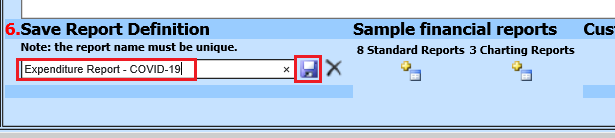
17. Save Report
Note: The value for the Activity, Program, Project column consists of Accounts payable and Gross Pay for Account Payable items with expense dates and payroll Time Cards with payroll dates with the report range