Revised: 4/2021
CPI is a third party administrator for 403(b) and
457plans. Web Financial Office will create the files required by CPI.
To create the file:
1. Select Payroll Processing
2. Select State/Federal Reporting and 3rd Party Data Export
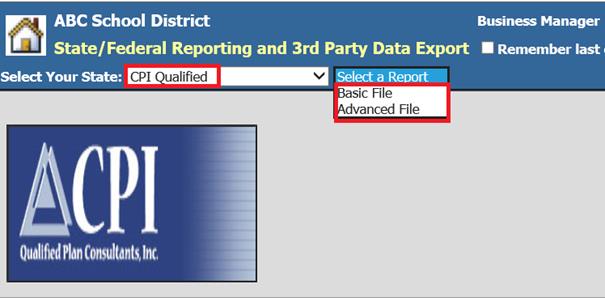
3. Select Your State: Select CPI Qualified
CPI has two files that may be submitted. A detailed list of the files, the fields included in each file and where the information for these fields resides in the SDS database is provided below.
1. The Basic File for remitting contributions for 403(b), 457, etc. It contains employee demographic info, 403(b) information and vendor names. Participants may be listed multiple times if they have multiple contributions.
2. The Advanced File is for remitting contributions for 403(b), 457, etc. It contains employee demographic info, 403(b) information and vendor names. Participants will be listed one time and contributions will be combined.
•Note: For any questions regarding timing of files to be submitted, which file type to choose or how to submit files, please contact CPI directly.
Demographic Fields and
their locations in the SDS database:
Fields 1-6 are located in the Employee Master.
1. Last name, first name, middle name or initial.
2. Social security number.
3. Employee address, city, state, zip.
4. Date of birth.
5. Date of hire: hire date.
6. Date of Termination: termination date.
o Amounts for Fields 7-14 are pulled from the Employee YTD Detail History. These fields will be reported if the Deduction/Benefit Master marked as indicated on the deductions and benefits reported to CPI.
7. Gross Compensation: G1 gross wages
8. 403(b) Contributions: Deduction/Benefit Master must have Fringe Benefit YN = N, Active = Y and Box 13 = E.
9. Roth YTD: Deduction/Benefit Master must have Fringe Benefit YN = N, Active = Y and Box 13 = BB.
10. Employer 403(b) Discretionary Contributions: Deduction/Benefit Master must have Fringe Benefit YN = Y, Active = Y and Box 13 = E.
11. 457 Contributions: Deduction/Benefit Master must have Fringe Benefit YN = N, Active = Y and Box 13 = G.
12. Other Employee Deferrals 401(k): Deduction/Benefit Master must have Fringe Benefit YN = N, Active = Y and Box 13 = D.
13. Other Employer Contributions 401(k): Deduction/Benefit Master must have Fringe Benefit YN = Y, Active = Y and Box 13 = D.
14. 403(b) vendor ID Number: Deduction and benefit master, vendor number. Deduction/Benefit Master must have Active = Y and Box 13 = E.
Creating the Basic File:
1. Select Payroll Processing
2. Select State/Federal Reporting and 3rd Party Data Export
3. Select Your State: Select CPI
4. Select the Basic file

5. Complete the top part of the screen with the correct district information.
6. From the Benefit and Deduction Selectors, select your appropriate choices.
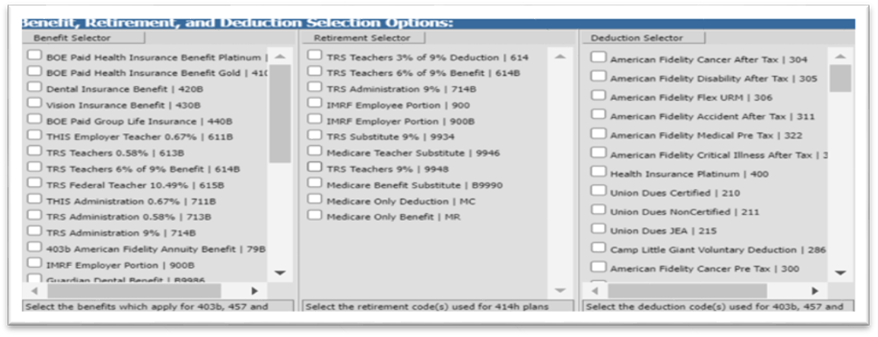
7. Select Save Setup. This will retain your information for future reports.
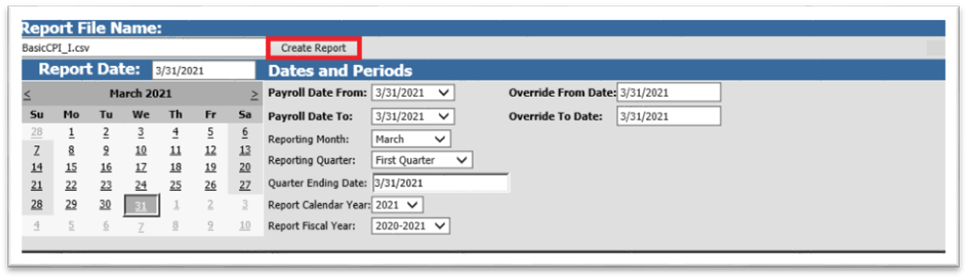
8. Enter the payroll date being reported in the Report Date field
9. In the Calendar Starting and Calendar Ending Dates, enter the SDS payroll calendar starting and ending dates.
o Note: If you
are reporting only one payroll, these dates will be the same date.
If you
are reporting a range of payroll dates, enter the first payroll date in the
starting payroll date field and the last payroll date in the ending payroll date
field.
10. Select Create Report. The file Basic CPI.csv file will be created.
11. Right click on the yellow file folder and select Save Target As. Change the file name to BasicCPI.csv and select Save to a location of your choice.

12. The file is ready to be uploaded to CPI
Advanced File Fields and
their locations in the SDS database:
Fields 1-6 are located in the Employee
Master.
1. Last name, first name, middle name or initial.
2. Social security number.
3. Employee address, city, state, zip.
4. Date of birth.
5. Date of hire: hire date.
6. Date of Termination: termination date.
7. Amounts for Fields 7-14 are pulled from the Employee YTD detail history. These fields will be reported if the Deduction/Benefit Master marked as indicated on the deductions and benefits reported to CPI.
8. 403(b) Contributions: Deduction/Benefit Master must have Fringe Benefit YN = N, Active = Y and Box 13 = E.
9. Roth YTD: Deduction/Benefit Master must have Fringe Benefit YN = N, Active = Y and Box 13 = BB.
10. Employer 403(b) Discretionary Contributions: Deduction/Benefit Master must have Fringe Benefit YN = Y, Active = Y and Box 13 = E.
11. 457 Contributions: Deduction/Benefit Master must have Fringe Benefit YN = N, Active = Y and Box 13 = G.
12. Other Employee Deferrals 401(k): Deduction/Benefit Master must have Fringe Benefit YN = N, Active = Y and Box 13 = D.
13. Other Employer Contributions 401(k): Deduction/Benefit Master must have Fringe Benefit YN = Y, Active = Y and Box 13 = D.
14. 403(b) Vendor ID Number: Deduction and benefit master, vendor number. Deduction/Benefit Master must have Active = Y and Box 13 = E.
Creating the Advanced File:
1. Select Payroll Processing
2. Select State and Federal Reporting and 3rd Party Data Export
3. Select Your State dropdown: Select CPI
4. Select Advanced file

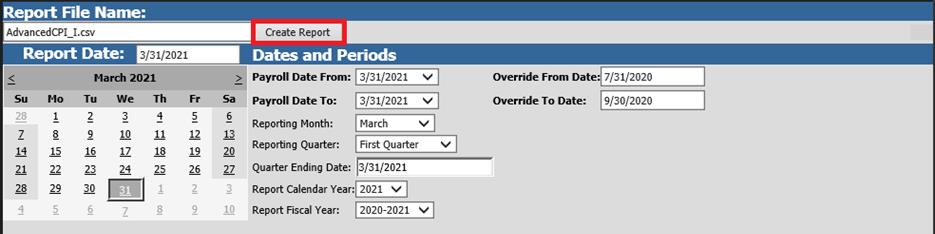
5. Fill in the top part of the screen with the correct district information.
6. From the Benefit and Deduction Selectors, select your appropriate choices.
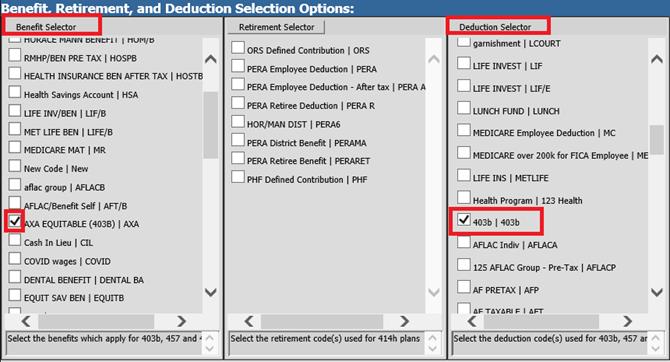
7. Select Save Setup. This will retain your information for future reports.

8. Enter the payroll date being reported in the Report Date field
9. In the Calendar Starting and Calendar Ending Dates, enter the SDS payroll calendar starting and ending dates.
o Note: If you are reporting
only one payroll, these dates will be the same date.
If you are reporting a
range of payroll dates, enter the first payroll date in the starting payroll
date field and the last payroll date in the ending payroll date field.
10. Select Create Report. The file AdvancedCPI.csv will be created.
11. Right click on the yellow file folder and select Save Target As. Change the file name to AdvancedCPI.csv and select Save to a location of your choice.

12. The file is ready to be uploaded to CPI