Revised: 8/2020
This screen allows you to create date driven reports and gives you the option to pick up to 40 fields. You can pick from various groups, Gross, Tax, Deductions and Benefits. When creating a report you simply select the data fields you would like to report, change column headers, create a report name and save it. You also have the option to share the report with other users.
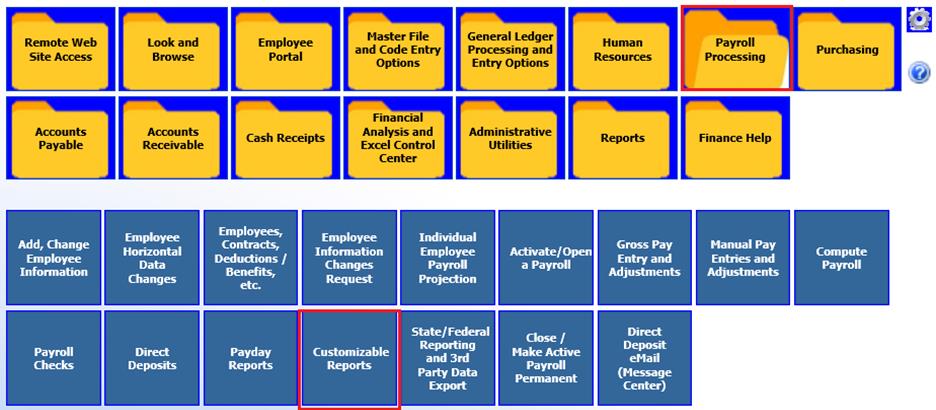
1. Select Payroll Processing
2. Select Customizable Reports
• Preview report in Crystal Report format
• Preview report in Pdf format
• Preview report using Quick view
• Preview report in Excel format
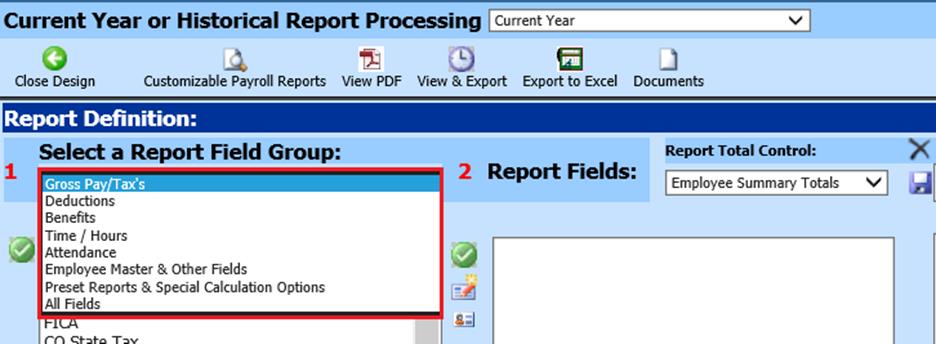
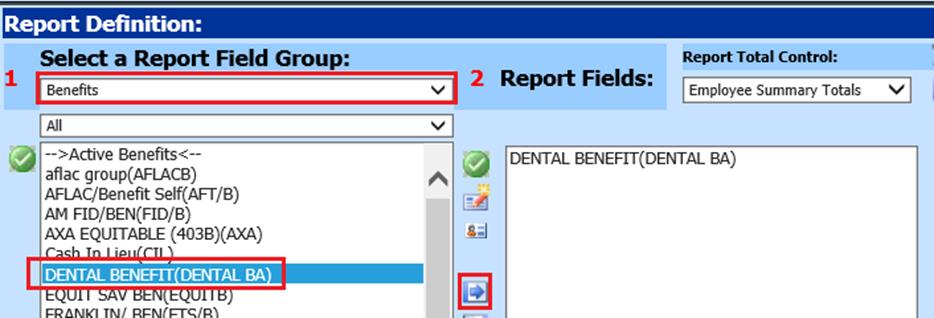
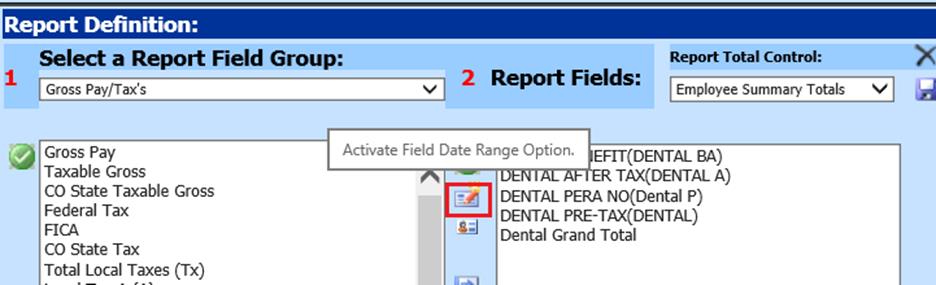
3. 1 Select a Report Field Group: Choose from the dropdown arrow; i.e. Gross Pay/Tax's. “All Fields” will allow you to select fields from several areas of data.
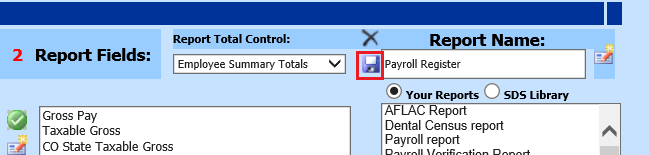
4. 2 Report Fields: Select how you would like your totals to appear. Each one is demonstrated below:
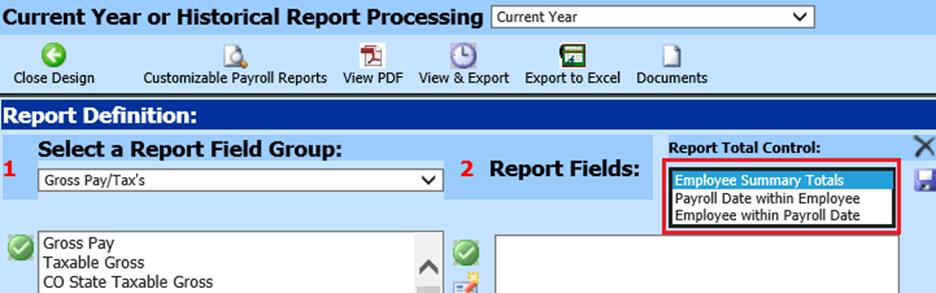
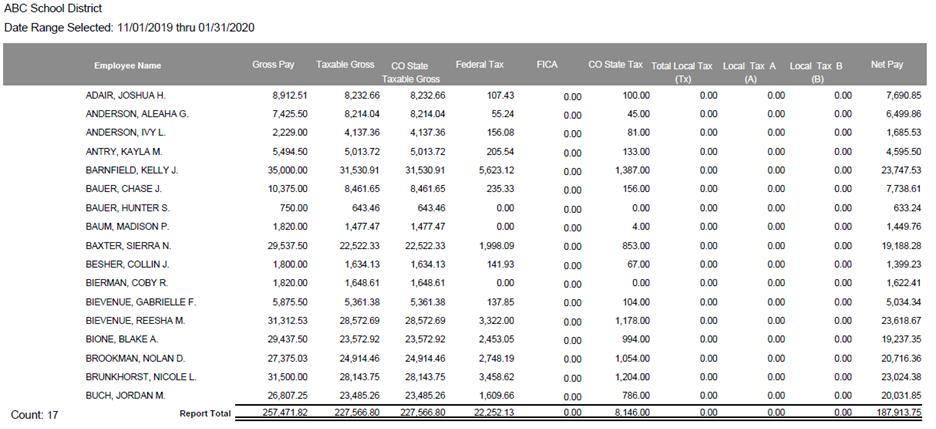
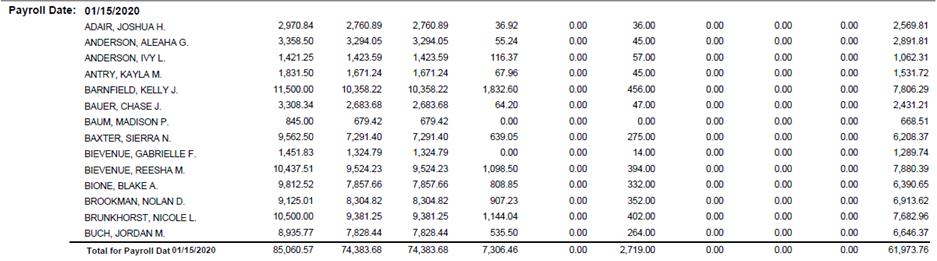
•Employee Summary Totals:
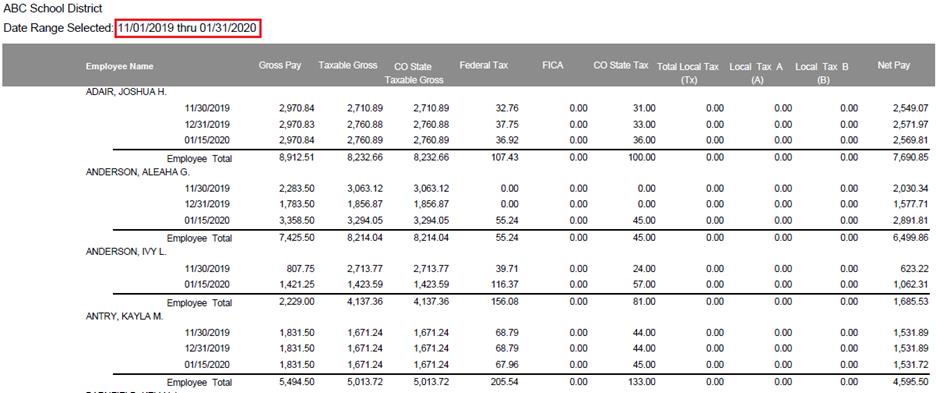
•Payroll Date within Employee:
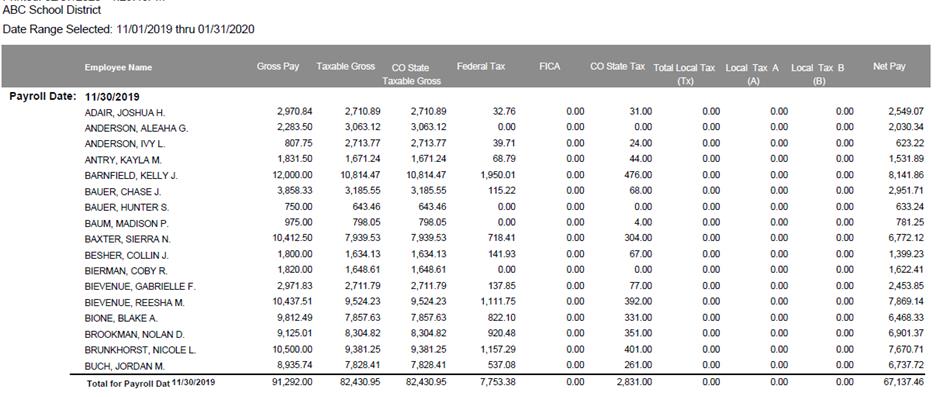
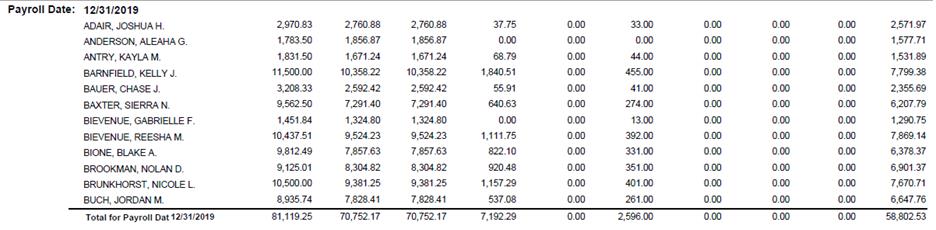
•Employee within Payroll Date:
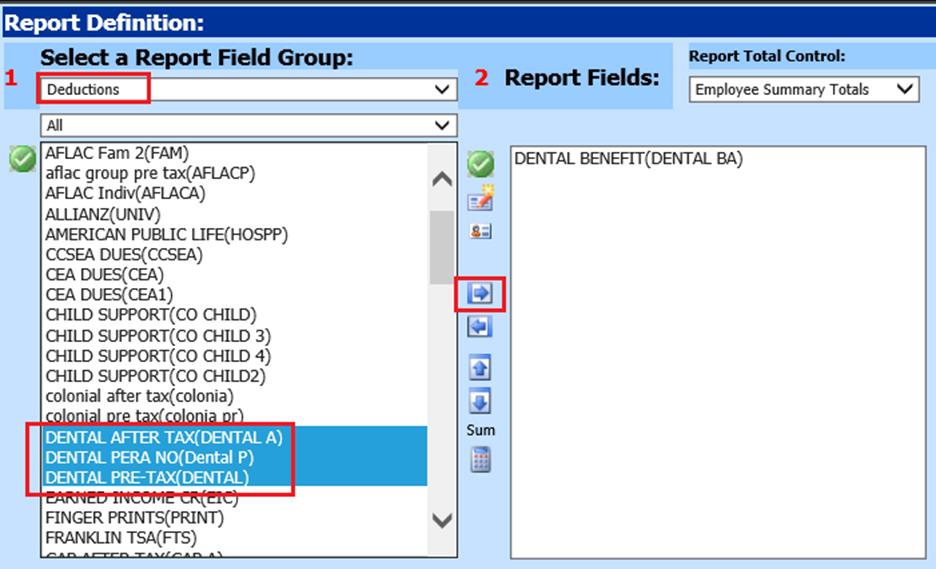
5. Select the fields you would like to report (i.e. Dental information) and click on the right arrow between column 1 & 2 to move selected data to column 2.
• Use to add a field to report
• Used to remove a field from report
• Used to move field up in the order listed
• Used to move field down in the order listed
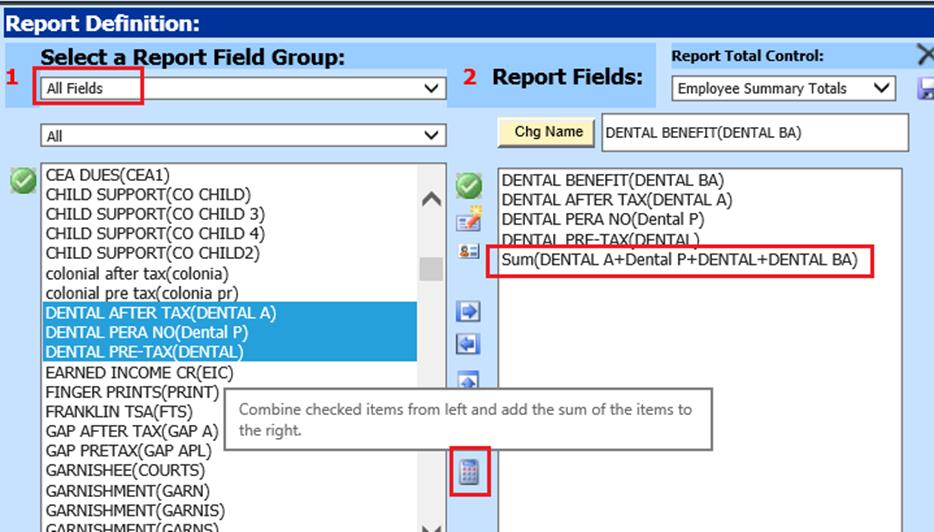
• Used to Summarize multiple fields
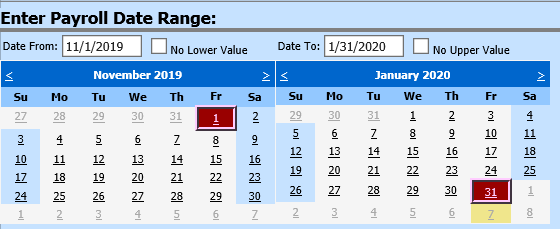
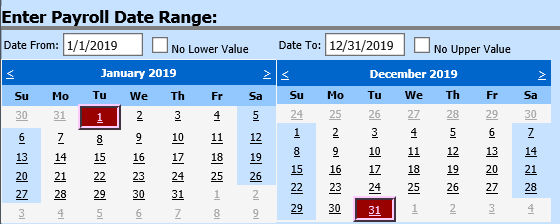
6. Determine the payroll date range you would like to report.
7. Preview the Report
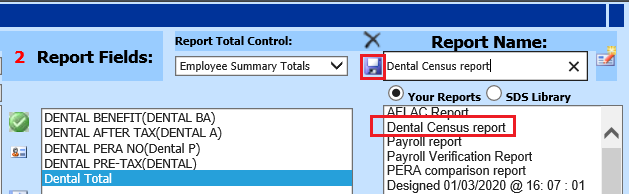
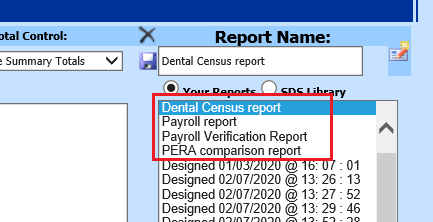
8. If you wish to save report, enter in name in Report Name field

9. Select Save icon
To create a report with multiple Fields.
The example below explains how to use two different Report Field Groups and create a summarized total of Benefits and Deductions.
1. 1 Select a Report Field Group: Choose from the dropdown arrow; i.e. “Benefits” or “All Fields”
2. Select Benefit Codes
3. 1 Select Report Field Group: “Deductions” or “All Fields”
4. Select Deduction Codes
5. Change Report Field Group to “All Fields” This option will list all fields available to choose from the codes defined above.
6. Highlight all fields (use the Ctrl key to select all fields needed)
7. Select the Sum icon
8. You have the option to rename the sum above the center column. Select the Sum formula.
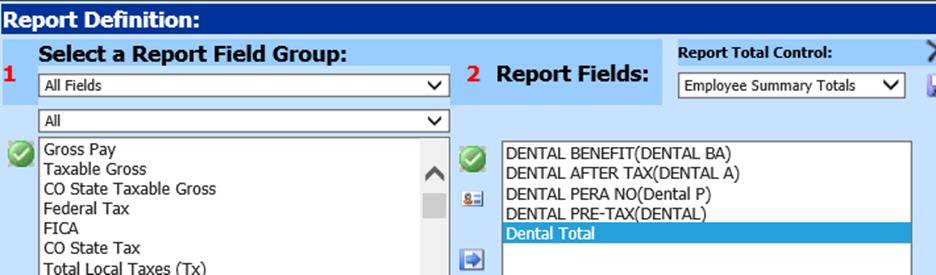
9. In the field above, change name Example: “Dental Total”
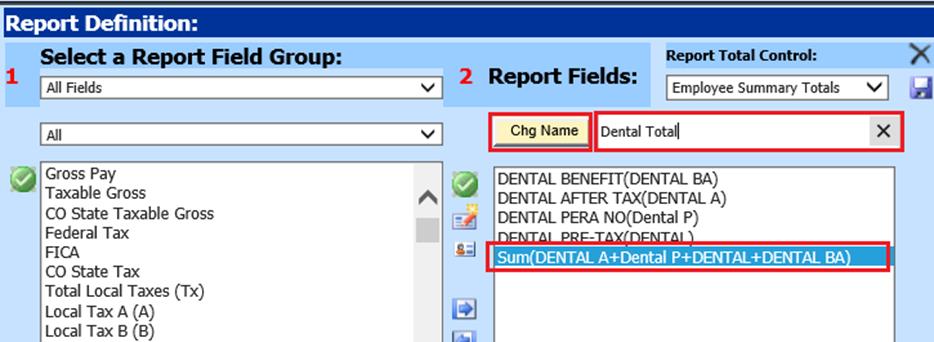
10. Select Chg Name and it will change the header of this particular column.
11. Determine the payroll date range you would like to report.
12. Preview the report.
13. If you wish to save report, under Report Name: Enter in new name for report.

14. Select Save Diskette. The Report Name will be listed below.
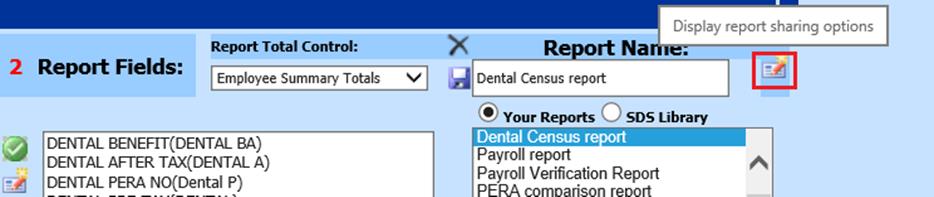
15. To share the report, select the envelope icon in the upper right hand corner.
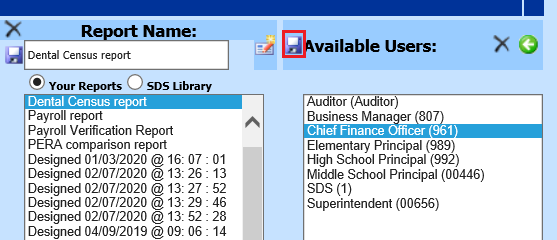
16. Available Users: Choose the user(s) you would like to share this report
17. Select the save icon
 .
.
Activate “Field Date Range” Option
1. Reporting Period: Determine the reporting period format
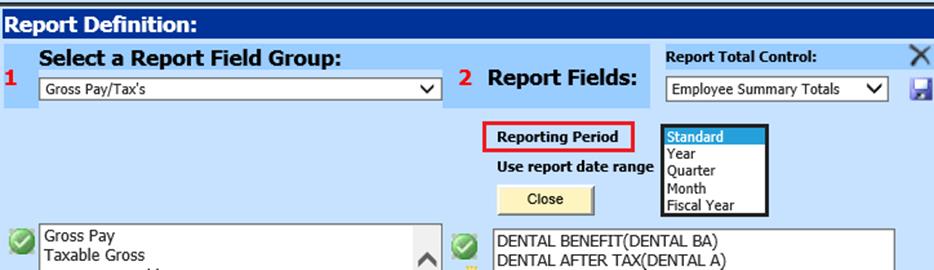
2. Use report date range: Determine the Date Range for reporting
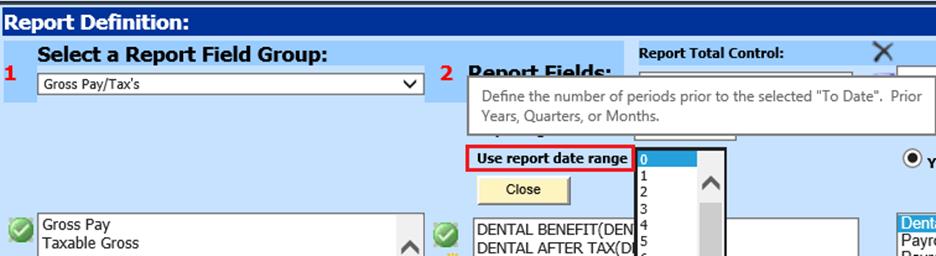
3. Select payroll date range you would like to report.
Activate “Who To Report” Option
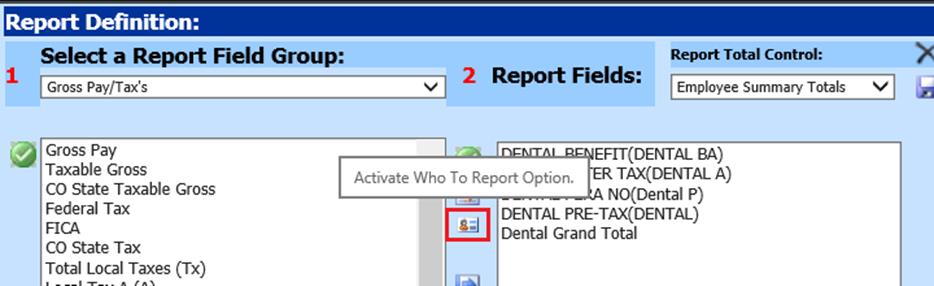
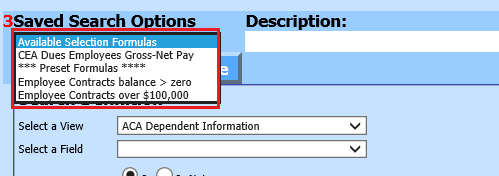
1. 3 Advanced Selection Formula: this includes preset formulas to use for reporting or you can select a view and field to create a new formula.
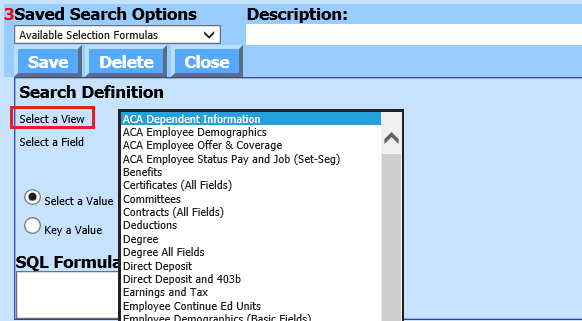
2. Search Definition: Determine what view to search from
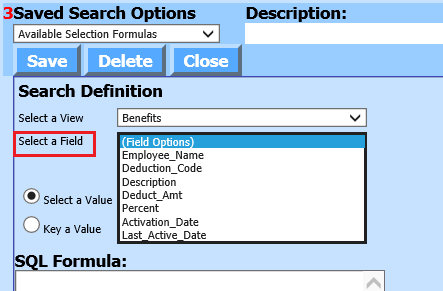
3. Select a Field: Choose from Field Options
4. Change Description field name
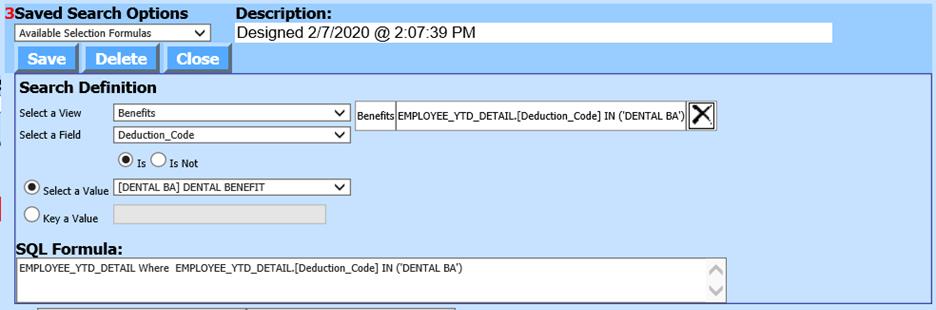
5. Select Save

6. Select Close
7. Preview Report
Note for future reports: If a report title is changed the original report will remain and another report with the new title will be created. This provides the ability to copy a report to a new name without the need to redesign the report. If the original report is no longer needed, delete the old report after the copy has been made.
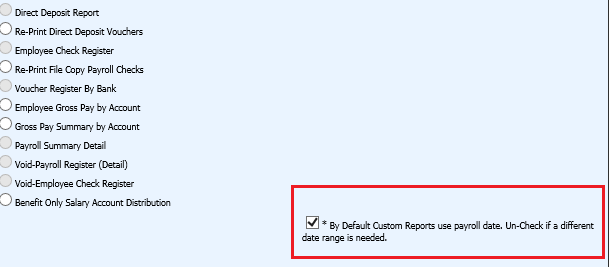
*Payday Payroll Reports
screen will allow you to access any Custom Reports you have created in the
Customizable Reports Area. When you select one of your custom reports from the
payday screen it will allow you to run your custom report for the payroll date
selected just like the standard reporting from your payday reporting area. If
you do not currently have any custom reports built, you will not see the option
to run custom reports from your Payroll Payday Reports screen.
You can also use a date range from this area by deselecting “ By Default Custom Reports use payroll date. Un-Check if a different date range is needed.”