Revised: 10/2020
This section of the Budget Master shows you the setup of the state codes in each account dimension. These codes are used to create state account numbers. Codes can be added or changed in this area, as needed. These codes are state specific and are setup for you with your initial installation by SDS. The group setup for these codes help with the way your financial reports will total.
1. Select Master Files and Code Entry Options
2. Select Budget Master
3. Select Dimension Code Add & Change
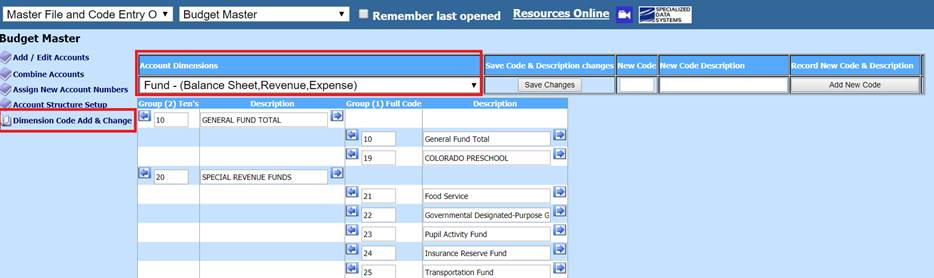
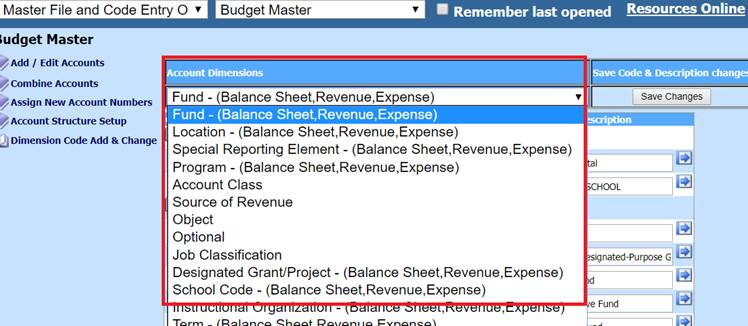
4. Account Dimensions: The first one displayed will be Fund. By selecting the drop down, the other Account Dimensions will display. The setup that is completed in this area correlates to the way your financial reports will total for you.
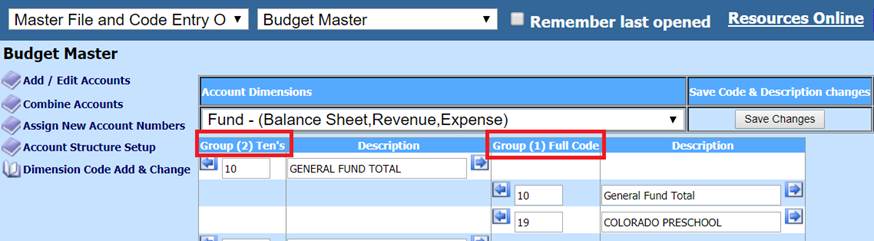
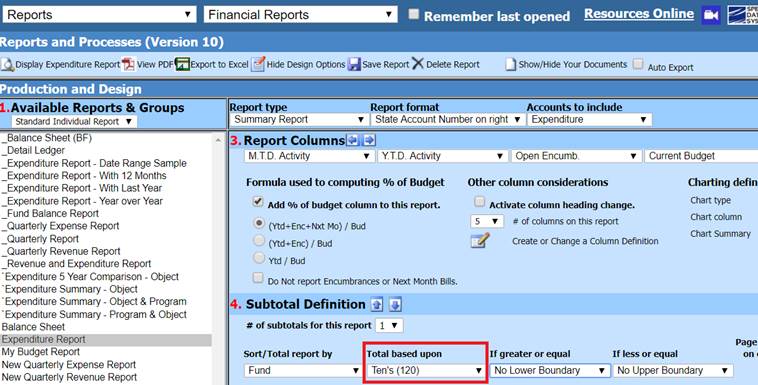
5. For the first selection of “Fund” there are “2” groups. The first one is on “1” or the One’s position of the number this is also labeled as full code. When you are running financial reports and you want to report on the Full code it will total after each fund. The second group is on the (2) or Ten’s position of the number. If this is used in the financial reports area you would get a total on Fund 10 and 19 together.
6. Looking at an example of a financial report and how the report will change based on choosing “Full Code” or “Tens”. To view the financial reports, select Reports then Financial Reports. For the example the expenditure report has been selected.
7. In the first screen shot the “Full Code” has been selected for the “Fund”. The report for this example is on Screen shot 2. In the report for this selection notice that there is a total for each “Fund”.
Screen 1: Setup of “Full Code” for the Fund

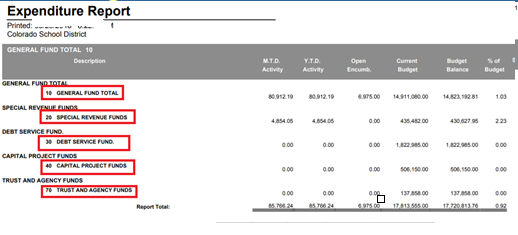
Screen 2: Report of “Full Code”. There is a total for each Fund

a. When the report is setup using the second option for the total to be based on the second “(2)” group or the ten’s position of the number Fund 10 and 19 are totaled together and become “General Fund 10” total. Fund 41 and Fund 43 have been totaled together and have become “Fund 40” Capital Project Funds. The setup for this is in “Screen Shot 3” and the report is “Screen Shot 4”.
Screen 3: Setup for the totals to be on Group (2) or Ten’s position
Screen 4: Report with Fund 10 and 19 together and Fund 41 and 43 together
8. To create a new code, select the account dimensions you need to have the new code added for. Enter the new code in the “New Code” field. Select the “Add New Code”. The new code will show below. The account dimension for this example only had one group for “Full Code.”

9. To add a new code to an account dimension that is using more than one group the process is the same to add the code but then you will need to determine which group or groups this code should be in. To add a code to more than one group select the arrow button in the direction you want to move the code to.
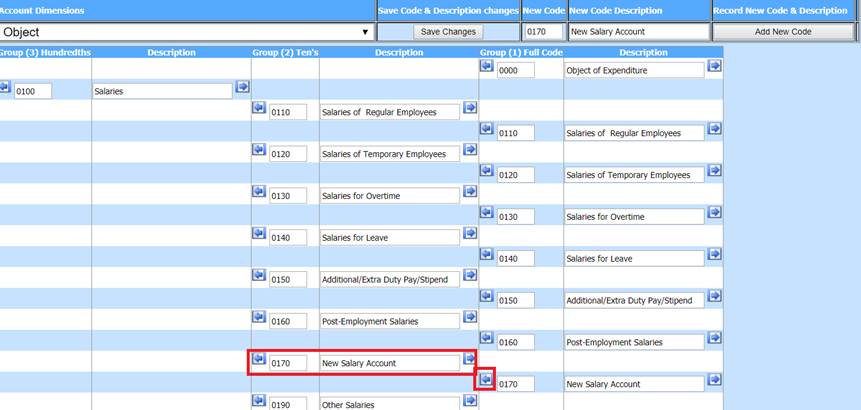
10. An example of having a code in more than one group is below. The example is using the “Object” dimension. The new code was added as “0170” and the description was “New Salary Account”. They system automatically added it into the “Group (1) Full Code”. If you want this code to be in another group, select the arrow button to move it over to the next group. See the second screen shot. This code has been moved into “Group (2) Ten’s”.
Screen Shot 1: Adding the new code to Group 1

Screen Shot 2: Moving the code to another group
11. You can delete a code if it is not already assigned to an account in the “Budget Master” area. To do this you need to move the code to the right side of the screen so that it is only showing in the “Group (1) Full Code.” Once it is only in this area and is not associated with any account in the budget master area it can be deleted by selecting the right arrow button on that code.

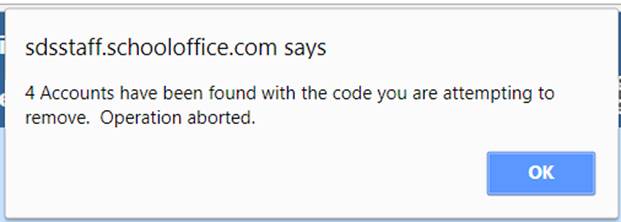
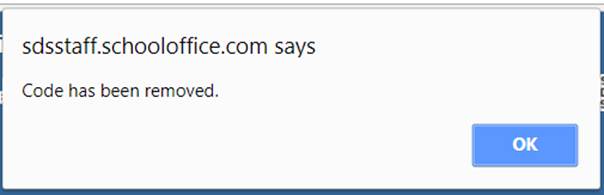
12. Once the arrow button is selected on the right the following message will appear that the code will be deleted.
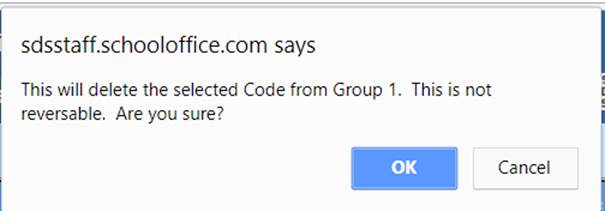
13. If this code has not been assigned to any account in the budget master the code will be removed.
Note: If this code has been assigned to an account in the budget master area you will get the following message that the account is assigned to an account or several accounts and the operation has been aborted and the code can not be deleted.