Revised: 4/2021
To begin employee setup, a code must be created in the deduction/benefit master for the 403b deduction.
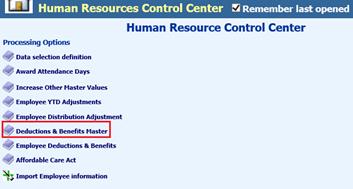
1. Select Human Resources
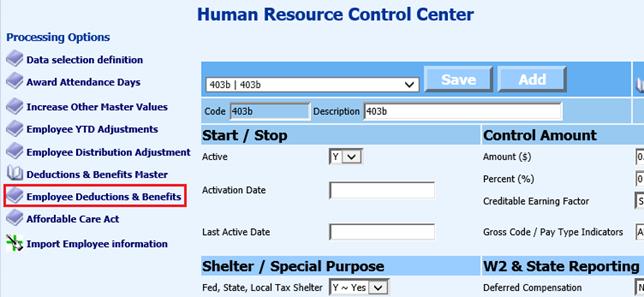
2. Select Human Resources Control Center
3. Select Deductions & Benefits Master
4. Select “Add”
5. Enter Code: You can use alpha or numeric to set up the code
6. Enter Description of 403b
7. Select Deduction or Benefit
8. Select Vendor from the drop down selection
a. If Vendor is not listed, you will need to set up the Vendor in Master File Vertical entry view. See below link for detailed steps on adding a new Vendor: http://help.schooloffice.com/FinanceHelp/#!Documents/vendorbasicfields.htm
9. Update Shelter/Special Purpose selections, as needed
10. Update W2 & State Reporting Information, as needed
11. Expense object for Benefit: Complete this selection, if setup is a Benefit
12. Liability Classification: Enter payroll liability account
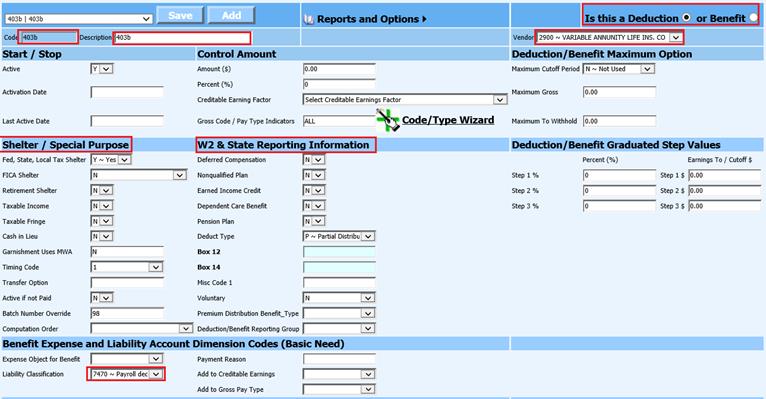
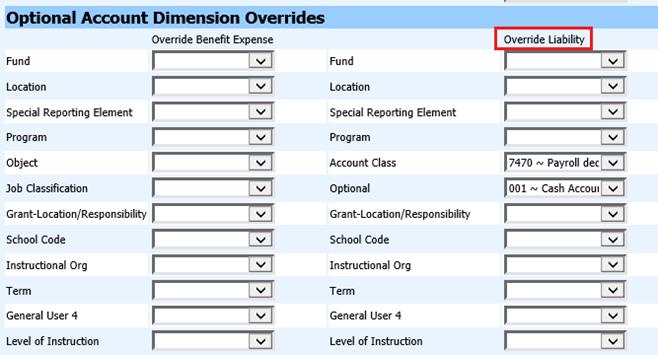
a. If the state account number for Payroll liability account has an additional entry in another dimension field, you will need to enter that in the “Liability Override” field for that dimension.
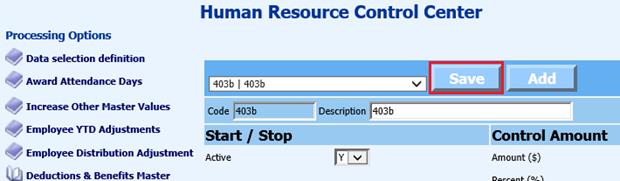
13. Select “Save”
Assign 403b Code to Employee
1. Select Employee Deductions & Benefits
2. Under Un-Assigned Employees: Select employees with 403b code
3. Select “Add New”
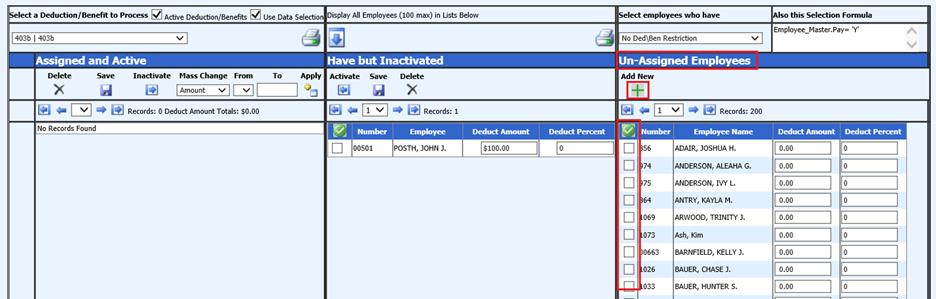
4. Confirm Messages from webpage, Select Ok
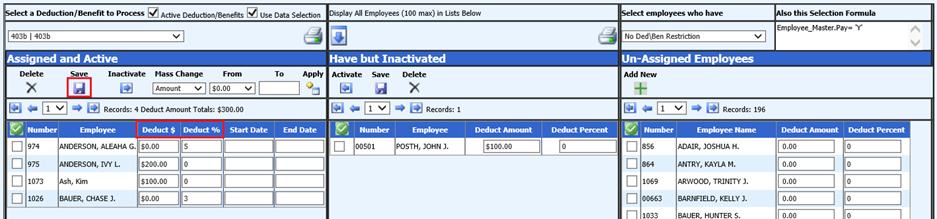
5. The employees selected will now be listed under Assigned and Active
6. Update Amount or Percent for 403b code
7. Select Save
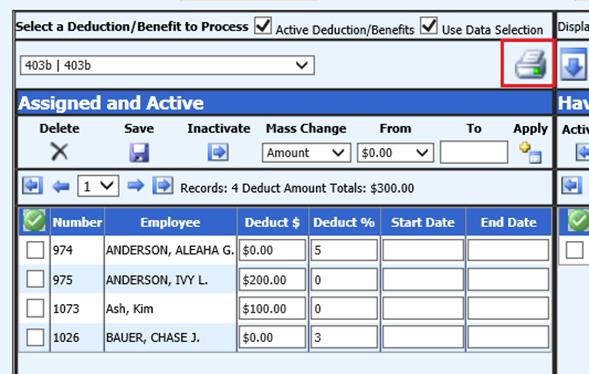
8. Print Employee Report for verification, as needed
Setup 403b direct deposit
1. Select Human Resources.
2. Select Add Change Employee Information
3. Select Employee
4. Check “Direct Deposit”
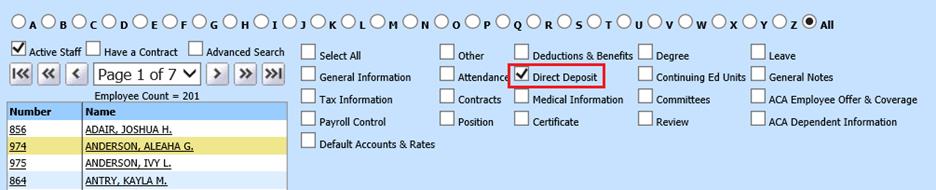
5. Select “Add”
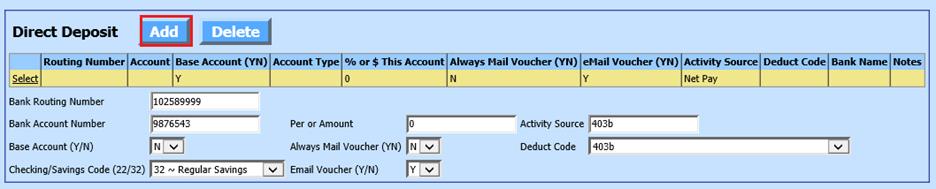
a. Bank Routing Number: enter the Bank Routing number provided by the employee’s 403b provider.
b. Bank Account Number: enter the employee’s account number used by their 403b provider.
c. Base Account YN: When you have more than one record, this determines which account is the main account.
d. Checking/Savings Code (22/32): Select “32”
e. Per or Amount: do not enter anything in this field. It will be filled by the program.
f. Always Mail Voucher (YN): Entering a Y will allow the employee to always have their voucher mailed to them regardless whether they have a login to the employee portal or are having it emailed to them.
g. Email Voucher (YN): Enter a Y or N if you wish for this voucher to be emailed to the employee
h. Activity Source: enter 403b
i. Deduct Code: from the drop down select the Deduction Code set up for 403b
6. Select Save
NOTE: The employee must have the balance of their check deposited to a regular checking or savings account.
7. This process will create an additional direct deposit record for the employee. The other direct deposit record should be setup with a .99 in the Per or Amount field.
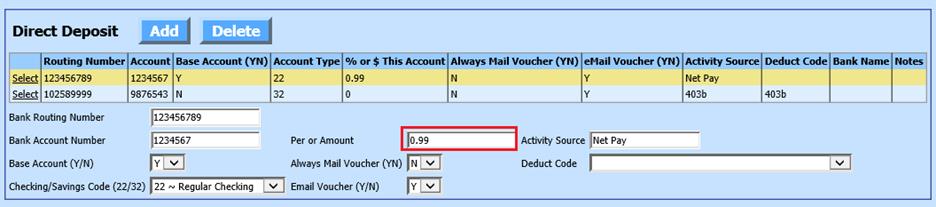
8. Select Save
NOTE with Direct Deposit
Report: The 403b direct deposit that is setup will cause the Direct
Deposit Report total to be that much higher than the amount of the actual net
pay direct deposit total on the Employee Check Register. When the PR liabilities
are transferred to AP there will be a debit and credit entry for the vendor that
will wash the payment to the 403b vendor to zero. You can manually key in a
check number and date for these entries or the invoices can be deleted.