Revised: 4/2021
The Position must be set up first before it can be assigned to employees. See the following link for details on setting up a Position Master code: http://help.schooloffice.com/FinanceHelp/#!Documents/positionmaster.htm
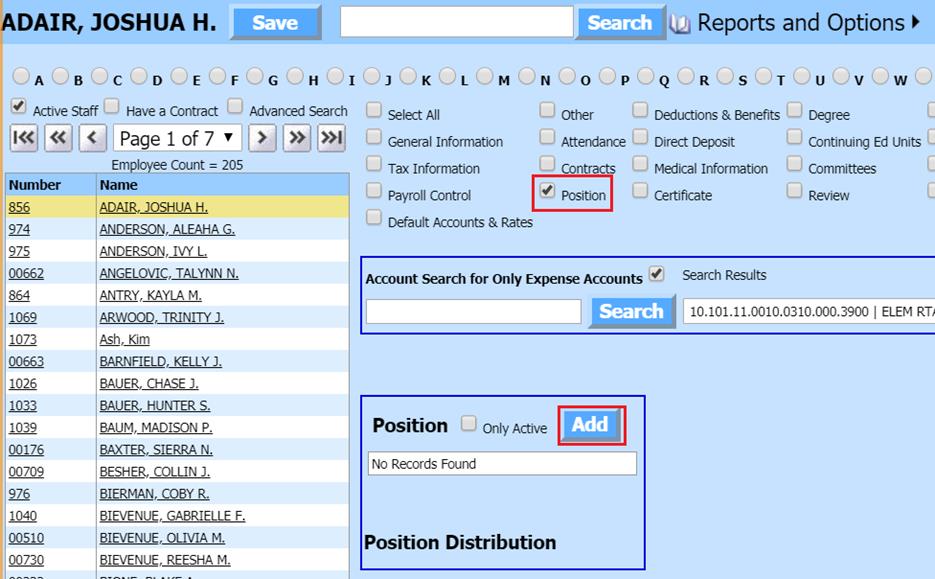
1. Select Human Resources or Payroll Processing
2. Select Add Change Employee Information
3. Place a check in Positions
4. Select the Employee from the employee list at the left side of the screen
5. Under the Positions, select “Add”
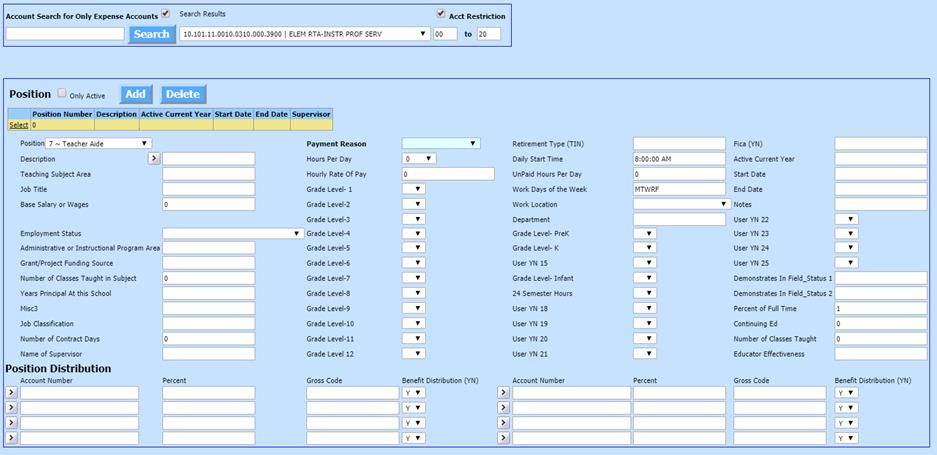
6. Depending upon the state you reside, will determine the fields listed and required to be completed. The following fields are recommended to be completed for all states when using the Position table for Time Clock and eTimesheet processing:
•Position: Select Position from drop down selection
•Description: Description of employee position worked
•Hours Per Day: Hours employee is normally scheduled for
•Hourly Rate of Pay: Employee hourly rate
•Retirement Type TIN: Position Retirement selection
o T: See your specific state Retirement codes
o I: See your specific state Retirement codes
o N: No Retirement
•Daily Start Time: Enter start time if using eTimesheet Process
•Unpaid Hours Per Day: When using Time Clock or eTimesheet, can automatically reduce time listed (lunch break .5 = half hour)
•Work Days of the Week: If using eTimesheet Process, enter days to be worked: i.e. MTWRF
•FICA YN: If the Employee Postion is subject to FICA, select “Y”
•Active Current Year: Enter Y or N
•Start Date: Start date of Position duties
•End Date: End date of Position duties
•Postion Distribution:
o Account Number: Position salary account number
o Percent: Position percentage
o Gross Code: (Not required in all states) Enter the Gross Code indicator associated with the Position
o Benefit Distribution YN: Enter Y or N
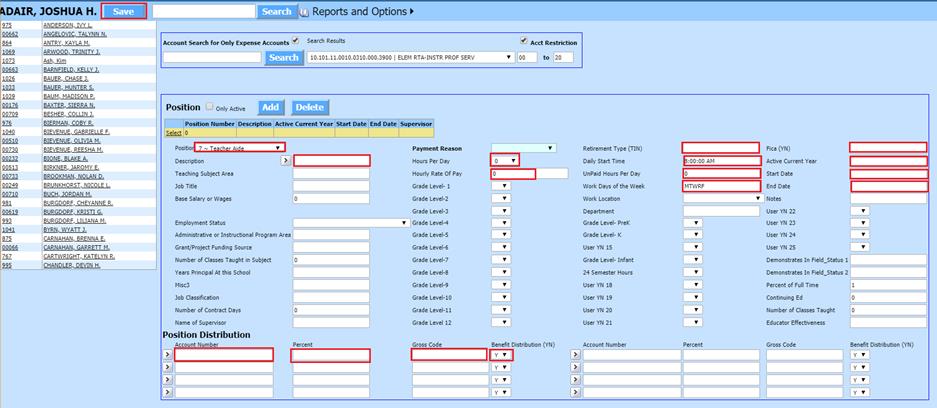
7. Select Save
8. Select Add, to add another employee position.
9. Select Save when completed