
Revised: 12/2020
Below are instructions on how to setup and process eTimesheets.
Activating SDS Web Office Settings for eTime Sheet Processing
1. Select Administrative Utilities
2. Select SDS Web Office Settings
3. Select each tab below to verify master settings
a. Product Activation:
i. Activate the Employee Portal Option
ii. Activate the Daily Electronic Time Sheets “eTime” (this option will be hidden, once activated)
iii. Add “Et” to the Special/Custom feature activation key under the Product Activation tab. If you currently have any codes listed here, add the “Et” at the end. (Enter the Et without quotation marks)
iv. Select Save Changes
b. Payroll
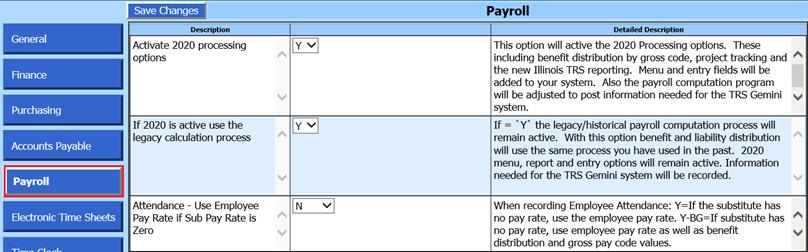

i. Activate the Multiple Employees for One Position option
ii. Select Save Changes, then log out of the system and then log back into the system.
Setup Security
1. Select Administrative Utilities
2. Select Security – Application Access
3. If you have not yet setup
Employee Portal users; under Options, select Mass Create Employee Portal
Users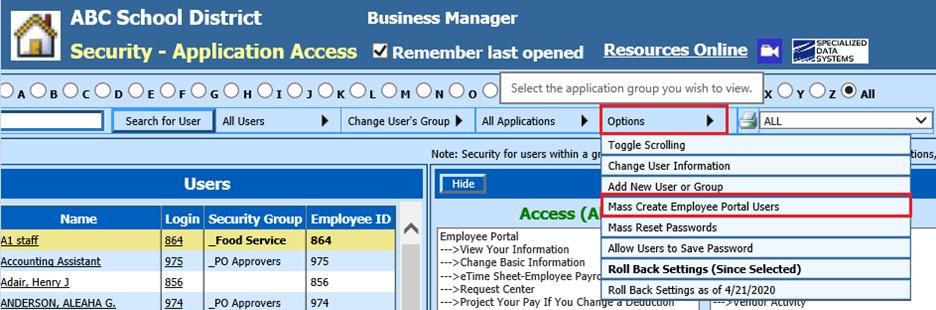
4. The below view will display
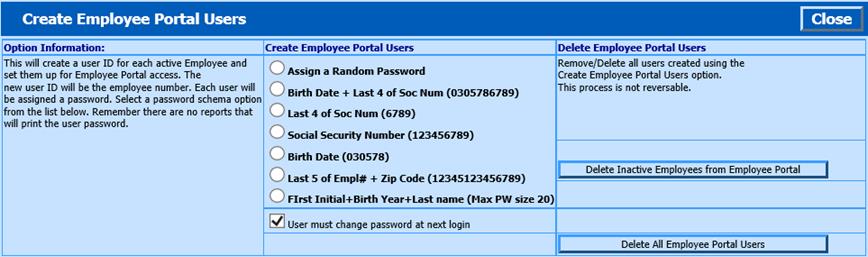
a. Create Employee Portal Users: Select password option for employees
b. Check mark “Users must change password at next login”. This option will force employees to change their initial password assigned.
c. Select Create Employee Look and Browse Users
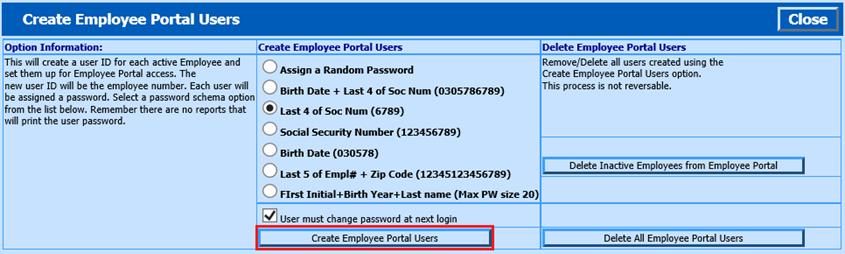
d. The system will create a security group named _Emp_LB. It will also create a security sign in for each employee. The password will be given to each employee from the option that is selected.
Seel link for additional setup of Employee Portal: http://help.schooloffice.com/FinanceHelp/#!Documents/settingupsecurityfortheemployeeportal.htm
Setting up Positions
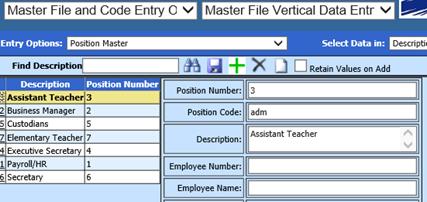
1. Select Master File and Code Entry Options
2. Select Master File Vertical Data Entry and Changes
3. Entry Options: Select Position Master
4. Setup the various positions that are needed.
Note: If using Positions for the first time, select the  to setup a new
position
to setup a new
position
See link for additional details on Position Master: http://help.schooloffice.com/FinanceHelp/#!Documents/positionmaster1.htm
Assigning positions to employees
1. Select Human Resources or Payroll Processing
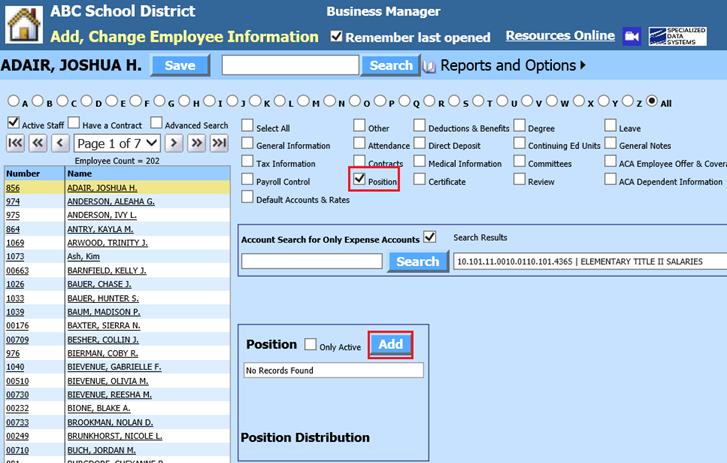
2. Select Add, Change Employee Information
3. Select the employee
4. Select Postion
5. Select Add
6. Complete fields for employee positions
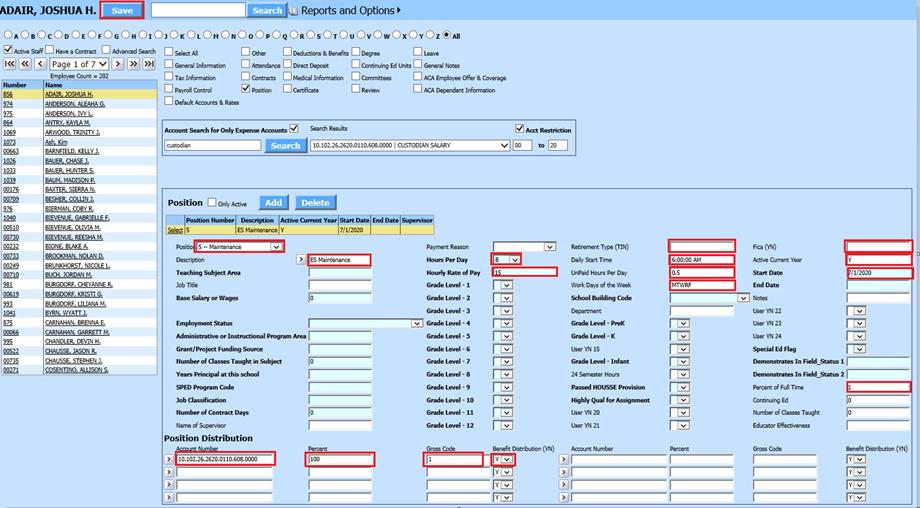
•Position: Select Position
•Description: Enter Position Description
•Hours Per day: Enter Hours per day worked
•Hourly Rate: Enter Hourly Rate
•Retirement Type TIN: Update, as needed
•Daily Start Time: Enter Start Time
•Unpaid Hours Per Day: This is used for breaks or lunch time that is not being paid for. Example if the employee is to work 8 hours during the day and they are to start at 8 am their work day would be over at 4 pm if no hours were entered into this field. If 1 hour was entered into this field than this employees work day would end at 5 pm.
•Worked Days: M- Monday, T-Tuesday, W-Wednesday, R-Thursday, F-Friday
•Fica (YN): Update, as needed
•Current Year: This field needs to have a Y to allow the supervisor the ability to assign the employee an extra job that they have done
•Start Date: Enter Start date of position
•Percent of Full Time: Enter percent of Full Time, i.e. 1 = 100%, .25 = 25%
•Account Number: Enter Account number to expense
•Percent: Enter Percent for each account number
•Benefit Distribution (YN): Select Y or N
•Gross
code: The gross
code needs to be assigned for each employee based on the gross code that has
been used for this employee as it relates to each account. These codes have been
assigned for each employee from either the employee demographics screen or the
employee contracts screen. (The gross code(s) will be used later on in the
process for grouping the employees.)
Assigning employees to a Supervisor
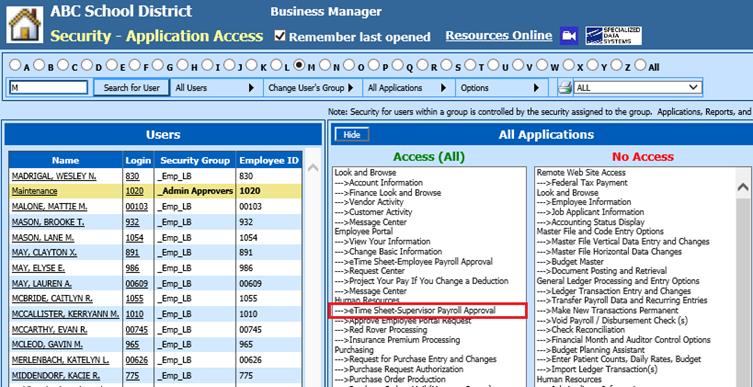
1. Select Administrative Utilities
2. Select Security – Application Access
•Verify Supervisor has access to approve employee eTime
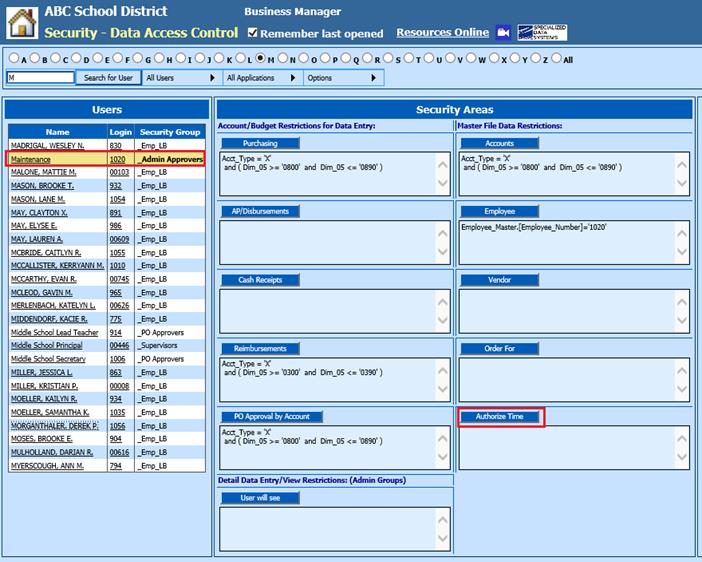
3. Select Security – Data Access Control
4. Select Supervisor
5. Select Employee
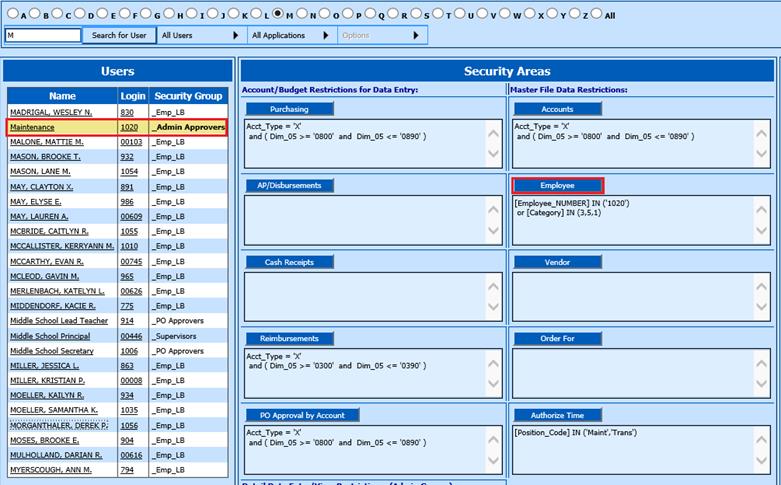
•Under Filter Options, select the Value to assign the supervisor employees(s) they are authorizing.

•Use the Add arrow to update formula
•Verify Restriction for Authorize Time listed
6. Select the Authorize Time option.
•Under Filter Options, select the Value to assign the supervisor position(s) they are authorizing.
•Use the Add arrow to update formula
•Verify Restriction for Authorize Time listed
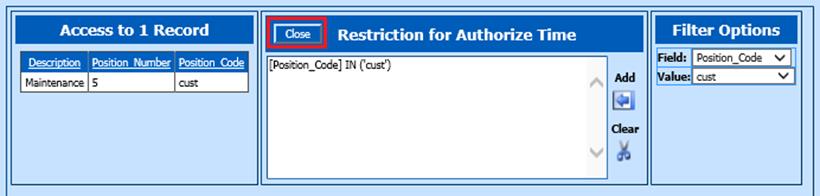
7. Select Close
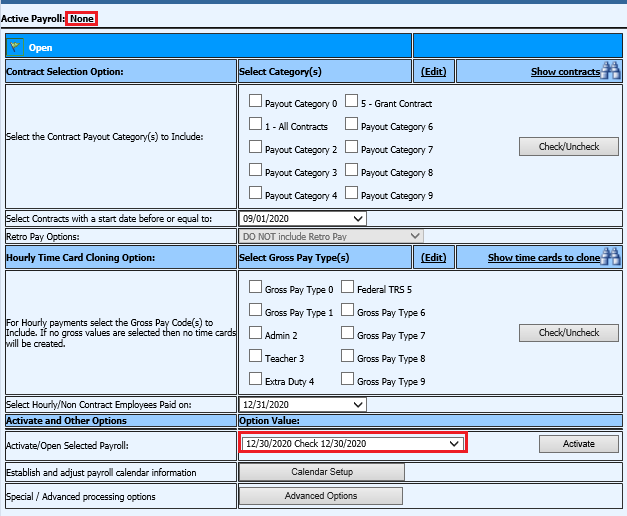
Setting up Payroll
1. Select Payroll Processing
2. Select Activate/Open a Payroll
3. Select Calendar Setup
4. Setup the payroll date for the next payroll
5. Select the payroll date, first work day, and the last work day and then record the new payroll
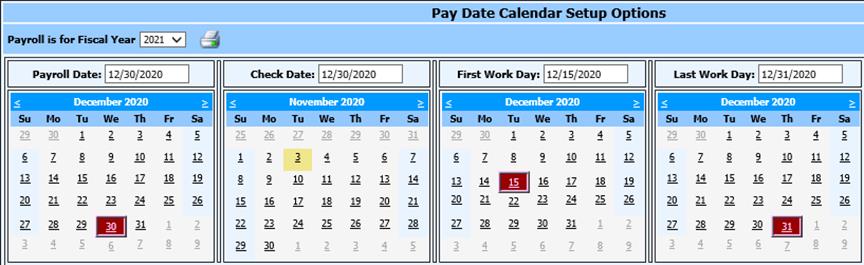
6. The payroll does not have to be activated at this point. However, the payroll date and work days have to be in the calendar area for the process to work.
Setup Payroll Approval – This process will go through assigning time to allow employees, supervisors, and business office approvals.
1. Select Human Resources
2. Select etime Sheet – Setup
3. 1 Payroll Date: Select the Payroll Date.
4. 2 Pay Groups: Select the pay groups. Pay groups are determined by the number that was setup in the gross code field in the Employee etimesheet information.
5. 3 Day Type: Select the day type. The next column displayed will show the days for this pay period.
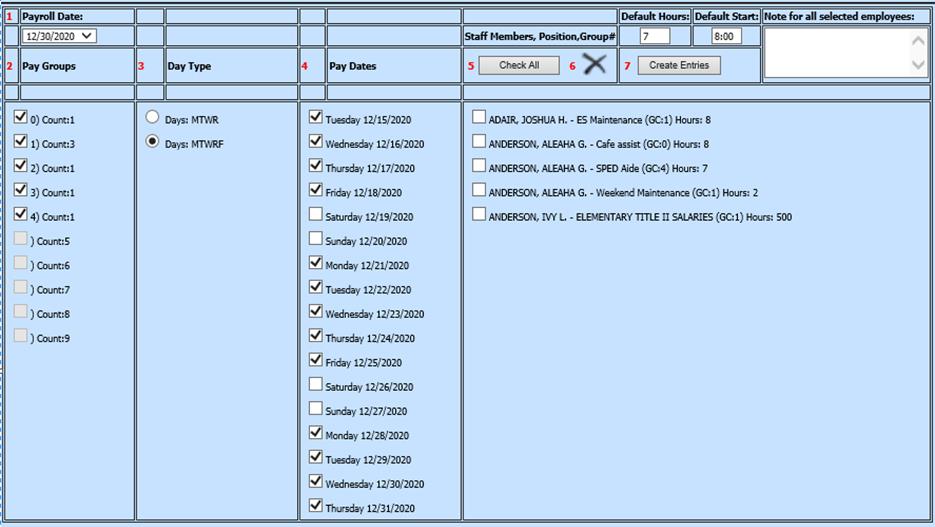
6. 4 Pay Dates: All dates within the payroll calendar setup will display, uncheck dates, if needed.
7. 5 Staff Member, Positions, Group#: Select Employees to assign time, or “Check All”.
8. If there is an employee in this area that should NOT be there, select that employee and select 6 “X” to delete.
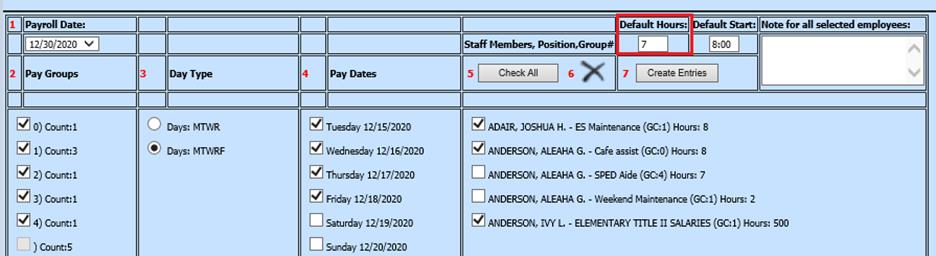
9. 7 Select the button “Create entries”. If a record has already been found, a second record will not be created.
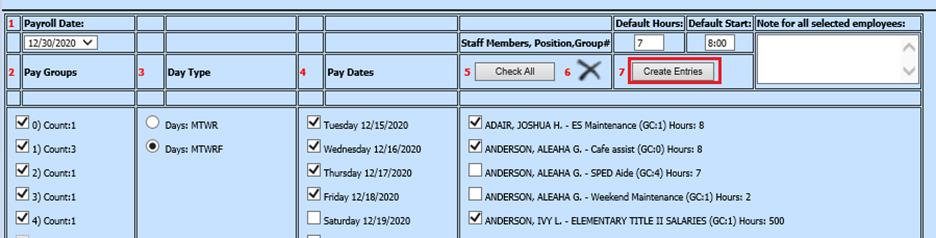
10. If the employee was not setup with a set number of hours to work, the system will use the number set in the default hours field.
What does the Employee see?
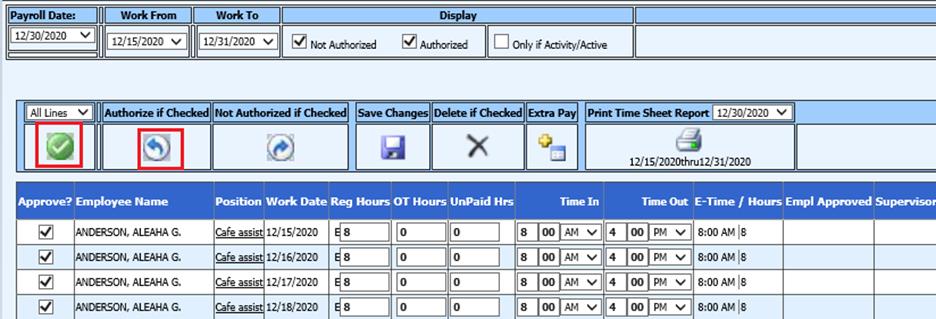
Ø The employee will see all of the days that they were assigned to work. If the hours need to be adjusted, the employee can make the appropriate changes and save the changes.
Ø To authorize the etimesheets, the employee can select the green check option, to check all line items, and then select the “Authorize if checked button”.
Ø The employee should verify their hours. They should log in weekly to approve and check their time.
Ø There is no automated notification that is sent to the employees to notify them that they have time to approve.
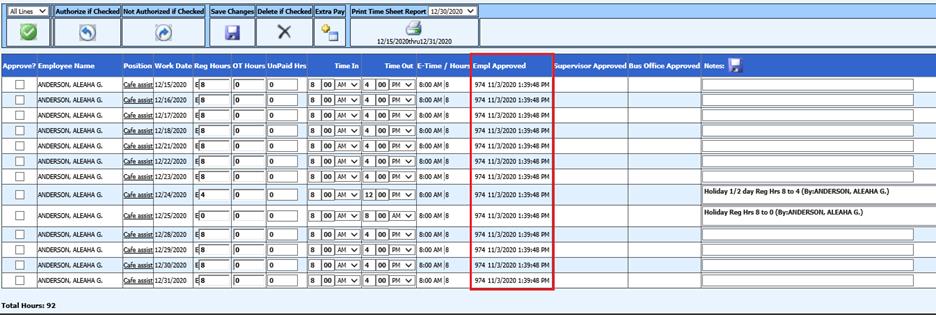
Ø Once the employee has approved their time, the time does not “disappear” from the screen. The date/time is displayed on the screen to indicate the employee has approved the time.
Ø Once the time has been authorized the employee will see the following.
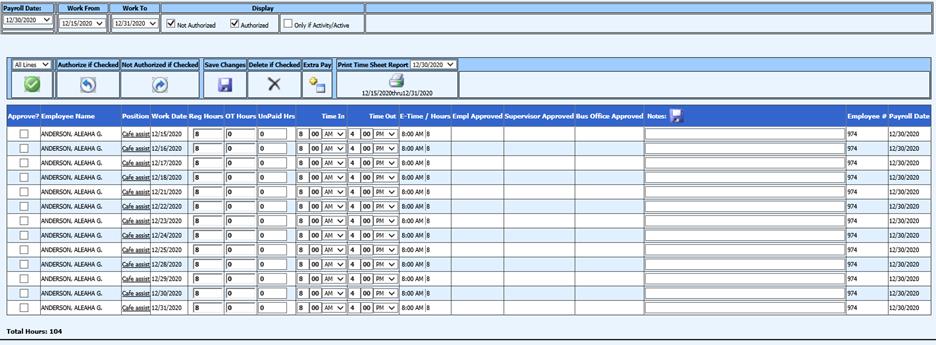
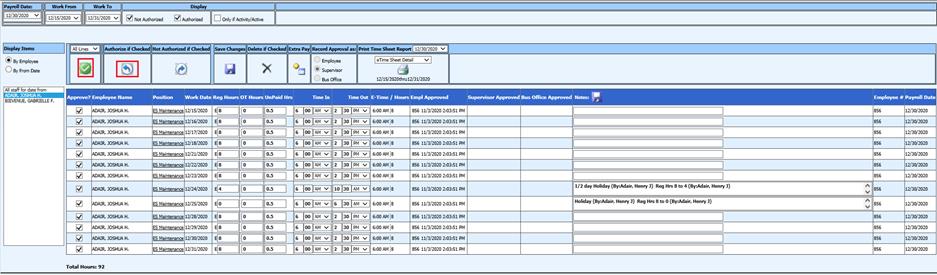
What does the Supervisor see?
Ø The supervisor will see all of the days that his/her group of employees has been assigned to work. If the hours need to be adjusted, the supervisor can make the appropriate changes and save the changes.
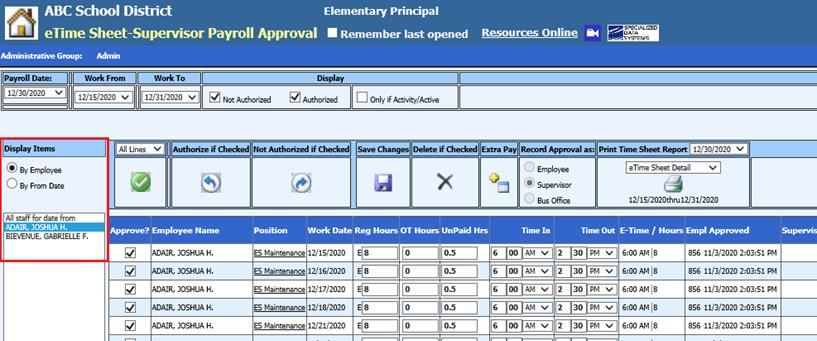
Ø To authorize the etimesheets, the supervisor can select the green check option, to check the entries, and then select “Authorize if Checked"
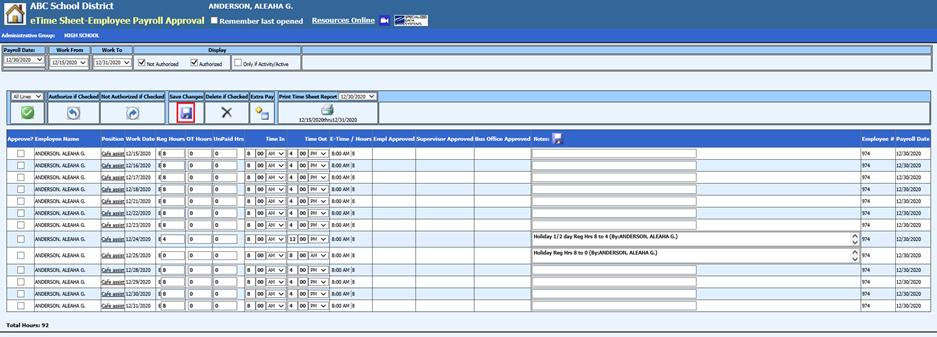
11. What does the Business Office see?
Ø They will see all of the days that each employee has been assigned to work. These entries can be viewed by employee or by date. If the hours need to be adjusted, the business office approver can make the appropriate changes and save the changes.
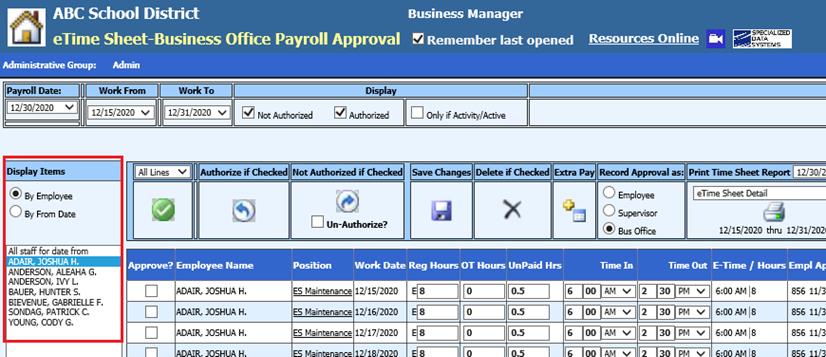
Ø To authorize the etimesheets, the business office can select the green check option, to check the entries, then select “Authorize if checked”. Time selected will be fully approved.
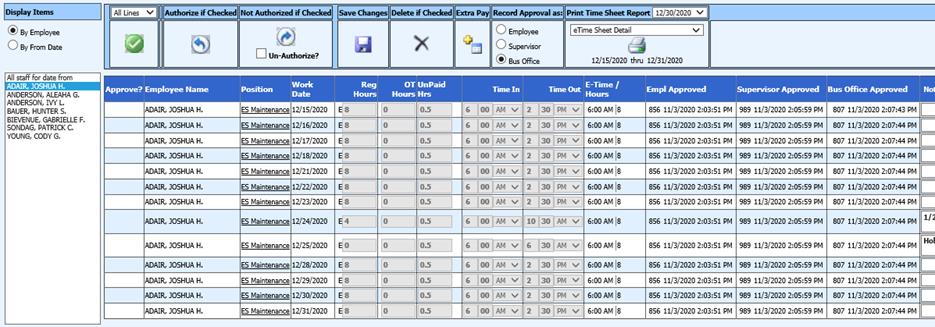
Ø If the time is not approved by the Business office, the time will not be paid.
How to transfer the e Time Sheets to Payroll
1. Select Human Resources
2. Select eTime Sheet – Send to Payroll. A list of employees that have had their payroll time approved, will be displayed
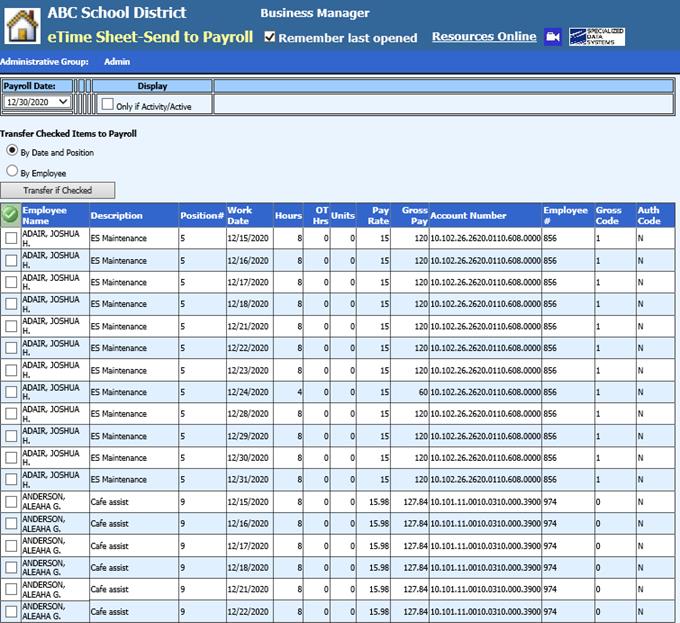
3. To move these etimesheets into the payroll, select the employee records and select “Transfer if Checked”. The records will be listed under Payroll Processing, Gross Pay Entry and Adjustments.
NOTE: If the employee has an Employee Contract setup and you are just tracking the employee time, Do Not transfer time cards, this process produces a time card entry for each date assigned. Make sure to verify all Payday reports.
4. Complete payroll, as normal