Revised: 6/2021
This process will allow for the redistribution of payroll costs per employee. You can change the percentage of the distribution if the costs were calculated using two or more accounts or if the distribution should have been for more than one account you will be able to add additional accounts to the distribution. After the changes have been made to the accounts, you will post a journal entry to the system, to correct the account distribution.
Changing the Employee Account Distribution on a Closed Payroll
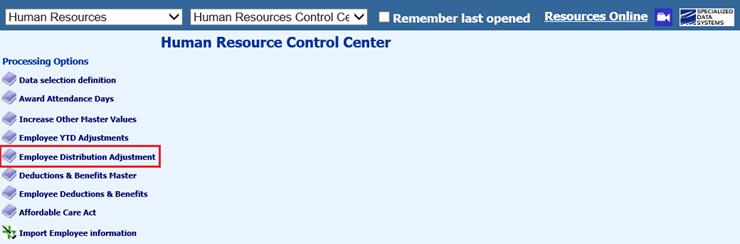
1. Select Human Resources
2. Select Human Resources Control Center
3. Select Employee Distribution Adjustment
Changing the Distribution for an Employee with more than one Account in the Original Computation
1. Select the payroll date, to be adjusted
2. Select employee
a. For this example the Employee’s original distribution for the three accounts were set at 66.49%, 19.15% and 14.36%.
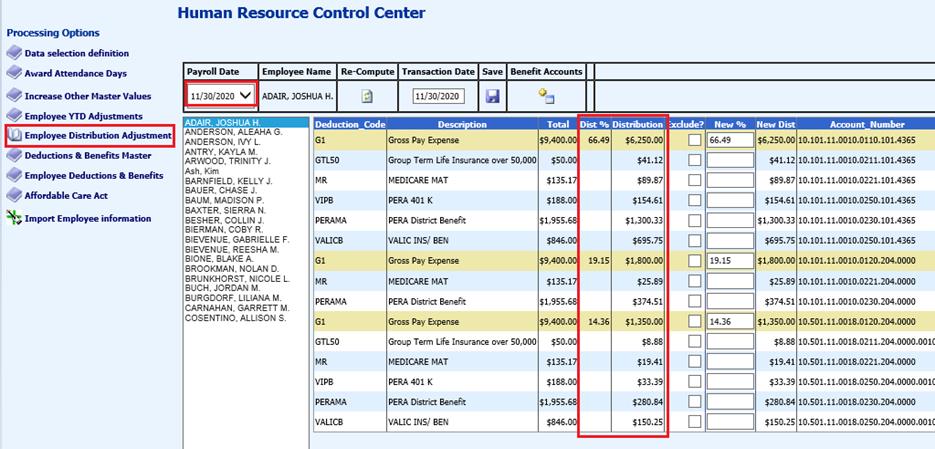
3. Change the distribution to 50%, 25% and 25%
4. Select Re-Compute

5. The “New Dist” column has changed to match the change in the percentage. The distribution has changed for both the salary accounts and the benefit accounts.
6. Once the change has been verified and is correct, select the “Save”.
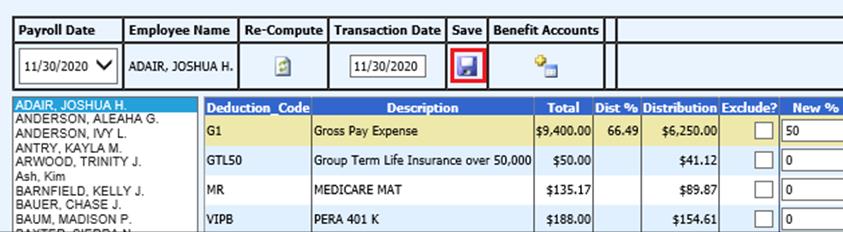
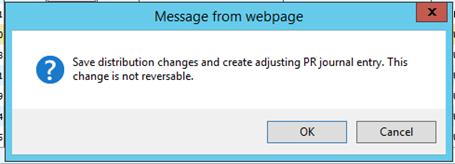
7. The system will create a new journal entry to make the adjustments for this payroll. Select Ok to web page message
8. The Payroll Distribution report will also change.
View of the original payroll distribution for this employee
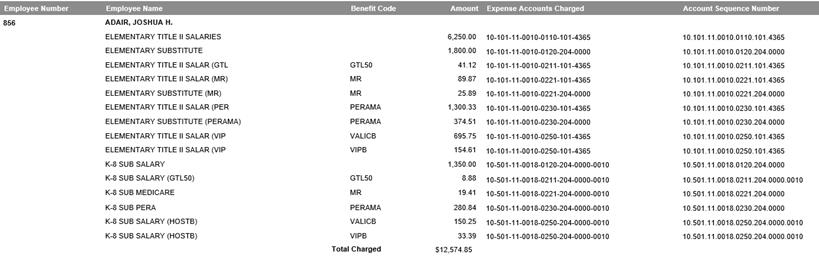
View of the payroll distribution report after the new distribution calculation has been saved

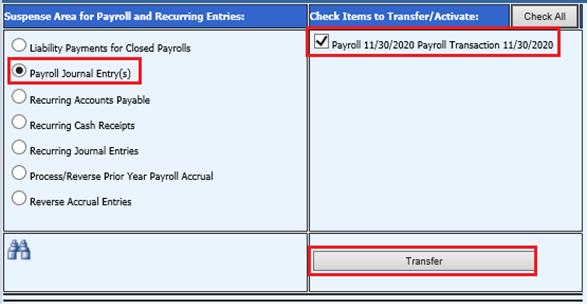
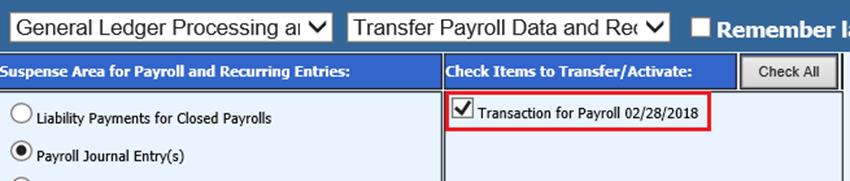
9. The new transaction will need to be transferred to the general ledger. Select General Ledger Process
10. Select Transfer Payroll Data and Recurring Entries
11. Select Payroll Journal Entry(s)
a. Select payroll date
b. Select Transfer
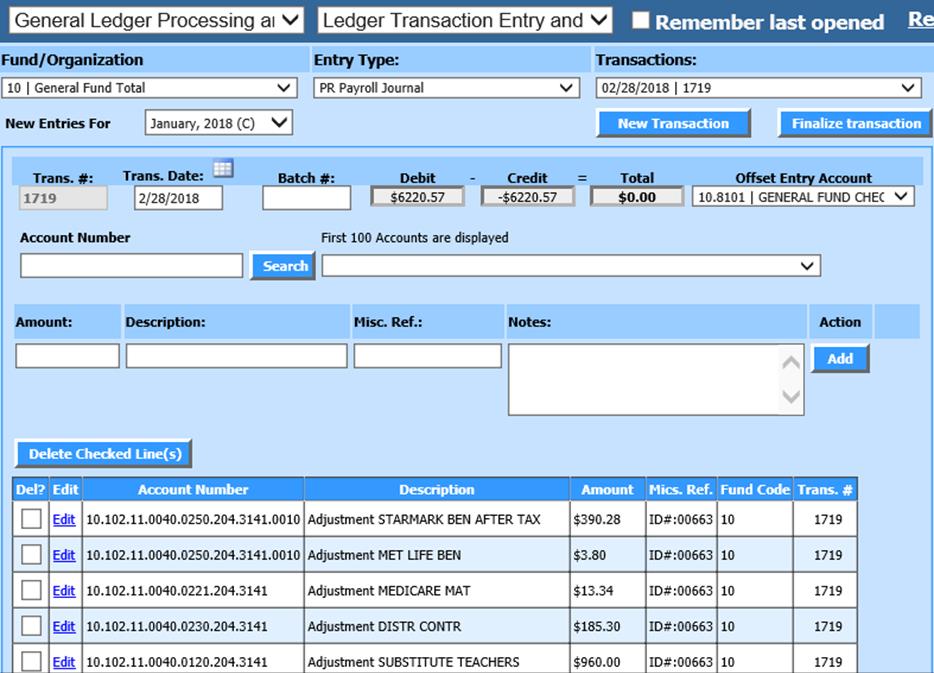
12. The new entry is listed and needs to be made permanent
13. Select Make New Transactions Permanent
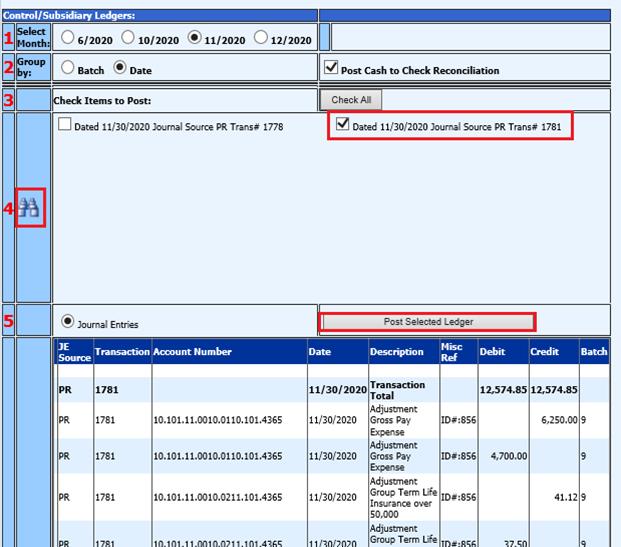
14. Post Transaction to Selected Ledger
Changing the Distribution for an Employee with just One Account in the Original Computation
1. Select the payroll date to be adjusted
2. Select employee
a. For this example the Employee only has one account in the original distribution.
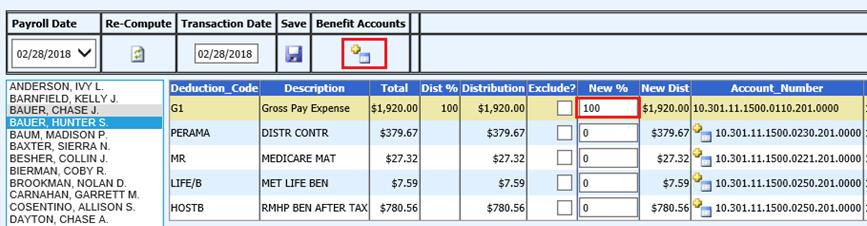
3. Select the Benefits Accounts option. The screen will open up with a drop down under the “Add a Gross Pay Account”. Select the desired account and then select the plus button to add this account to the distribution area.
4. Change the percentages on the salary accounts and then select the accounts that the benefits need to be posted to for the new salary account that was added to the distribution area.
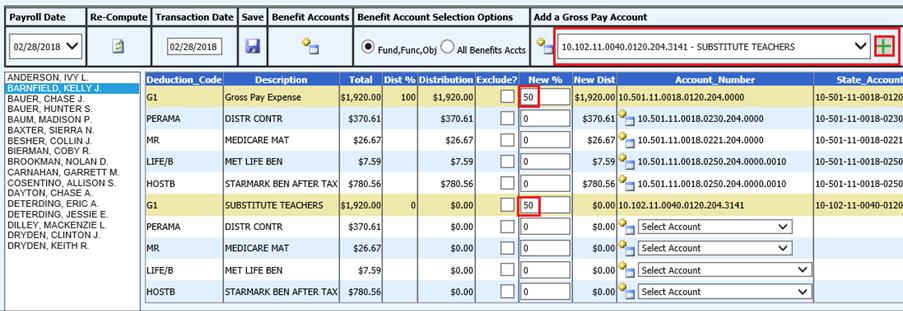
5. Then select the “Re-Compute” button and the system will calculate the new distribution for each of the accounts.

6. If this is the distribution that is desired then select the save option and the system will create a new journal entry.
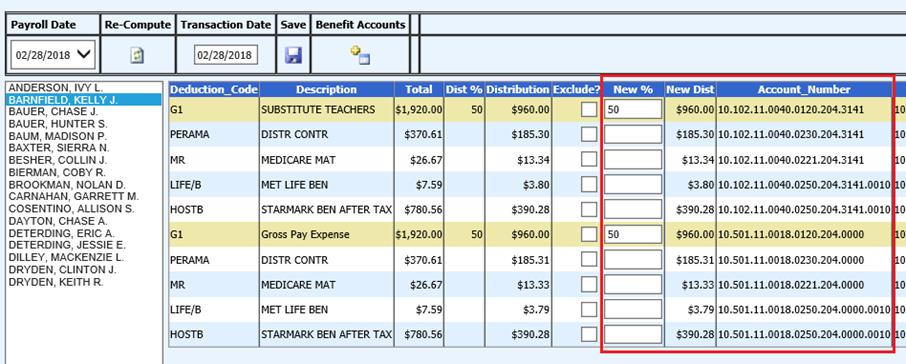
View of the original payroll distribution for this employee.
 View of the payroll distribution report after the new
distribution calculation has been saved.
View of the payroll distribution report after the new
distribution calculation has been saved.

7. The new transaction needs to be transferred to the General Ledger. Select General Ledger Processing and Entry then Transfer Payroll Data and Recurring Entries.
8. Select the bullet “Payroll Journal Entry(s)”. Select the payroll date and transfer the entry.
9. The new entry can be viewed by selecting General Ledger Processing and then the “Transactions” drop down and selecting the new transaction.
Changing just the Benefit Distribution for an Employee
1. Select the payroll date that needs to be adjusted
2. Select the employee
a. For this example only the benefit distribution will be changed for the employee.

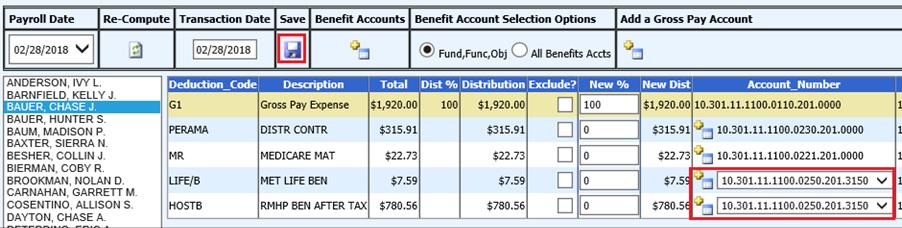
3. Select the option “Benefit Accounts”. This will open the screen selection to see the benefits for just the “Fund, Function, and Object” of the salary account or you can select “All Benefit Accts” and you will then have the option to change the benefit to distribute to a different function or object than the original salary was distributed to.

4. Select the “Select Account” drop down to change the benefit account number to the desired account number for the specific benefit.
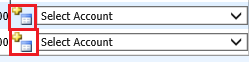
5. If the “Select Account” drop down option is not next to the benefit you would like to change, select the button with the plus symbol next to the account. This button will active the option for you to change this account.

6. Then select the “Re-Compute” button and the system will calculate the new distribution for each of the accounts.

7. If this is the distribution that is desired, then select the Save option and the system will create a new journal entry.
View of the original payroll distribution for this employee.

View of the payroll distribution report after the new distribution calculation has been saved.

8. The new transaction needs to be transferred to the general ledger. Select General Ledger Process then Transfer Payroll Data and Recurring Entries. Select the bullet “Payroll Journal Entry(s)”.
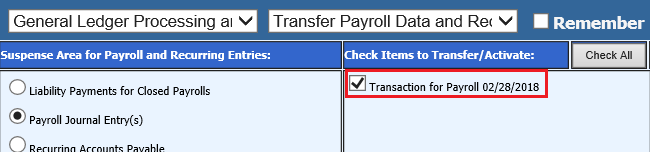
9. Select the payroll date and transfer the entry.
10. The new entry can be viewed by selecting General Ledger Processing and then the “Transactions” drop down and selecting the new transaction.
Exclude? – How to exclude accounts from the distribution
The Exclude option is designed for use with the current open payroll, after the payroll has been computed or a closed payroll that you only want the exclusion to be for that specific payroll date that has been selected.
1. Select the Payroll date and the Employee that you want to adjust the distribution for.
2. Check the codes (account numbers) you want to exclude from this payroll’s calculation by selecting those items in the “Exclude?” field.
3. The system will adjust the distribution of the amounts that you want to exclude to the other accounts in the distribution
4. Select the “Save” button.
5. If this was for an open payroll the system will change the distribution for the selected employee. The change can be viewed in the “Payroll Distribution by Employee” report. If you compute the payroll again after making this change the system will revert back to the original distribution.
6. Note: If you compute payroll after you have completed the exclude process, you will have to redo Steps 1 through 5 again.
7. If this was done for a closed payroll the system will change the distribution for the selected employee. The change can be viewed in the “Payroll Distribution by Employee” report. The system will also create a journal entry to post with the distribution change.
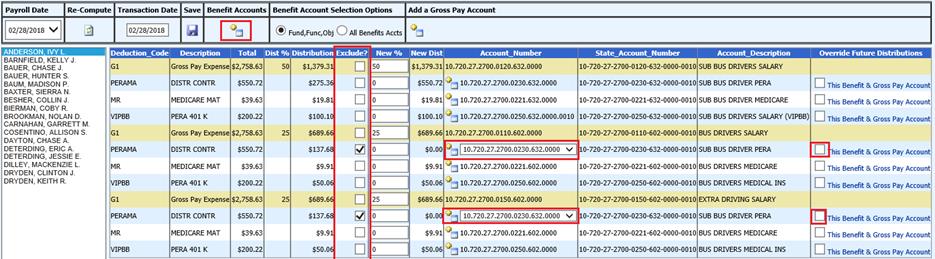
Override Future Distributions
This feature will allow you to override the benefit distribution on the current payroll and future payrolls.
1. Select the Payroll date and the Employee that you want to adjust the distribution for.
2. Select the “Benefit Accounts” option.

3. This will open the screen to show the option to “Override Future Distributions.” Make the needed changes to the distribution by “Excluding?” an account or change the account in the distribution to the correct account.
4. Once the distribution has been changed select the item or items that are to be changed from this payroll forward in the “Override Future Distributions” area.
5. Select the save button.
