
Revised: 8/2021
The Indiana Unemployment Report is used to create a file
for submittal to the Indiana Unemployment Online Tax System. After
creation of the Indiana Unemployment report, there is a report to print for data
verification and keep for your records.
Before we cover
how to run the report, you may need to
setup a unique Job Code in the Employee Master for
employees that are paid, but not to be reported to
unemployment. This is a user defined code that you can decide what you want to
use however it must be the same code on all employees that are not to be
reported. To set this up follow the below instructions:
1. Select Human Resources
2. Select Employee Horizontal Data Changes
3. Entry view: Select Employee Demographics All Fields
4. Under First Field to Edit "Job Code"
5. Enter a unique job code that you will use for all employees that get paid but you do not want reported to unemployment. Once you have these entered, select Save.
Once the
employees have been coded correctly, run the report.
To run the Indiana Unemployment Report
follow the below instructions:
1. Select Payroll Processing
2. Select State/Federal Reporting
3. Select Indiana as the state
4. Select Unemployment Report

5. Enter the Dates and Periods information
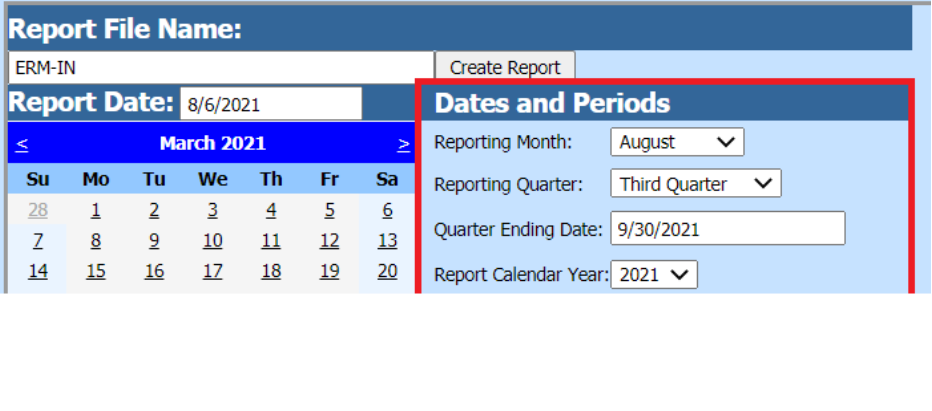
•Reporting Month: select the month of your report.
•Reporting Quarter: select the quarter of your report.
•Quarter Ending Date: enter the ending date of your quarter.
•Report Calendar Year: select the correct calendar year.
•Report Fiscal Year: select the correct fiscal year.
•Period Ending: enter the date the period ended.

•Month X # of Employees: enter the number of employees that were paid for each month of the quarter. This figure should be taken from the payroll that contains the 12th day of the month.
•Max UIC Wage: enter the maximum UIC wage amount.
•Taxable IR Reimb.: From the drop down select Taxable or Reimbursed.
i. Taxable: Complete the information relating to the unemployment tax rate and payments (the four items on the right side).
ii. Reimbursable: The information relating to tax rate and payments does not need to be completed.
•Job Code: Enter in the unique Job Code that you created in the above section of these instructions so employees that are paid but you do not want reported on this unemployment report.
6. After all the items have been completed, select the Save Setup button.

7. Select the Create Report button.

The file that is created will be listed at the top of the screen when first created. When you re-enter this area, the report will be displayed under Show/Hide Historic Reports. All files created will have a date and time stamp on them for when they were created.
To open the file to review, click on the yellow folder under the open column.

To save the file, right click on the folder and select “Save Target As”. Then save the file on your desktop or other desired location on your computer. You can upload the file for submission. The system will retain the files that have been created. These files can be viewed by selecting the Show/Hide Historic Reports button.
To delete any of the files, select the box under the Del? column and then select the Delete button.