Revised: 6/2021
The Order for Master area is used to maintain the ordering information, as it relates to processing requisitions and purchase orders in the Purchasing area. This information will appear on the purchase order report under the heading “Order from”. This gives the information of who placed the order at the school. This list can be as simple as the various school locations in your district, the departments that may order items in the school, or the individuals that can place an order in the school.
Adding a new Order for Master
1. Master File and Code Entry Options
2. Master File Vertical Data Entry and Changes
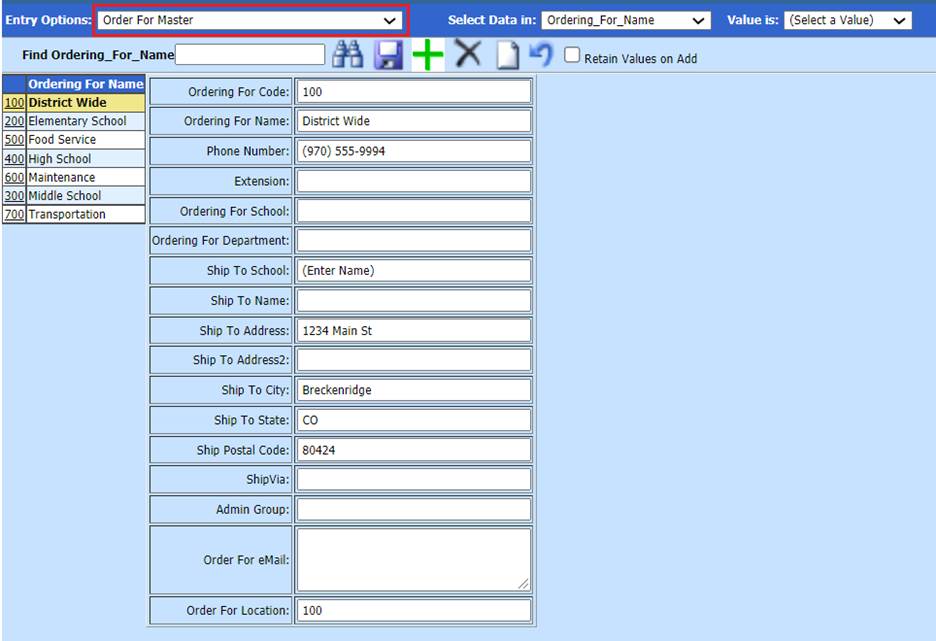
3. Entry Options: Select Order For Master
4. Select Add a Record
•Orderering For Code: Enter code
•Ordering For Name: Enter Name
•Phone Number: Enter Phone Number
•Extension: Enter Extension
•Ordering For School: Enter School Name
•Ordering For Department: Enter Department Name
•Ship to School: Enter School that is to receive shipment
•Ship to Name: Enter Name of person to receive shipment, this field can also be completed when creating Requisition, so can be left blank on this screen.
•Ship to Address: Enter Address for shipment
•Ship to Address 2: Enter second line for Address, if needed
•Ship to City: Enter City
•Ship to State: Enter State
•Ship Postal Code: Enter Zip Code
•Ship Via: Enter shipping preference
•Admin Group: Enter Admin Group from Security-Request and Approve, if needed
•Order for eMail: Enter eMail address for shipment
•Order for Location: Enter Location number- This is the number that is used in the PO number if you use one of the options that use the location. The number that it is looking at is the LAST field in the Order for master view. That field is titled “Order for Location”.
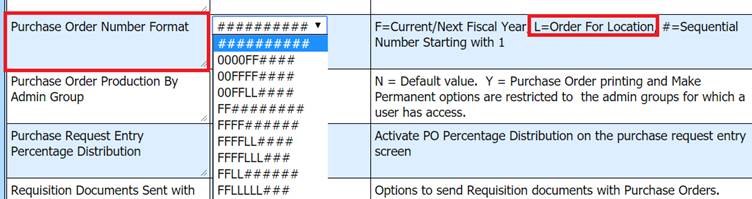
Note: The location numbers can be used as part of the purchase order number. To activate this option:
1. Select Administrative Utilities
2. Select SDS Web Office Settings
3. Select Purchasing
4. Review the options in the Purchase Order Number Format drop down. The “L” represents the location from the “Order for Location” field in the Order for Master.
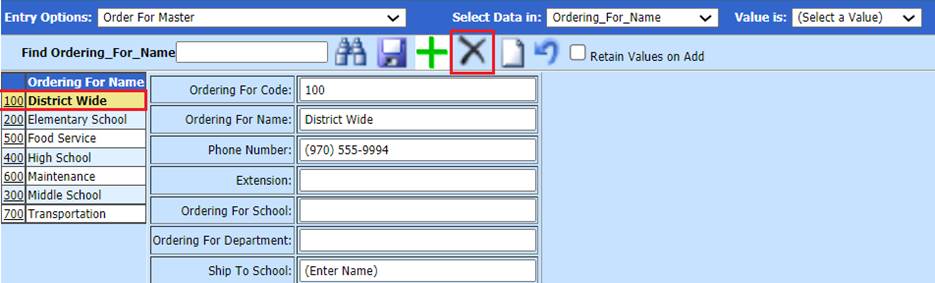
How to delete an Order for Name
1. If an Order for Name has been entered into the system and no data is associated with that order for name, the order for name can be deleted by selecting the delete.
How the Order for Name is used in the system
1. Once the setup is completed, the Ordering for names will be used when requisitions are created in the system. Please review the following documentation when creating a purchase requisition. http://help.schooloffice.com/financehelp/#!Documents/purchaseorderprocessing.htm
2. The order for drop down is found:
a. Select Purchasing
b. Select Request for Purchase Entry and Changes
c. Select a vendor for the requisition
d. Select New Request
e. 1 Order For: Select drop down
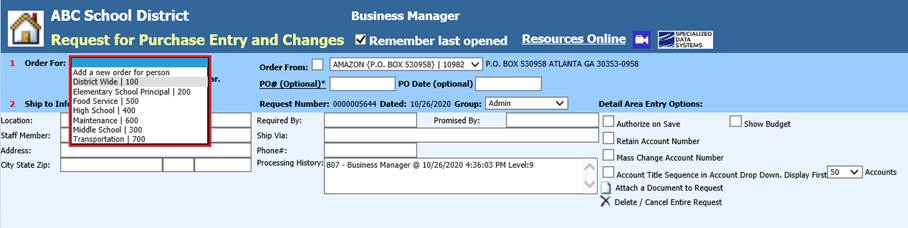
f. 2 Ship to Information: Information listed is from Order for Master setup. Users can override fields upon data entry, if needed, this will not update Order for Master settings
