
Revised: 6/2021
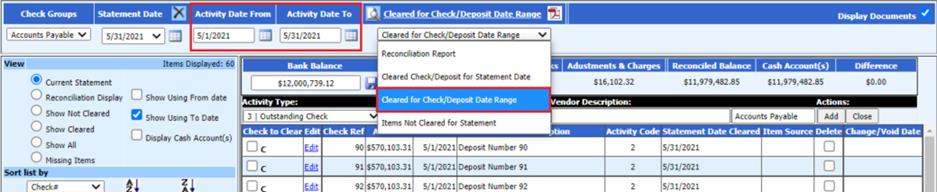
1. From the Reports selection at the top of the screen, there are two cleared check reports available to use.
a. Cleared Check/Deposit for Statement Date: This cleared check report will list items cleared for the statement date selected.
Note: The total of the cleared deposits and cleared checks on this report should match the total of these items on the bank statement. If the amounts do not agree review the report of cleared items to the actual bank statement to see what is different.
b. Cleared for Check/Deposit Date Range: This cleared check report will include check/deposits that have the activity dates within the selected range.
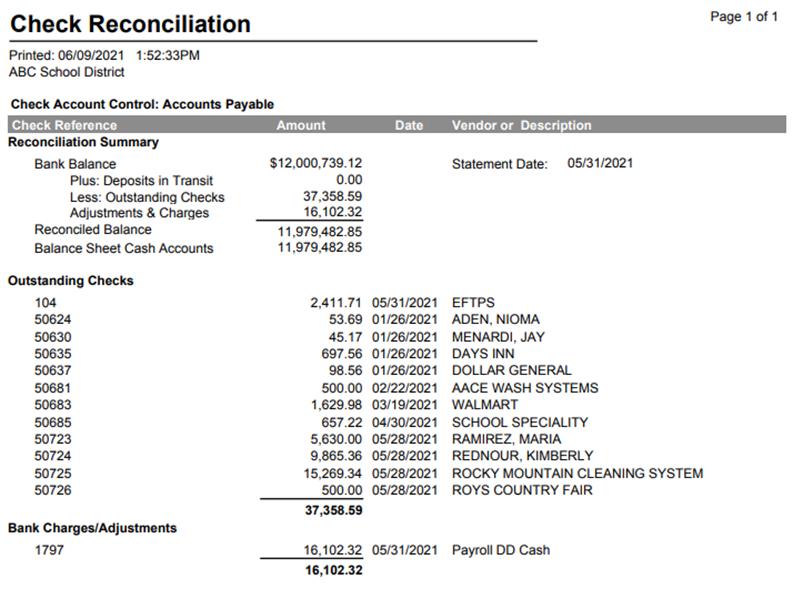
3. From the Reports selection at the top of the screen, select the Check Reconciliation Report

4. Verify the Reconciled Balance and Balance Sheet Cash Accounts totals equal each other.
5. This screen shot is the check reconciliation report without showing the balance sheet cash accounts.
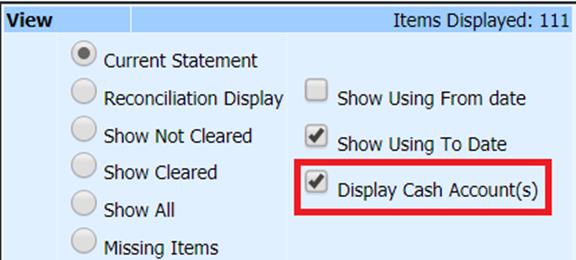
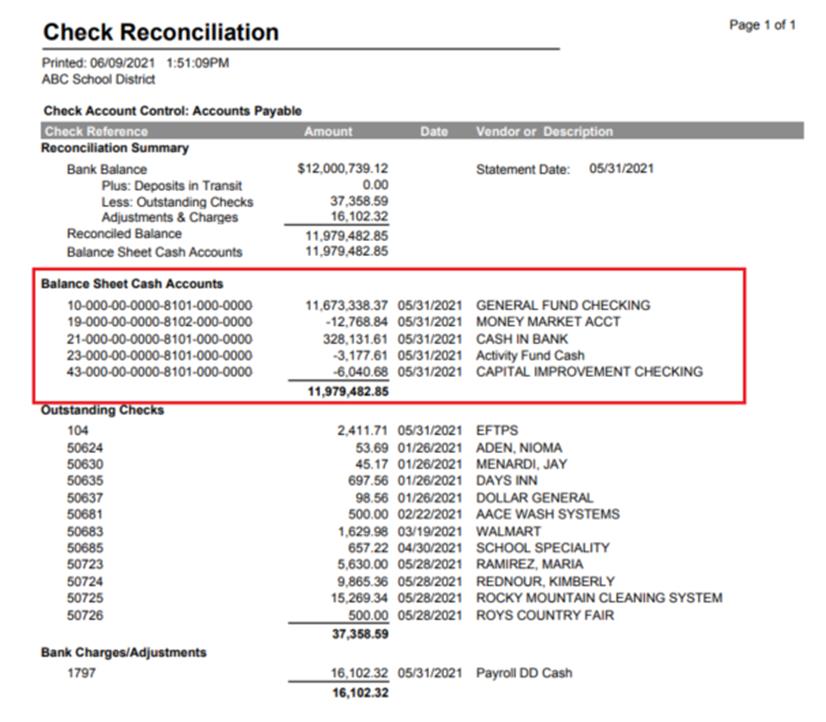
6. The second screen shot is the check reconciliation report showing the balance sheet cash accounts. This is done by selecting the “Display Cash Account(s)” before previewing the check reconciliation report.
Note: If the balances do not match, things to look for
1. Verify the Cleared Check report matches your bank statement deposits and checks.
2. Make sure you entered the correct Ending Bank Balance.
3. Verify the entries posted in the Cash Account(s), use Look & Browse to view the detailed activity
4. Verify the expense on date and check dates for items that have been posted.
5. When a user works in the check reconciliation area, it will remember what they did last, so each user may be in a different month for reconciliation purposes or they may not be setup.