Revised: 5/2021
The Recurring Accounts Payable transaction entry must be entered and completed first. See link for additional step by step instructions on this process: http://help.schooloffice.com/FinanceHelp/#!Documents/recurringaccountspayable2.htm
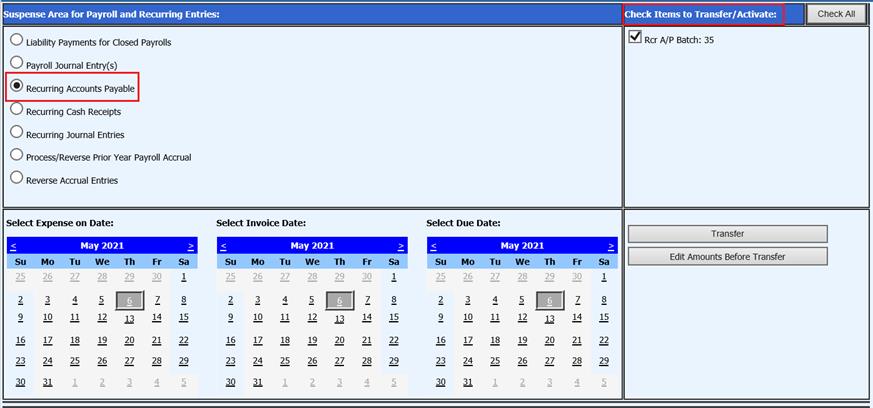
1. Select General Ledger Processing and Entry Options
2. Select Transfer Payroll Data and Recurring Entries
3. Select Recurring Accounts Payable
4. Check items to Transfer/Activate: Select AP Batch
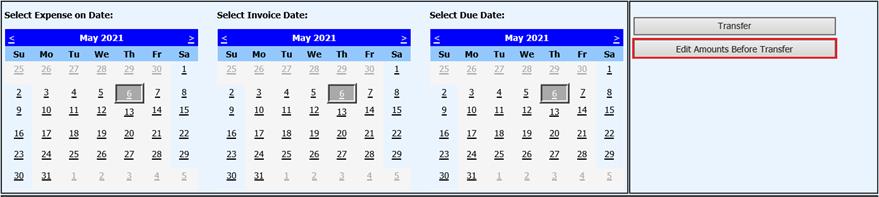
5. Select Calendar dates:
a. Select Expense On Date: This date will determine which month the recurring entries will be posted to
b. Select Invoice Date: Select Invoice Date for recurring entries
c. Select Due Date: Select Due Date to be posted to
6. Edit Amounts Before Transfer: Select if the Recurring Entries need to be edited prior to transfer.
7. If you wish to change all batch numbers, invoice numbers for all items recurring
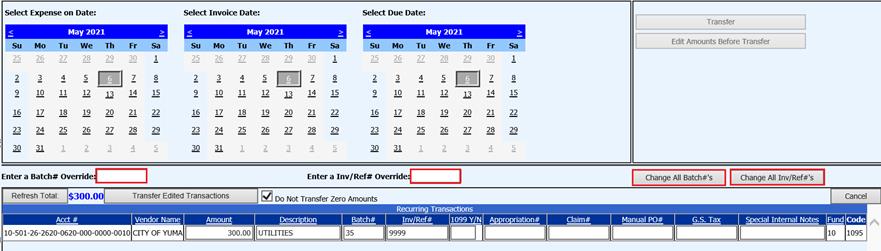
a. Enter a Batch # Override: Enter new Batch number
b. Enter a Inv/Ref# Override: Enter new Invoice or Reference number
c. Chage All Batch #’s: Select if you wish to change all invoice/Reference numbers, listed below
d. Chage All Inv/Ref #’s: Select if you wish to change all Invoice/Reference numbers, listed below
8. Update Invoice fields, as needed
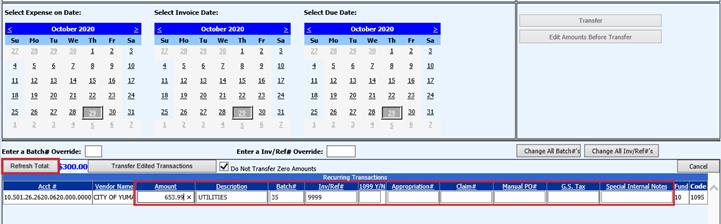
a. Amount: Enter Amount
b. Description: Enter Description
c. Batch#: Enter Batch number
d. Inv/Ref#: Enter invoice or reference number
e. 1099 YN: Enter Y or N for 1099 vendor
f. Select “Refresh Total”, verify detail listed

9. Select the Transfer Edited Transactions

10. The Recurring Accounts Payable invoices are now in Disbursements/Accounts Payable entry view to process.