
Revised: 10/2022
Detailed Information on Michigan ORS Reporting
The following steps will
provide detailed information for ORS reporting, to help with understanding the
field information for ORS reporting, where it is pulling from and where to enter
employee information.
DTL1 – Demographic
Record
The Demographic Record (DTL1) will only be
created when there is a change of an employee’s name, address or work status
changes during the pay period reported.
Indicating a Change
Update fields needed for reporting an employee demographic change
1. Select Human Resources or Payroll Processing
2. Select Employees, Contracts, Deductions / Benefits, etc.
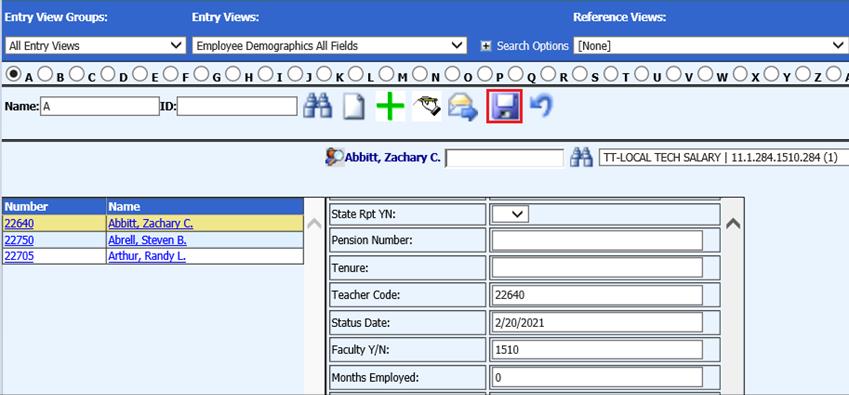
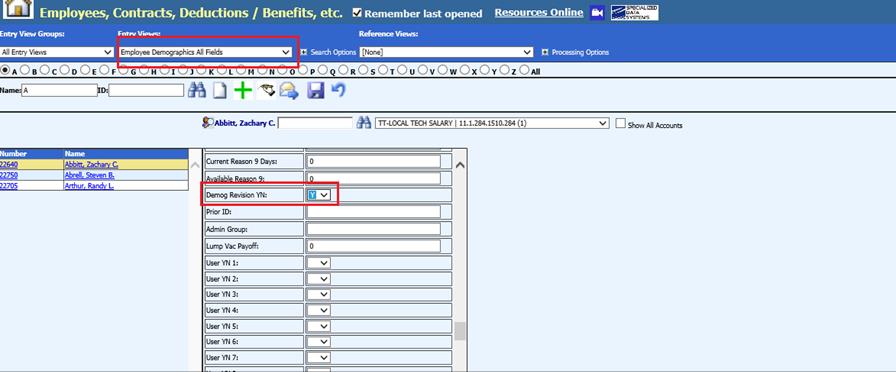
3. Entry Views: Select Employee Demographics All Fields
4. Demog Revision YN: Select “Y”
5. Status Date: Enter date of change

•This date is used to compare to the Period Starting Date and the Period Ending Dates. If the Status Date falls within these date ranges, a demographic record will be added to the file.
6. Select Save
Report Change to Employee’s Name
1. Select Human Resources or Payroll Processing
2. Select Employees, Contracts, Deductions / Benefits, etc.
3. Entry View: Select Employee Demographics All Fields
4. Demog Revision YN field: Select “A”
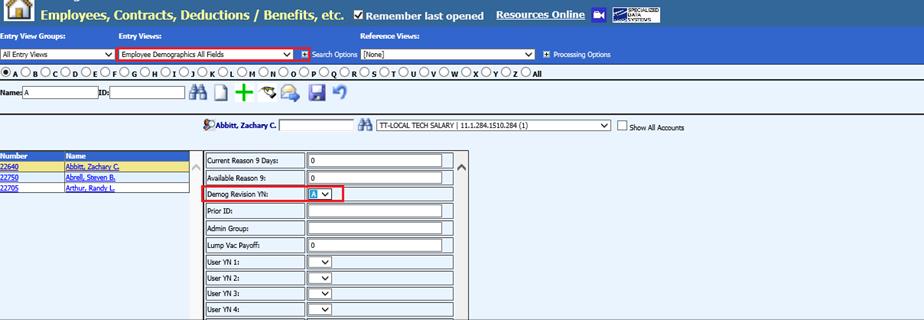
5. Status Date field
•This date compares the Period Starting Date and the Period Ending Date. If the Status Date falls within these date ranges a demographic record will be added to the file.
6. Enter Date of change
7. Select Save

Report Work Status Change
1. Select Human Resource or Payroll Processing
2. Employees, Contracts, Deductions / Benefits, etc.
3. Entry View Employee Demographics All Fields
4. Demog Revision YN: Enter “Y”
5. Function: Enter 4 digit Class Code.
6. Cd Code: Enter 2 digit Wage Code. (See section on Detail 2 records for further instruction on Employee Class and Wage codes.)

7. Select save
Report New Hire or Termination
1. Select Human Resources or Payroll Processing
2. Select Employees, Contracts, Deductions / Benefits, etc.
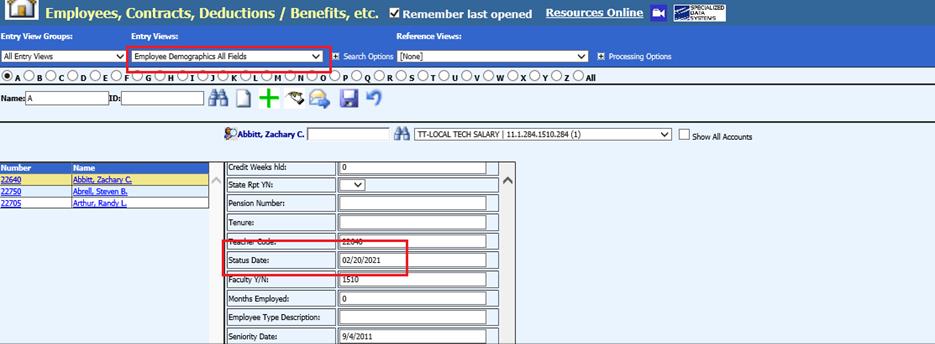
3. Entry View: Select Employee Demographics All Fields
4. Demog Revision YN: Enter “Y”
5. Status Date field: Enter Termination or Hire Date

6. Select Save

DTL2 – Wage and Service
Record
The Wage and Service record (DTL2) is created for
employees who have earnings in the reported pay period. Data required for these
records will come from several different areas.
•Field Name: Description
•Social Security Number: Social Security Number field on the Employee Master File
•Last Name: Employee Name field on the Employee Master File
•First Name: Employee Name field on the Employee Master File
•Middle Name: Employee Name field on the Employee Master File
•Begin Date: will be the Period Starting Date entered in the input box on the ORS report creation screen / Payroll Processing / State/Federal Reporting and 3rd party Data Exporting or from the Service Start Date field on the time card if the employee’s first day worked is different than the period starting date.
•End Date: will be the Period Ending Date entered in the input box on the ORS report creation screen / Payroll Processing / State/Federal Reporting and 3rd party Data Exporting or from the Service End Date field on the time card if the employee’s last day worked is different than the period ending date.
•Retirement Hours: comes from the Reg. Hrs + OT Hrs + Retirement Hrs Days fields on the time cards that fall within the reporting pay period.
•Reported Wage Code: the default will be 01(regular wages) unless there is an entry in the Employee Wage Code field on the time card or employee master.
•Employer Reported Wages: comes from the Gross Pay field on the time cards that fall within the reporting pay period.
•Reportable Wages: comes from wages reports with Ret_I field on the time cards that fall within the reporting pay period.
•Exception Wages: comes from the Gross Pay field on the time cards that fall within the reporting pay period if the Employee Class Code field is 9001 or 9002.
•Member Contributions: comes from the Employee YTD Detail History area if deductions are found that match the codes selected under the Retirement Selector on the screen.
•Employer Contributions: comes from the Employee YTD Detail History area if benefits are found that match the codes selected under the Retirement Selector on the screen.
•Pay Rate: if contractual position, this comes from the Orig Contract field on the employee contract file provided the contract starting and ending dates fall within the range of the period being reported and there is an I in the Retirement_TIN field.
o If the Employee Class Code field on the time card is 9510, 9520 or 9530 (Supplemental employment), the pay rate comes from the Pay_Rate field on the time card.
o If there is no contract it will use the Pay_Rate field on the time card.
o If the Pay_Rate field on the time card is zero, it uses the Rate 1 field on the employee master.
•Employment Class Code: Comes from the Employee Class Code on the time card. If there is no class code on the time card, the program will first look up the class code in the field called Class in the Position Master, using the Position Number from the timecard. If no class code is found, the default used for class code is the Function field from the Employee Master.
•For Districts using E-Time sheet option, you must enter the 4 digit Employee Class Code in the Position Master into the field called Class.
•Contract Begin Date: if contractual position, this comes from the Start_Date field on the employee contract file.
•Contract End Date: if contractual position, this comes from the End_Date field on the employee contract file.
Frequency of Pay: this comes from the Tax Table field on the employee master.
Note: For an employee to be reported they need to have an Employee Class Code in the Function field and Wage Code in the CD Code field in the Employee master. If an employee has multiple positions the main position should be entered into these fields. For subsequent positions the Employee Class Code and Wage Codes can be entered in time cards in the Gross Pay Screen.
The class code is a 4 digit code defined by ORS to define members’ positions. This employee class code is used to report an employee's position in the DTL2 records on your retirement detail reports. The wage code is a 2 digit code defined by ORS to define members’ type of wages such as but not limited to regular, summer, adjustment, retiree and coaching.
Enter ORS Defined Employee Class and Wage Codes in Employees, Contracts, Deductions / Benefits and etc. Screen.
1. Select Human Resources or Payroll Processing
2. Select Employees, Contracts, Deductions / Benefits, etc.
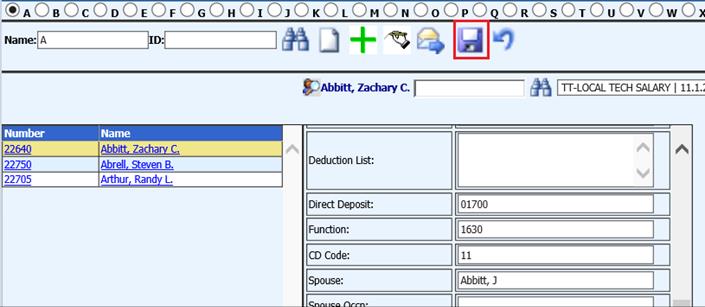
3. Entry View: Select Employee Demographics All Fields
4. Function: Enter 4 digit Class Code
5. Cd Code: Enter 2 digit Wage Code
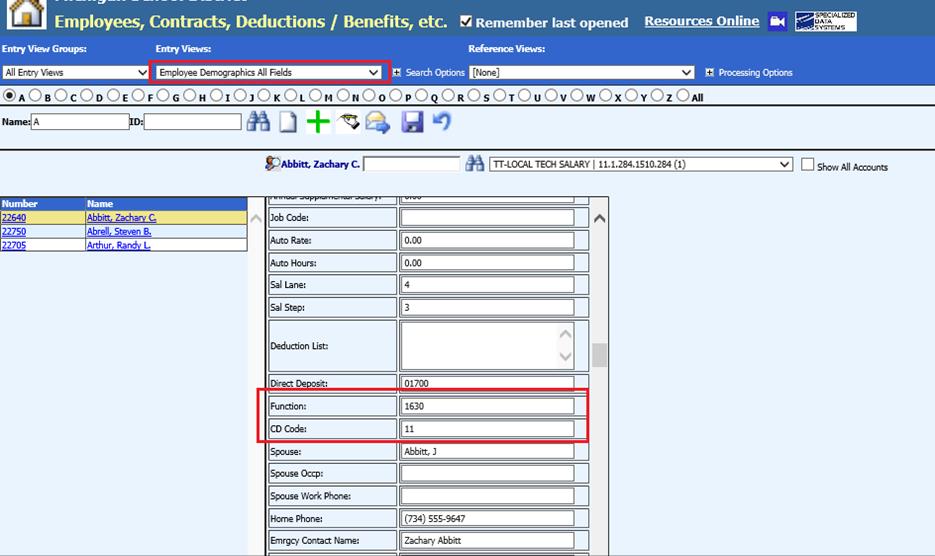
6. Select Save

Enter ORS Defined Employee Class and Wage Codes in the Add, Change Employee Information Screen.
1. Select Human Resources or Payroll Processing
2. Select Add Change Employee Information
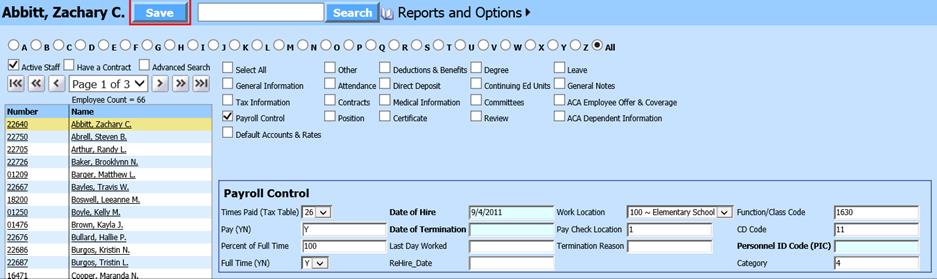
3. Select Payroll Control
4. Function/Class Code: Enter 4 digit Employee Class Code
5. Cd Code: Enter 2 digit Wage Code
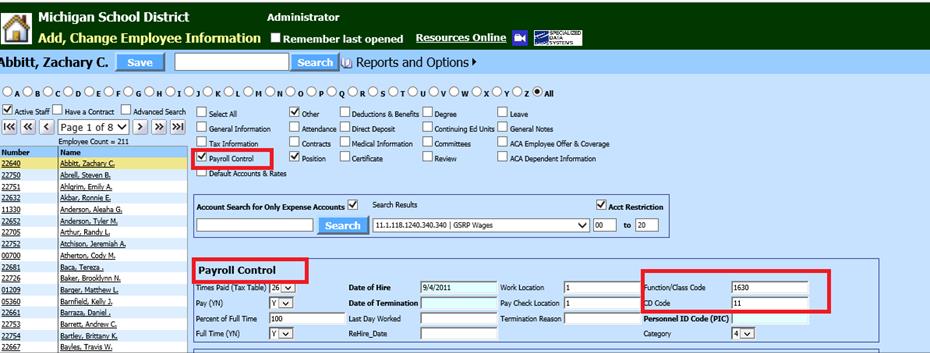
6. Select Save
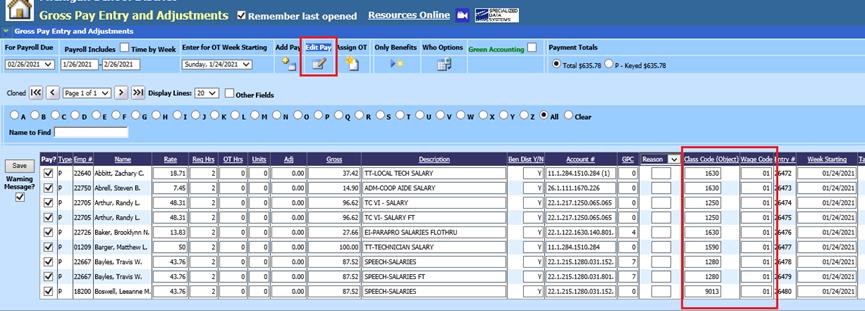
Enter ORS Defined Employee Class and Wage Codes in the Gross Pay Entry and Adjustments Screen.
Note: Entering or editing Class and Wage codes in this entry view will override codes entered in the employee master.
1. Select Payroll Processing
2. Select Gross Pay Entry and Adjustment
3. Select Edit Pay
4. Edit Class Code (Object Column) for Employee Class Code
5. Edit Wage Code Column for the Wage Code
6. Edit or add in Add Pay view: Select Add Pay
7. Select Employee to add time card
8. Select Other Fields
9. Class Cd: Add Class Code
10. Wage CD: Add Wage Code
11. Edit codes on previously entered time cards in the Class and Wage Columns
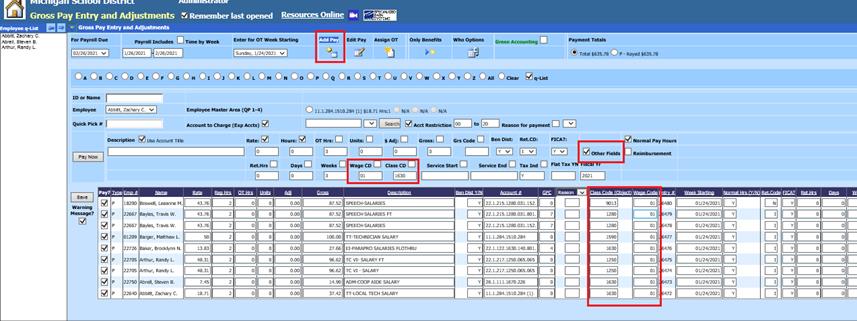
12. Select Save
DTL3 – TDP Deduction
Record
The TDP Deduction record
(DTL3): will be created for employees who have a current TDP agreement in the
reported pay period. Data required for these records will come from several
different areas.
•Field Name: Description
•Social Security Number: Social Security Number field on the Employee Master File.
•Last Name: Employee Name field on the Employee Master File.
•First Name: Employee Name field on the Employee Master File.
•Middle Name: Employee Name field on the Employee Master File.
•TDP Deduction Amount: comes from the Employee YTD Detail History area if deductions are found that match the codes selected under the Retirement Selector on the screen.
•TDP Agreement Number: comes from the TDP Agree Num field in the Employee YTD Detail History area if deductions are found that match the codes selected under the Retirement Selector on the screen.
•TDP Invoice Number: comes from the TDP Invoice Num field in the Employee YTD Detail History area if deductions are found that match the codes selected under the Retirement Selector on the screen.
•Pay Period End Date: comes from the Period Ending Date entered in the input box on the ORS report creation screen / Payroll Processing / State/Federal Reporting and 3rd party Data Exporting.
•TDP Deduction Reason Code: comes from the TDP Deduct Code field in the Employee YTD Detail area if deductions are found that match the codes selected under the Retirement Selector on the screen.
Add TDP Deduction to Employee
If you do not already have a TDP deduction set up please refer to help documents and check with ORS or Auditor on tax shelters: http://help.schooloffice.com/financehelp/#!Documents/humanresourcescontrolcenterdeductionsbenefitsmaster1.htm
1. Select Human Resources or Payroll Processing
2. Select Employees, Contracts, Deductions / Benefits, etc.
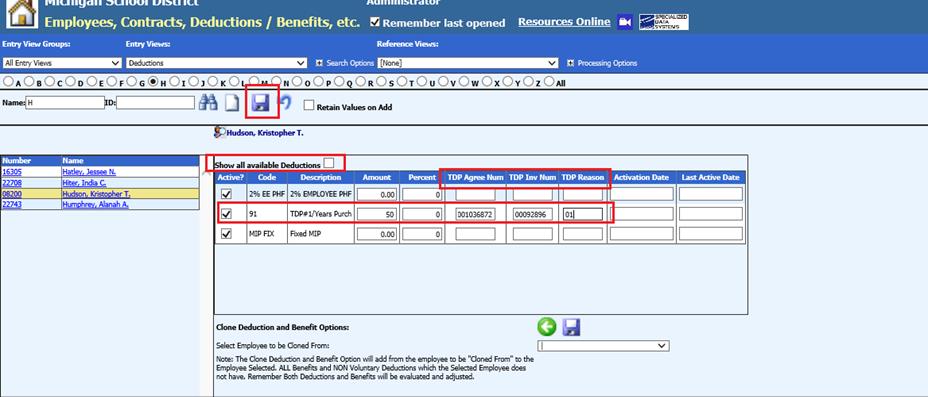
3. Entry View: Select Deductions
4. Select to show all available Deductions
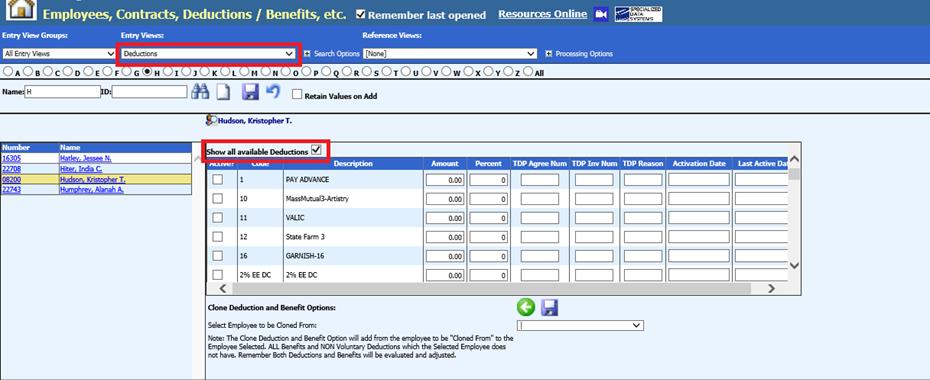
5. Select TDP deduction code
6. Select Save
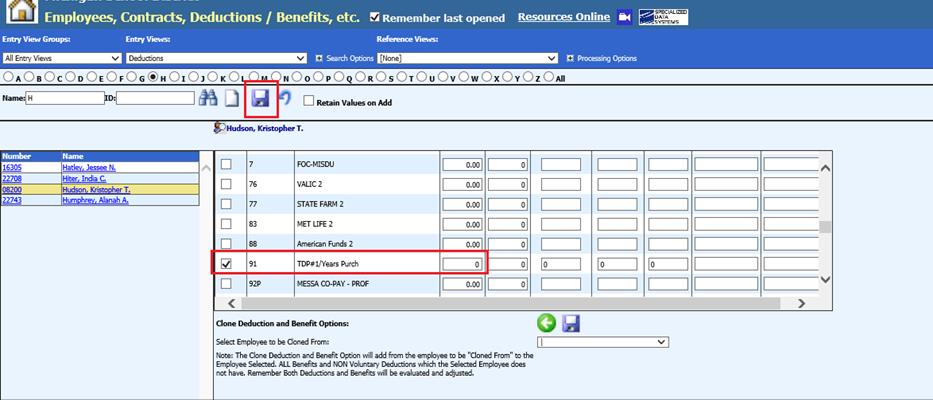
7. Uncheck Show all available deductions
8. Enter TDP Agreement Amount, Number, Invoice Number and Reason if you have one in appropriate columns.
9. Select Save
DTL4-Detail
Record
The Defined Contribution
and PHF Deductions and Benefits will be reported on the Michigan ORS Retirement
Report. A detail record (DTL4) is required to report the gross wages,
Employee Defined Contributions, Employer Defined Benefits, PHF Employee and
Employer information. This record will only be added if the employee has
deduction & benefit records completed.
For the program to identify the Defined Contribution and PHF Codes, you must complete the following steps.
Defined Contribution Deduction/Benefits
1. Select Human Resources
2. Select Human Resources Control Center
3. Select Deduction/Benefit Master
4. Select a deduction or benefit that should be reported as a “Defined Contribution” Retirement Item

5. Gross Code / Pay Type Indicators: Enter ALL
6. Misc_Code 1: Enter “1”
7. Select Save

PHF Deductions/Benefits
1. Select Human Resources
2. Select Human Resources Control Center
3. Select Deduction/Benefit Master
4. Select a deduction or benefit that should be denoted as a “PHF” Retirement Item

5. Gross Code / Pay Type Indicators: Enter ALL
6. Misc_Code 1: Enter “2”
7. Select Save

Creating the ORS Web Reporting File to Upload to ORS
The payroll must be closed before creating the file.
1. Select Payroll Processing
2. Select State and Federal Reporting
3. Select Your State: Select Michigan
4. Select Retirement (ORS Web reporting)
5. Select Report Date
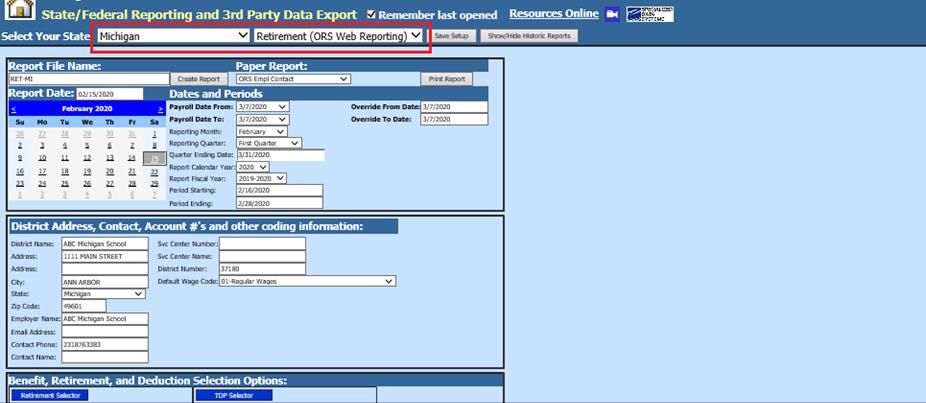
Report Screen
Complete the following items on the report screen. . These dates must match what was reported to ORS with your Payroll Schedule.
Dates and Periods
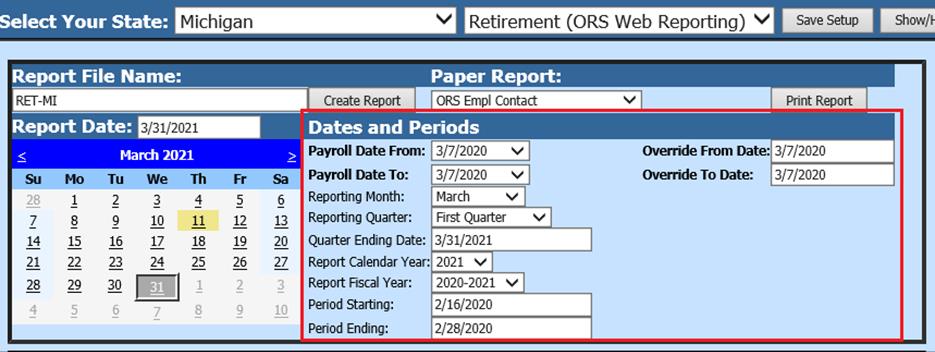
•Payroll Date From: Enter start date to be included on the file. Report only one date at a time.
•Payroll Date To: Enter ending date to be included on the file. Report only one date at a time.
•Reporting Month: Select month
•Reporting Quarter: Select Quarter
•Quarter Ending Date: Enter end date
•Report Calendar Year: Select Year
•Report Fiscal Year: Select Year
•Period Starting: Enter starting date
•Period Ending: Enter ending date
****To run the report for an ACTIVE payroll you may use the override from and to dates.

•Override From Date: Enter active payroll date
•Override To Date: Enter active payroll date
•Payroll Date From: Select Date (don’t use the dropdown)
•Payroll Date To: This defaults to your last closed payroll date
•Reporting Month: Select month
•Reporting Quarter: Select Quarter
•Quarter Ending Date: Enter end date
•Report Calendar Year: Select Year
•Report Fiscal Year: Select Year
•Period Starting: Enter active payroll date
•Period Ending: Enter active payroll date
District Address, Contact, Account #’s and other coding information
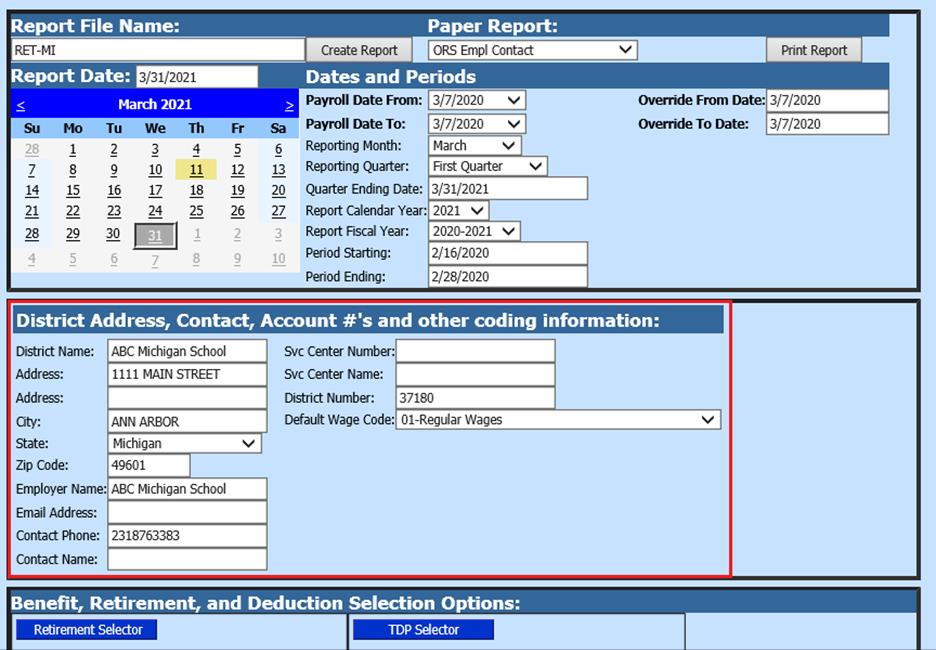
•Svc Center Number: Enter number
•Svc Center Name: Enter name
•District Number: Enter the 5 digit District Number
•Default Wage Code: Select wage code
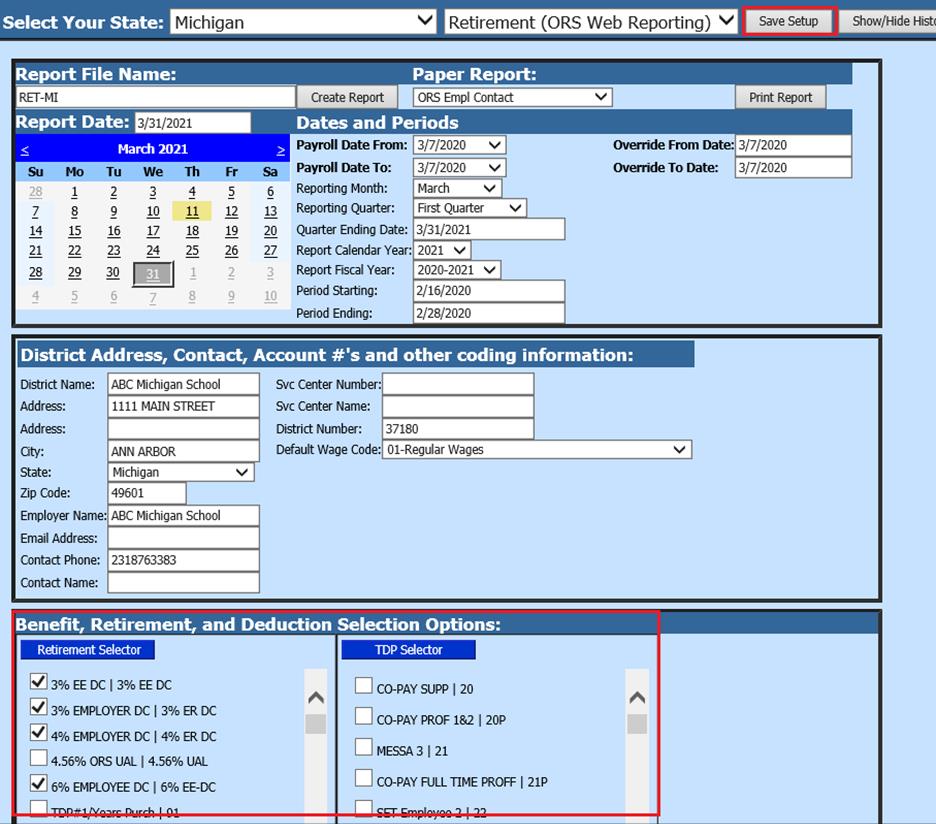
6. Under the Retirement Selector, select the retirement codes to be reported. Note that for the codes to show in this screen they must be marked as Retirement in the Deduction and Benefit Master.
7. Under the TDP Selector, select the TDP deduction codes to be reported.
8. Select Save Setup
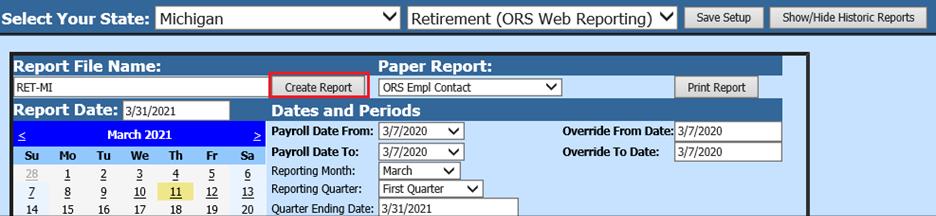
9. Select Create Report
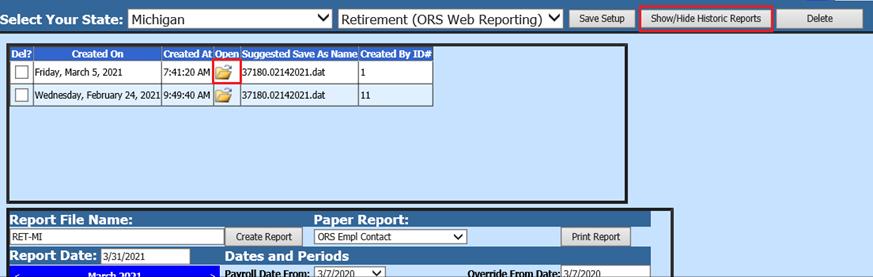
o The file that is created will be listed at the top of the screen when first created. When you re-enter this report it will be displayed under Show/Hide Historic Reports. All files created will have a date and time stamp on them for when they were created.
10. Paper Report: Select Print Report to review the report of what is created in the file.
11. To save the file to send to right click on the folder and select save target as. Then save the file on your desktop or other desired location on your computer. Save the file name per ORS requested file name. You can then send the file to ORS.