
Revised: 6/2021
After a district has settled their employment contract with a bargaining group, the need to increase the affected employees’ contracts becomes an issue.
The necessary steps depend on how the district has maintained their records in the past and how they want to pay the salary increase.
Retro pay is a payment for the increase salary for contract payments already received. Activating the Contract Increase and Retro Pay process allows you to apply Retro pay adjustments to active contracts.
Activate Contract Increase and Retro Pay Options
1. Select Administrative Utilities
2. Select SDS Web Office Settings
3. Under the Payroll tab, Activate Contracts Increase and Retro Pay Options; select “Y”
4. Select Save Changes
5. Log out of the system to activate the new settings
6. Log back into the system
Entering of Retro Pay
Using Contract Increase Options for Active Contracts entry:
1. Select Human Resources
2. Select Contract Increase Options for Active Contracts
3. If Salary schedule is in use Post salary change to Proposed Contract Increase
•1 Select Employee Contracts to increase
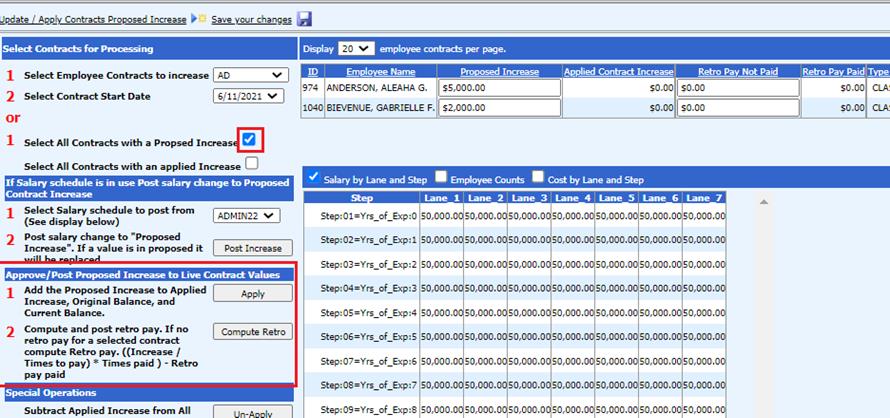
•2 Select Contract Start Date or place a check in Select All Contracts with Proposed Increase.
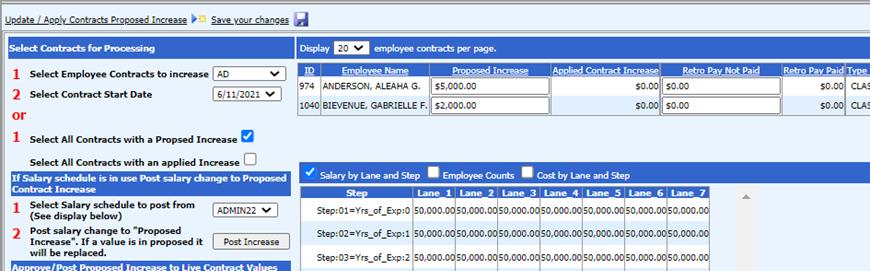
4. Enter in the amount needed for the “Retro Pay Not Paid”
5. Under Approve/Post Proposed Increase to Live Contract Values
•2 Compute and post retro pay. If no retro pay for a selected contract compute Retro pay ((Increase/Times to pay) * Times paid) – Retro pay paid, select “Compute Retro”
•Special Operations
o Selecting Un-Apply will Subtract Applied Increase amount from all employee contracts even if some have been paid. It will reduce the Original Balance and Current Balance. Retro Pay Not Paid will adjust to zero and will Copy Applied Increase amounts replacing the value in the Proposed Increase
o Selecting Zero Proposed will set all contract Proposed Increases to zero
o Selecting Zero Retro will set all Retro Pay Not Paid entries to zero
•Selected Contract Information
o Amount of contracts and summary of totals
Process Payroll with Retro Pay
1. Select Payroll Processing
2. Select Activate/Open a Payroll
3. Select Calendar Setup
4. Enter in Payroll date for Retro Payroll
5. Select Record New Payroll for xx/xx/xxxx
6. Select Ok. The payroll date has been created.
7. Select the Payout Category(s)
8. Select “Show Contracts” to view the Employees to be paid with Retro Pay
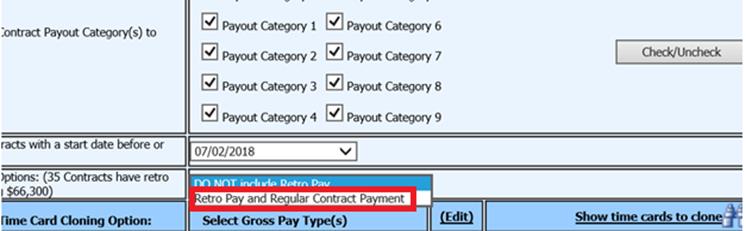
9. Select Retro Pay Options: This will display how many contracts that have retro pay and total amount
10. Select Activate Payroll.
11. Follow the below Basic Payroll Processing Step by Step Outline, to complete the payroll process with Retro Pay:
http://help.schooloffice.com/financehelp/#!Documents/basicpayrollprocessingstepbystepoutline.htm
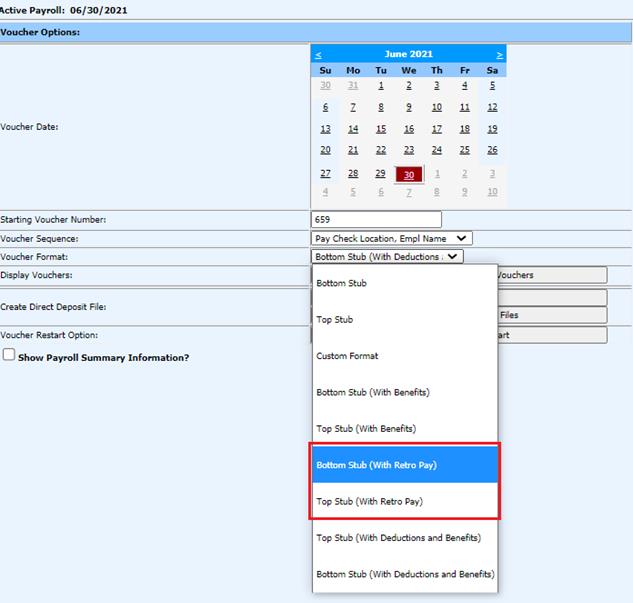
Note: When Printing Direct Deposit Vouchers, select the voucher format with Retro Pay listed.
Note: Multiple Retro Pay Payrolls are allowed. Once payroll is closed, you can run another Retro Pay Payroll if needed.