
Revised: 4/2021
To Add a new employee:
1. Select Human Resources or Payroll Processing
2. Select Add, Change Employee Information
3. Place a check in General Information
4. Select Add
A new window will display for you to enter in the new employee information and use the cloning option:
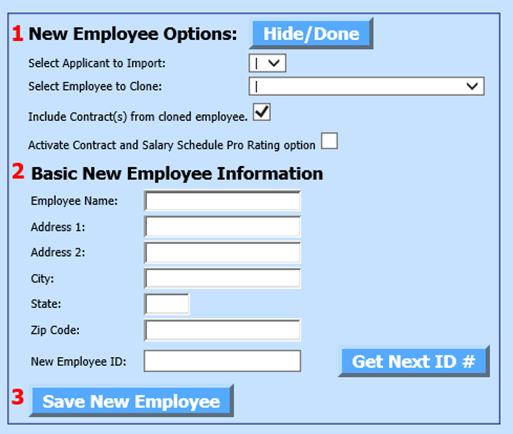
To use the Clone/copy option with another employee:
1 New Employee Options (optional):
a. Select an employee, from the field ‘Select Employee to Clone” drop down list to use the cloning option. This should be an employee close to the type of employee you are adding.Select “Include Contract(s) from cloned employees” if the contracts are to be cloned.
b. Check the “Activate Contract and Salary Schedule Pro Rating Option”.
c. Complete the information displayed in the area below the heading “Contract Information” for # of pays for the contract and New Empl Salary.
d. The dates, Pays, Lane, Step, and New Employee Salary will be recorded from the information entered in the Contract Information area. Account numbers and other information required for a complete contract will be transferred from the “Cloned” employee’s contract. If the cloned employee has multiple contracts, the contract with the most current contract start date will be adjusted with the entered information. Other contracts will be transferred unchanged from the “Cloned” employee’s contract area. Once this is saved, you will need to go into each of the main areas: Deductions, Benefits, Contracts and add or adjust as needed.
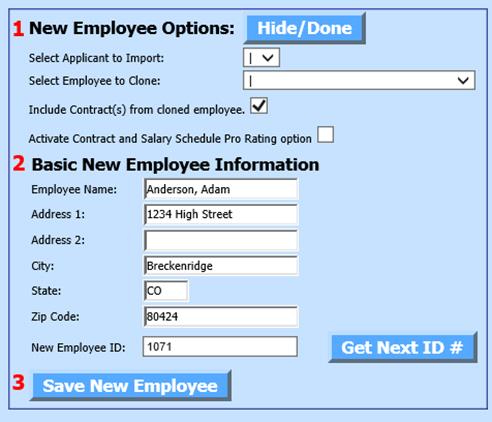
2 Basic New Employee Information (mandatory for all new employee entry):
a. Enter the new employee’s name, address, city, state, zip code.
b. Select Get Next ID#
c. Save New Employee
d. Select Close
e. Select Hide/Done to return to the demographics, benefits, etc.
•Select the check boxes for Demographics information to be completed for new employee or use the “Select All” option.

For more information on completing each section, see below link: http://help.schooloffice.com/financehelp/#!Documents/addchangeemployeeinformation.htm
•Once you have completed each section in the employee master, select Save. You will receive a time stamp of the save.
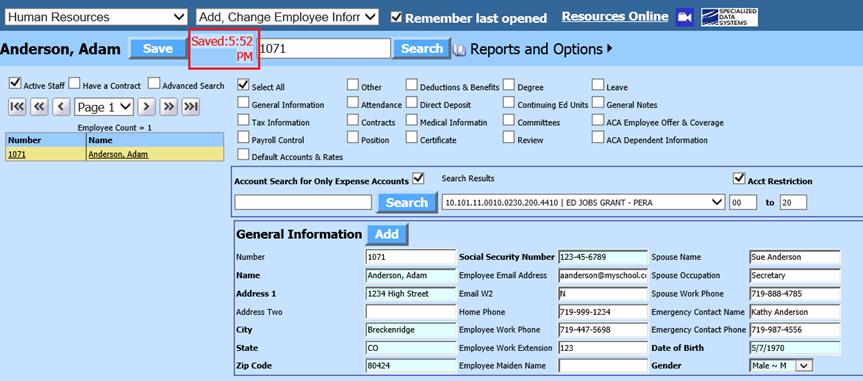
Note: The fields highlighted are the fields needed for State reporting requirements. You can adjust the brightness of the highlighted field by selecting “Reports and Options” and selecting “Required Field Highlight”, then select “Light Background” or “Bright Background”
Reports and Options
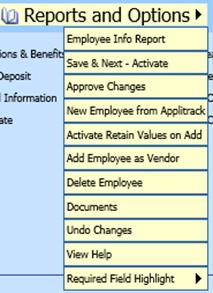
•Employee Info Report: Report to include all employee demographic information
•Save & Next – Activate: Upon entry on multiple employee’s data, you can activate this option and upon Save it will advance to the next employee
•Approve Changes: Approve any Employee Portal Requests
•New Employee from Applitrack: Import new employee from Applitrack
•Activate Retain Values on Add: Activate the copy option to clone another employee’s information to the new employee
•Add Employee as a Vendor: Activate this option in SDS Web Office setting and you can transfer the Employee information to the Vendor table.
•Delete Employee: If you have entered in an employee incorrectly and need to delete
•Documents: Uploading and saving any employee documentation
•Undo Changes: Undo the changes you have made to the employee
•View Help: Access to Finance Help counsel
•Required Field Highlight: Adjust the brightness of the highlighted state required fields (above using Light background, below using Bright background)