Revised: 11/2020
The Time Clock (Login In/Out) process allows for the human resource / payroll departments to enter time for an employee that did not clock in or out. It also allows these departments to correct a time clock entry that is not correct. This area also allows the ability to setup badge information or magnetic strip readers on employees.
1. Select Human Resources
2. Select Time Clock (Login In/Out)
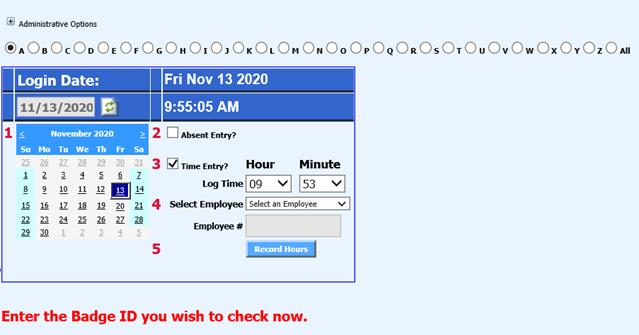
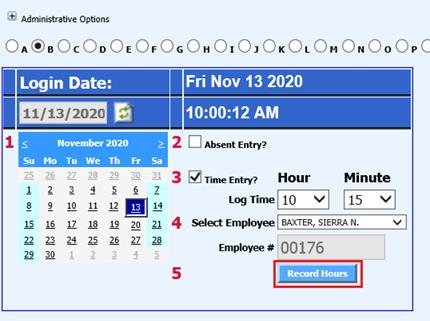
3. 1 Select the date that needs to be added/adjusted
4. 2 Select if absent entry
5. 3 Select if time entry
a. Log Time: Hour/Minute
Clock in/out time for the employee can either be entered or deleted depending on the situation.
6. 4 Select employee
7. 5 Select Record hours
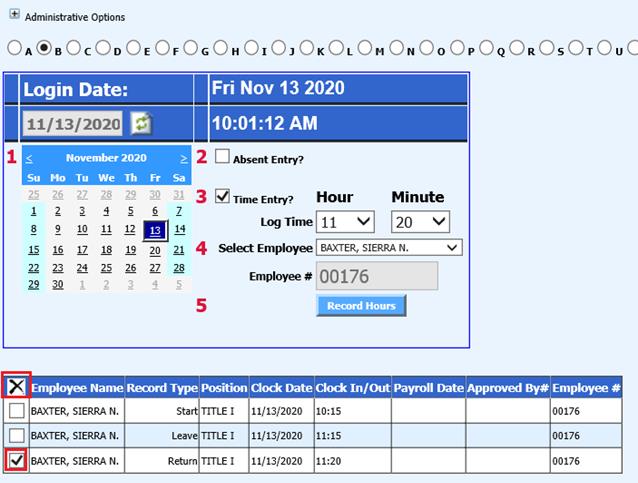
Delete Time Entry
If time that has been recorded needs to be deleted select the box next to the login/out time and select “X”
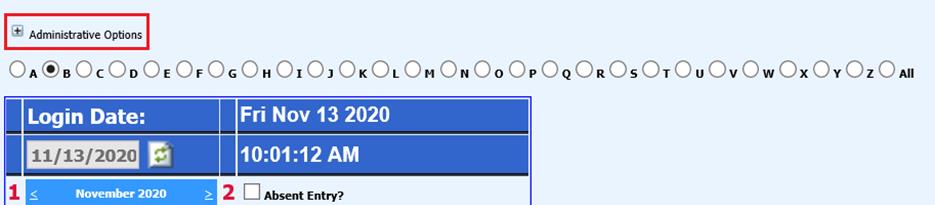
Administrative Options
Time Clock with Badge Lookup, Assign Badge ID’s to Employees and Settings for magnetic strip reader
Time Clock with Badge Lookup
1. Select Administrative Options
2. Select Time Clock with Badge Lookup
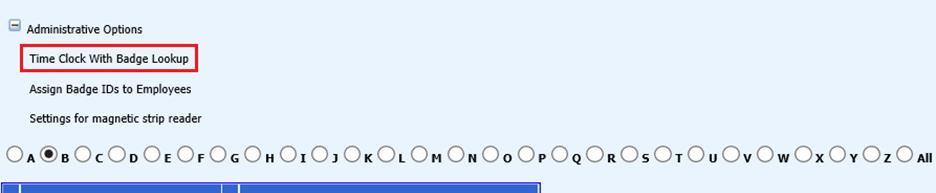
3. Select “OK” on Message from webpage
4. 4 Select Employee
a. Employee # will display
5. Enter Time Card record
Assign Badge IDs to Employees
If you have chosen to use the keypad or mouse for employees to log in/out of the time clock system instead of the swipe cards, you can assign each employee a new ID number or you can have them use their employee number as their badge ID number. If you have employees using their SDS assigned employee number as the badge ID, you do not need to assig a new badge ID number.
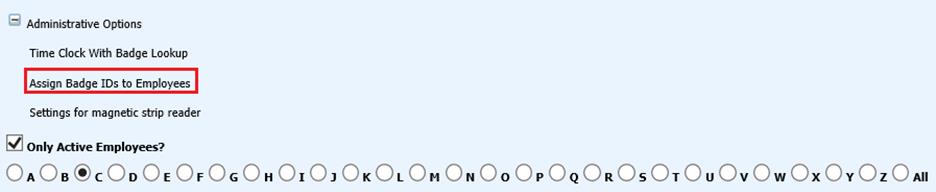
1. Select Administrative Options
2. Select Assign Badge IDs to Employees
3. Select Employee
4. Click on “Select”
5. New Badge ID: Enter new code
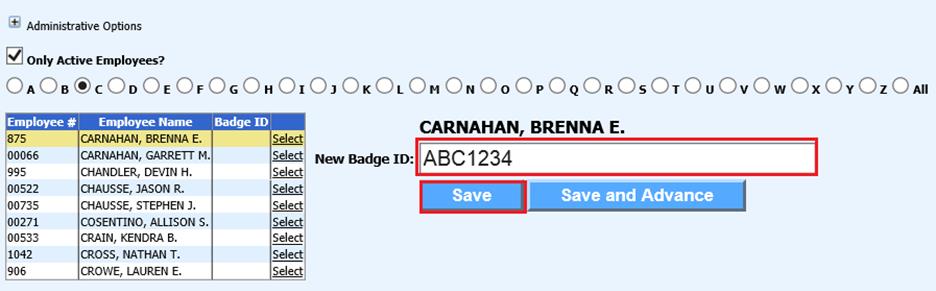
6. Select Save
a. If updating multiple employees, select “Save and Advance” to go to the next employee
Settings for magnetic strip reader
1. Select Administrative Options
2. Select Settings for magnetic strip reader

3. Run the card through the magnetic reader. This will assign the strip on the card.
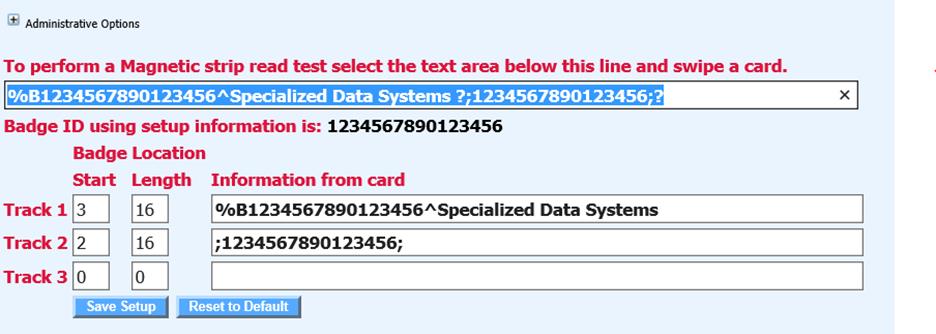
4. Select Save Setup
5. Select the next card to run through the magnetic reader.
6. Select Save Setup, after each swipe of card
7. Contiue process until all cards are completed
8. Select Assign Badge ID’s to Employees to assign/verify ID numbers