
Revised: 8/2021
Before we cover how to run the report you may need to setup a unique Job Code in the Employee Master for employees that are paid, but not to be reported to unemployment. This is a user defined code that you can decide what you want to use however it must be the same code on all employees that are not to be reported.
To set up Wisconsin Unemployment:
1. Select Human Resources
2. Select Employee Horizontal Data Changes
3. Entry Views: Select Employee Demographics All Fields
4. First Field to Edit: Select Job Code
5. Enter a unique job code that you will use for all employees that get paid but you do not want reported to unemployment. Once you have all these entered then make sure you hit save.
Now that you have all the employees that are being paid but don't want recorded marked with a unique job code you created, you are now ready to create the report.
1. Select Payroll Processing
2. Select State and Federal Report
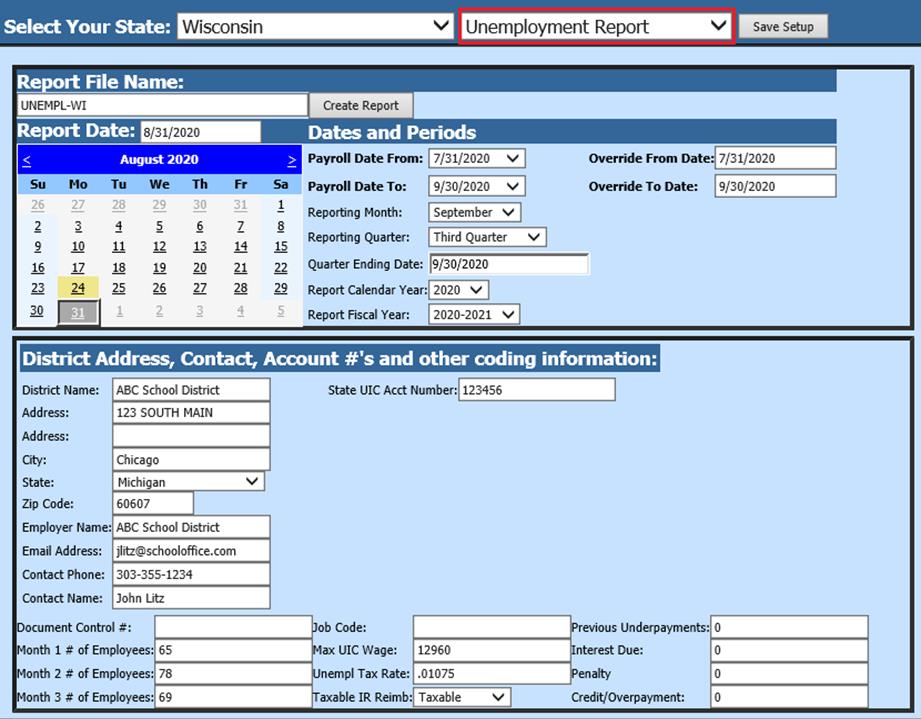
3. Select Your State: Select Wisconsin
4. Select Unemployment Report

5. Choose the payroll dates within the quarter you are reporting and fill in the quarter and quarter ending (Example below is for the 3rd quarter.). Complete the information in the District Address, Contact, Account #’s, Unique Job Code (You created in the above section of these instructions). After all the items have been filled in on the screen select “Save Setup” at the top.
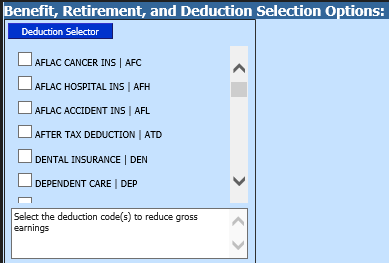
6. Select any deductions that reduce gross earnings, if applicable.
7. Select Create Report
8. A message will appear when it is complete. Select OK.
9. The file that is created will be listed at the top of the screen when first created. You can then right click on the folder and save it to your local drive for submittal.

10. When you re-enter this report, it will be displayed under Show/Hide Historic Reports. All files created will have a date and time stamp on them for when they were created.
11. The system will retain the files that have been created. These files can be viewed by selecting the Show/Hide Historic Reports button.