
Revised: 2/21/18
There are two methods in WSO to
schedule elementary students.
Method 1: The
elementary scheduling process may be done before the “Prepare
to Open School/Year End Process” (Rollover) in the next year
area.
Method 2: The elementary scheduling process may be
completed after the “Prepare to Open School/Year End Process
(Rollover) in the current year
area.
Overview
Below is an
outline of the steps for Elementary School Scheduling. Detailed
instructions follow the outline.
1. Setup Steps for Student Elementary School Scheduling.
o Enter appropriate Grade Year/NY Grade Year and Home Room/NY Homeroom values for each student.
Method 1: Before the “Prepare to Open School/Year End Process” in Next Year area. Using “Prepare the Next Year Scheduling” feature.
Method 2: After the “Prepare to Open School/Year End Process” in Current Year area. Manually changing the Grade Year and Home Room Values.
o Enter/update Teacher Information.
o Enter/update Course Codes.
2. Create Student Schedules and Teacher Assignments.
3. Run Reports.
Setup for Elementary Scheduling
Note: Timing and method used are important when
setting up for Elementary scheduling. If using method 1, all school
locations should run the “Prepare the Next Year Scheduling” process during
the same time period. Below is the Prepare to
Open screen. When scheduling begins, all schools (Elementary,
Middle and High) must have completed this process to ensure that the
information in the Next Year fields is correct. For
example, if an elementary school has not completed this process, those
graduating from that school to Middle School will not be processed with their
new grade, location, etc. Another example, if the Middle school did not complete
the process and the elementary did, the graduating elementary students will
comingle with the MS class that was not advanced.
Method 1 – BEFORE running the “Prepare to Open
School/Year End Processing”
Step 1a -Prepare the Next Year Scheduling
Area
Note: It is not necessary to perform Step 1
(Delete Course codes in Next Year Area) or Step 2 (Delete Master Schedule).
However, it is recommended that you do perform these two
steps to ensure that the area is clean for the selected
location.
Access WSO |Scheduling |Prepare the Next Year Scheduling Area |School to Process = Select from Dropdown.
1. Delete Course Codes in Next Year Area
o Click  beside 1
This will delete for the School Location selected.
2. Delete Course Master in Next Year Area
o Click beside 2
This will delete for the School Location selected.
3. Copy Course Codes from Last Year
o Click  beside 3
This will copy the course codes from the current year to the next year area.
4. Copy Course Master from Last Year
This step is not necessary for Elementary Scheduling. Proceed to step 5.
5. Move Grade Year to NY Grade Year.
o Click beside 5
This will copy Grade Year to NY Grade Year for All Teachers and Students in the selected location.
6. Move Home Room to NY Home Room
o Click beside 6
This will copy Homeroom to NY Homeroom for all Teachers and Students in the selected location. NOTE: this is not commonly done, but if a group of students is to stay with the same teacher, this helps accomplish that task.
o Click beside 7
This will increase the NY Grade Year by 1 for students in the selected location.
If a non-numeric value is found the student will be placed in grade 01. I.e. K will become 01. NOTE: for students who are being retained, you will need to adjust their NY Grade Year by hand.
Step 1b – Enter/Update Teacher Information
1. Access WSO |Scheduling | Master File and Code entry and Changes |Application = General Information |Entry Options = Teachers
2. Enter/Update the Next Year School Location, Next Year Grade Level Assignment, and Next Year Homeroom for each homeroom teacher.
Step 1c – Enter/Update Course Codes
1. Access WSO |Scheduling | Master File and Code entry and Changes |Application = Scheduling (Next Year) |Entry Options = Course Codes – Next Year (All Fields)
2. Verify or enter all the elementary classes/subjects to be taught including special classes (ie. Art, Music, and PE).
3. Verify the appropriate School Location is entered for each course offering.
4. Verify the appropriate Grade Level Assignment is entered for each course offering.
Method 2 – AFTER running the “Prepare to Open
School/Year End Process”
Step 1a –Enter/Update Grade Year
and Home Room Values for Next Year
1. Access WSO |Data Entry and Changes (Horizontal)|Entry Options = Demographics All Fields.
o Enter the new school year information in the Grade Year and Homeroom fields for each student.
Step 1b – Enter/Update Teacher Information
1. Access WSO |Scheduling | Master File and Code entry and Changes |Application = General Information |Entry Options = Teachers.
o Enter the School Location, Grade Level Assignment, and Homeroom for current year for each homeroom teacher.
Step 1c – Enter/Update Course Codes
1. Access WSO |Scheduling | Master File and Code entry and Changes |Application Scheduling (Current Year) |Entry Options = Course Codes – Current Year (All Fields)
• Verify or enter all the elementary classes/subjects to be taught including special classes (ie. Art, Music, and PE).
• Verify that the appropriate School Location is entered for each course offering..
• Verify that the appropriate Grade Level Assignment is entered for each course offering.
Method 1 and 2
Step 2 – Elementary School Scheduling – Create Student Schedules and Teacher Assignments
2. Access WSO |Scheduling |Elementary School Scheduling
3. Select the School Location from the dropdown.
4. Enter the Maximum Number of seats you want for each new course to be created.
Select the year you are working with (Current Year Area or Next Year Area) by clicking on the appropriate radial button.
5. Students are displayed on far left panel, teachers are displayed on middle panel, and Courses are displayed on far right panel.
6. In the middle panel, checkmark your homeroom teachers.
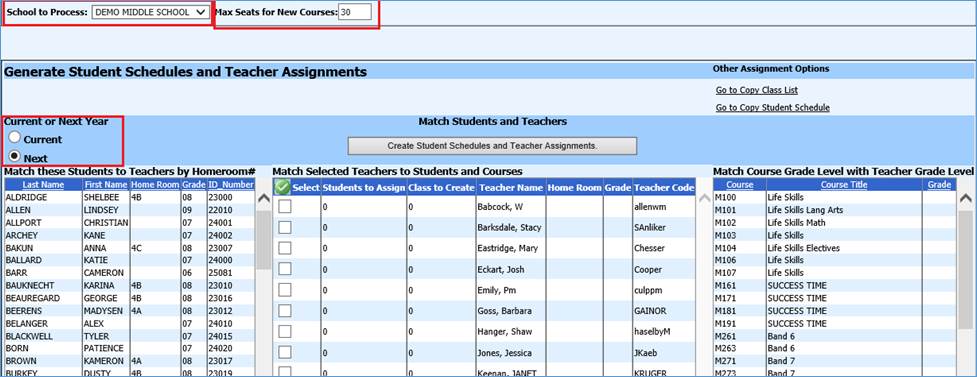
•Click on the Create Student Schedule and Teacher Assignments button. You will receive the following warning message.
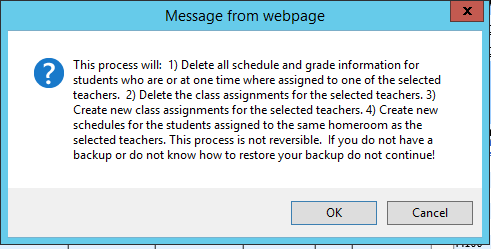
•Click on the OK button to Create Student Schedules and Teacher Assignments.
•Click on the Cancel button if you do not want to create the Student Schedule and Teacher Assignments.
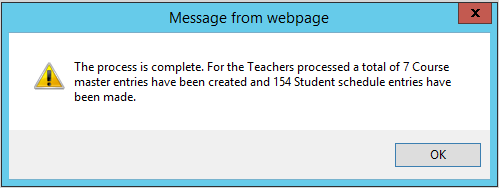
•When the process is complete you will receive the following message:
Step 3 – Evaluate Assigned Seats
It is not necessary to Evaluate Assigned Seats after running the Elementary Scheduling. The Elementary Scheduler updates the course master Assigned Seats field on the courses created by the scheduler as it schedules students into them. It is only necessary to Evaluate Assigned Seats after making manual schedule changes.
Step 4 – Special Courses (i.e. Art, Music, & PE)
All courses are assigned to the homeroom teachers in the elementary scheduling process. Follow these steps to change the teacher on special courses from the Homeroom teacher to the special teacher.
•If scheduling was done for current year. Access WSO |Scheduling | Master File and Code entry and Changes |Application = Scheduling (Current Year) |Entry Options= Course Master (Current Year) Basic Fields
•If scheduling was done for next year. Access WSO |Scheduling | Master File and Code entry and Changes |Application = Scheduling (Next Year) |Entry Options= Course Master (Next Year) Basic Fields
•Find each of the special course sections (see Note below). Click on each of them and change the Teacher Code field to the special teacher’s code and save.
Note: If desired, the Selection Field and Selection Value dropdowns can be used to query out the special courses by their Course Number or Course Description
Step 5 –Run Reports
•Access WSO |Reports |Student Reports
o Sort and Run the following reports:
§ Schedules
§ Class Lists
§ Student Locator/s
§ Teacher Locator/s