
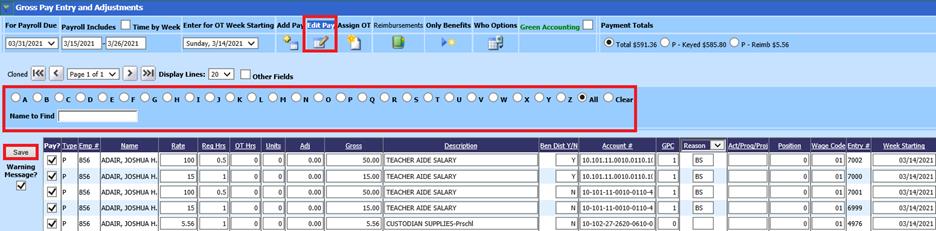
Revised: 4/2021
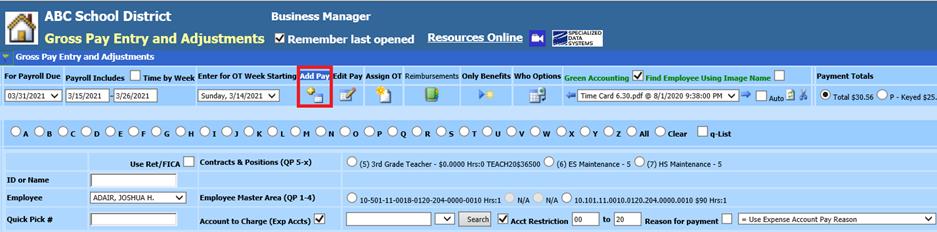
This entry view is used to edit an employee time card previously entered.
Gross Pay Entry and Adjustment Time Card Entry Screen: Add Pay
This entry view is used for initially entering an Employee manual time card.
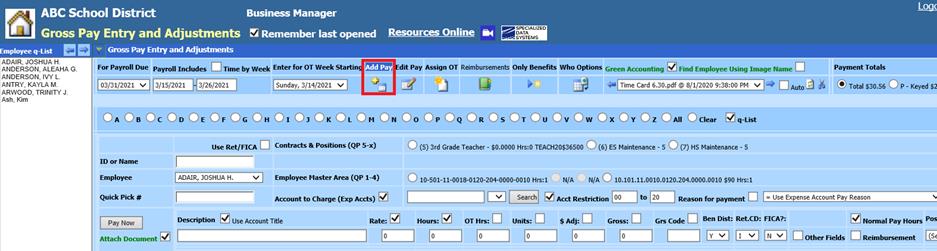
Gross Pay Entry and Adjustment Time Card Entry Screen: Add Pay with “q-list” selected
If you have the “q-list” checked, you will be able to select the employees from the left side of the entry screen
Gross Pay Entry and Adjustment Time Card Entry Screen: Who Options
This entry view will give you two different options to select from for cloning or copying a time card entry by Who can be paid and Who is not paid.


•Who Can Be Paid: All employee that fit the criteria of the below selections
•Who is Not Paid: Employee that fit the criteria of the below selections that don’t already have a time card entry for the payroll selected.
•Accounts and Rates in the Employee Master: This selection will pull in the data information listed in the Employee Master: Default Accounts & Rates section.
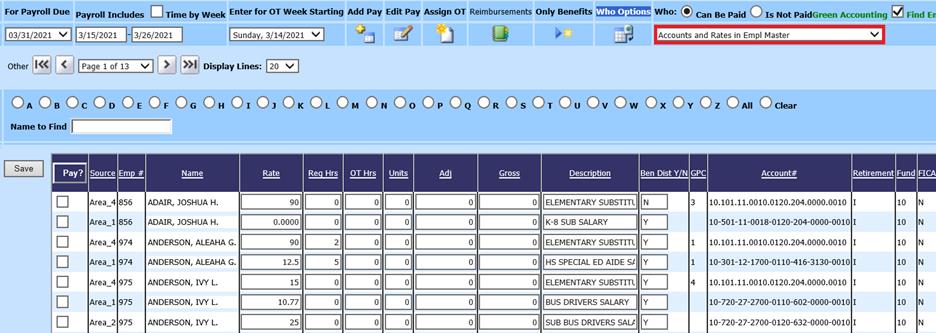
•Time Cards from Previous Payroll: This selection will allow you to select from time cards entered from a previous payroll.
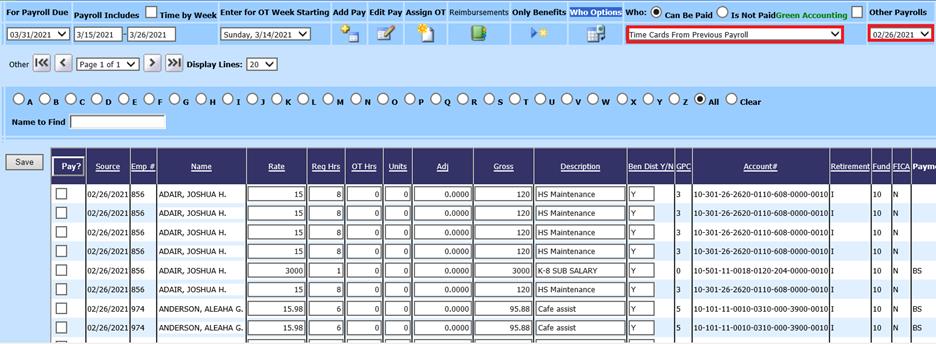
In either entry view, to pay the employee needed follow the steps below:
4. Check mark all employees by selecting “Pay?” or individually check mark each employee to pay
5. Make any adjustments needed for the entries selected

6. Select Save
Time Card Entry
To enter a time card using Employee Demographics area information
1. Select Add Pay
2. Enter the Employee ID or Name
a. If using the Name search and multiple names are listed, select the employee to Pay
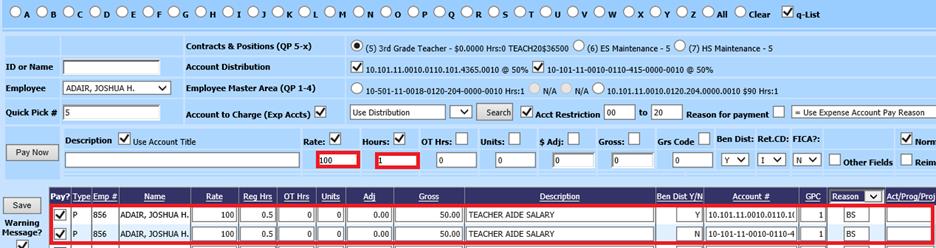
3. Enter the Quick Pick #, select from the Accounts to charge or enter the Account number.
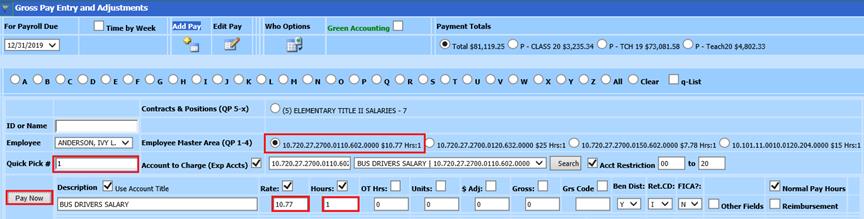
a. Quick Pick # box: Enter a 1 (shown above) to select the first account listed for the employee. The Account listed in Employee Master, #1 field in Default Accounts & Rates field (shown below) will be selected. If the Rates, Hours and Gross Code have been completed; these fields will also auto populate.

4. If you need to make changes to the description, hours or other payroll entry fields, make the needed adjustments at this time.
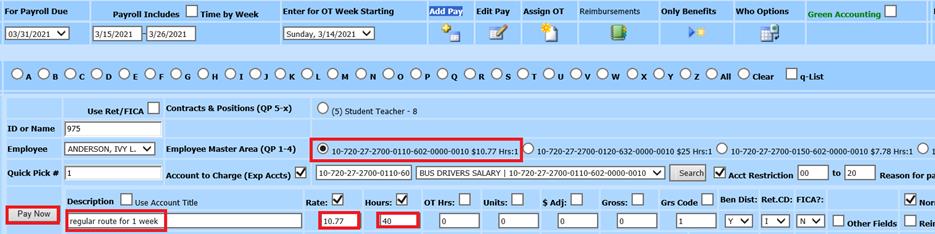
5. Select Pay Now
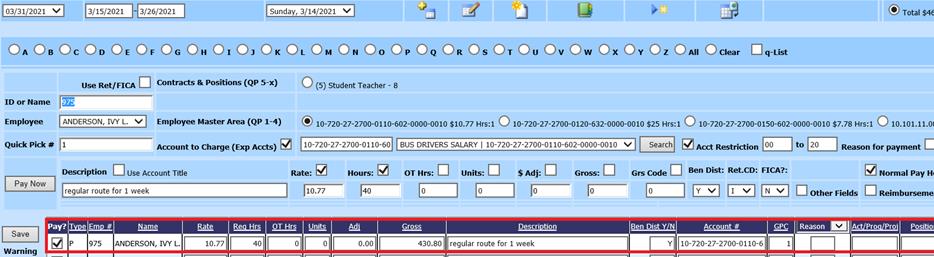
6. The entry has been moved to the lower section of the screen
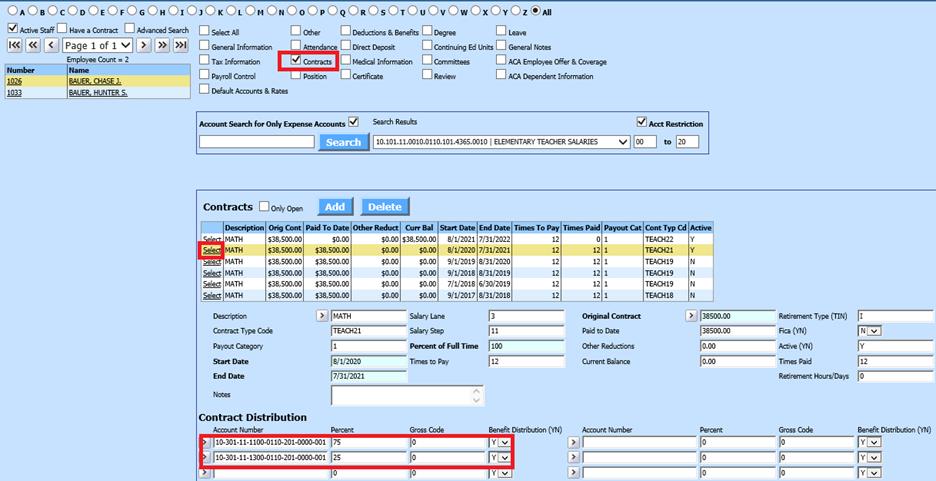
To pay an employee with a contract that has a percentage distribution to more than one account number.
If you have an employee with a contract distributed over to multiple salary accounts:
•Select Add Pay
•Enter in the Employee ID or Name
•After selecting the employee the contracts & positions became available in the “Contracts & Positions (QP5-x).

•Enter a 5 in Quick Pick# field (or the number associated with the information you want to pull into the payroll) the screen displays the account numbers associated with the contract and the percentage break down.

•Enter rate, hours and make any other changes to the payroll fields and hit enter. The program will split the rate according to the percentages from the contract
To pay an employee based on the information entered in the Employee Position area.
If paying an employee using the Employee Position Master follow the steps below:
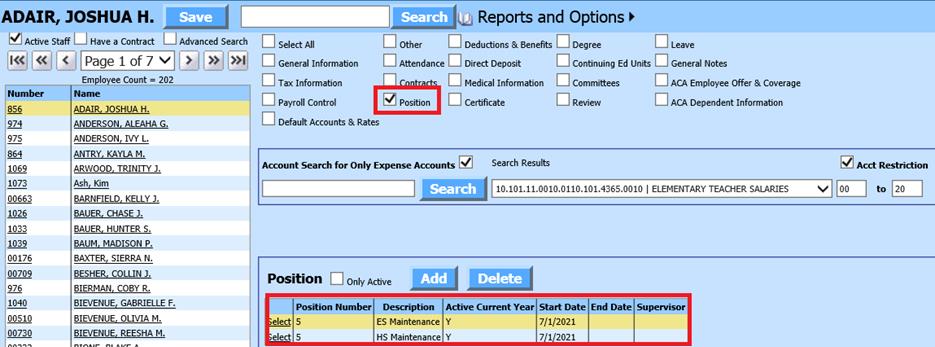
•Select Add Pay
•Select Employee ID or Name
•After selecting the employee, the contracts & positions became available in the “Contracts & Positions (QP5-x).
•Enter a 6 in Quick Pick# field (or the number associated with the information you want to pull into the payroll) the screen displays the account number, hours and rate associated with the employee’s position area.

•Make any other changes to the payroll fields and hit enter to record the time card entry.
Editing Time Entries
1. Select Edit Pay
2. Select the employee by using the name search or alpha radio buttons
3. Make the adjustments needed
4. Select Save
5. If the field that needs to be modified is not showing on the screen, select “other fields” to expand the selection.

6. You can edit multiple time cards by making the changes on each field that is displayed. After you have entered your changes, select the “Save” button. The system will check all your entries when you push save.
7. If something is entered incorrectly the system will highlight the incorrect entry. You can correct your entry and select the save button again.

To eliminate a time card,
remove the Check in the column labeled “Pay?” and select
“Save”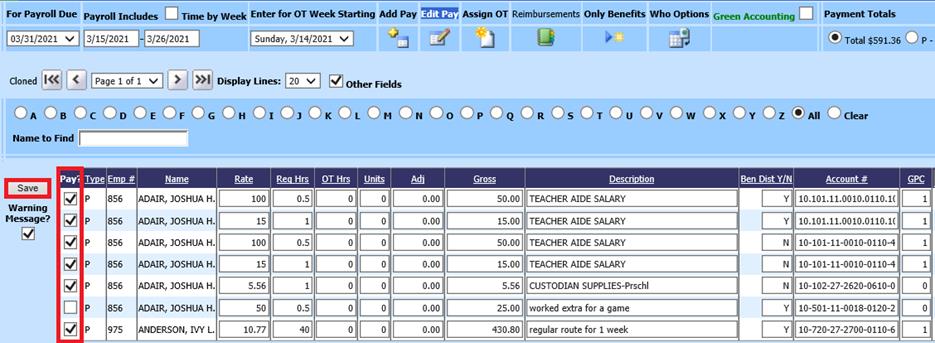
Note: When you are in the “Add Item” area
you can also make changes to any of the time cards displayed. Follow the same
rules that apply to the edit area.