Revised 1/29/2019
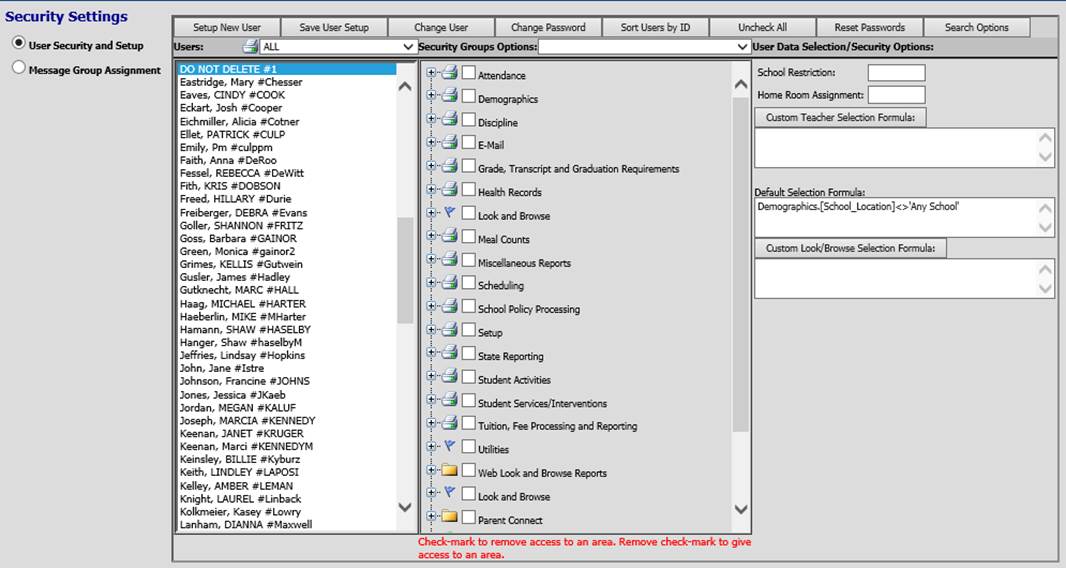
This is the original user security version found in the Administrative Utilities area of the Web School Office menu. This area allows you to easily add or adjust users and group security for the program applications, views and reports. Security options display in “tree” format. Items in the tree are check marked to remove access to those items from users.
List of Existing Student
System Users
Staff members listed in the Users column
will have access to the Student System. To view or edit the rights of any user,
highlight the user or user group in the list. Items listed in the security
tree in the middle of the screen with no check mark will be available to the
user or group and items check marked in the security tree will not be available
to the user or group. Clicking the + in front of an item will expand that item
to view additional options for that area. Checkmark any items in the
security tree you don’t want the selected user or group to have access to and
uncheck any items in the security tree that you want to allow for the selected
user or group. Click on another user in the user list on the left to save
changes.
Setup New
User
1. Select Setup New User.
2. Enter the User Code.
Note: The SDS client assigns the User Code. The User Code will be entered each time during the program login in the I.D # Field.
3. Enter the User Name for the new user.
Note: The User Name is the actual name of the employee being added into the security area.
4. Enter the Password for the new user. This needs to be a strong password that contains at least one number and one character. (i.e. John#son1)
5. If you would like to copy another users security or user group for this user select it in the below screen (i.e. _Teachers or _Admin). Then once you click save the user will have the same security as the user/group selected below. For example below Nielsen will have the same security as everyone in the _Teacher #_TG (Teacher Group). This process will save you TONS of time so that you do not have to individually setup each user’s security. See User Groups in the below section.
6. Select Save.

Note: If your school has the finance system and a user would like to have access to both systems, the same user login should be entered in the finance system. When the user logs in they will see the student and finance systems on their menu tree.
Note: To add a user security group, simply type an underscore at the beginning of both the User Code and User Name. Example: User Code: _Tchrs User Name: _Teachers
Change User
The Change User button will open this screen allowing you to edit a user’s name and password. Click the Save button after making changes in this screen.

Change Password
The Change Password button opens the screen below allowing you to edit a user’s password. Click the Save button after making changes in this screen.

Sort Users by ID
Selecting this
button will sort the list of users by user id instead of by user name.
Upon selection of this button, the description of the button will change to Sort
Users by Name  and can be used to return the
user list to being sorted by user name.
and can be used to return the
user list to being sorted by user name.
Uncheck All
This button will clear ALL checkmarks from the selected user’s security tree.
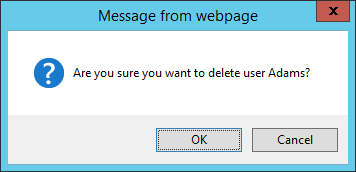
Delete
This button is used to delete the user selected in the User list. When this button is clicked, a confirmation message will display confirming you want to delete the user listed in the message. Double check that the user listed in the message is the user you wish to delete and click OK to delete or Cancel if you don’t want to delete this user.
Reset Passwords
This button will open this screen allowing you to Reset Password, Force Password Change, and Force use of strong passwords for all users in the selected Security Group. For detailed instructions on using these options, Click Here

Search Options

Click the Search Options button to open the options below to search for a user by login (user id), name, and school location.

Make desired selections and enter search criteria in the box to search by Login/Name. Click the Search button. Only users meeting the options entered will then display in the users list on the left.
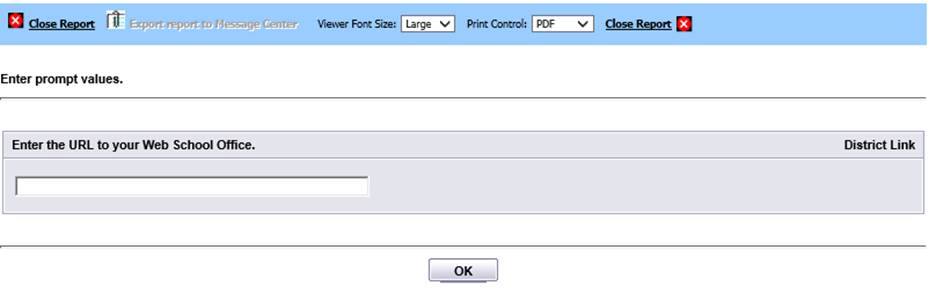
Print User Password Letters
If your security setup allows you to print user password letters, this printer button and dropdown box will display above the Users list.

To print passwords, select a group from the dropdown and click the printer button. Enter the URL for your Web School Office program on the next screen and click OK to preview the letters.
Security Group Options
Users can be assigned to security groups using this dropdown.

1. Select a user to assign to a security group from the Users list on the left.
2. Click the Security Groups Options dropdown and select the user group to which you wish to assign the selected user.
3. Click on another user in the list on the left to save.
User Data Selection/Security Options
This area is used to restrict which students or master file records a user can access.
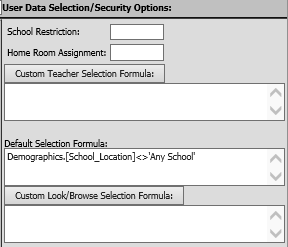
To restrict a user’s access to students and master file records for a specific school location, select the user in the Users list and enter that school location in the School Restriction box.
To restrict a user’s access to students in a specific homeroom, select the user in the Users list and enter their homeroom in the Home Room Assignment box. This is most commonly used in elementary buildings to restrict a homeroom teacher’s access to only students in their homeroom.
After entering or editing data in either of these boxes, click on another user in the list on the left to save.
There are two additional options on this screen to create more defined selections on a user or group of users.
1. The “Custom Teacher Selection Formula” allows you to create a custom selection used in Teacher Web.
2. The “Custom Look/Browse Selection Formula” allows you to create a custom selection used in Look and Browse in WSO.
For detailed information on using these options, Click Here